Discover the simplicity of how to attach crochet granny squares with our comprehensive guide. Learn various crochet joining methods to effortlessly create stunning designs. Ideal for beginners, Crochet Square Joining Made Easy offers step-by-step instructions, perfect for Joining Crochet Squares for Beginners.
Welcome to the world of crochet, where creativity and craft intertwine to create stunning designs. Today, I’m thrilled to share with you a step-by-step guide on how to connect crochet granny squares, an essential skill for every crochet enthusiast. Whether you’re a beginner or a seasoned crocheter, this guide will help you effortlessly create beautiful projects.
The Basics: Choosing Your Yarn and Tools
To begin your crochet journey, select the right materials. You’ll need:
- Yarn Type: Soft, durable yarn in your desired colors. Acrylic or wool blends are great choices.
- Colors: Choose colors that complement each other or go bold with contrasting hues.
- Crochet Hook: A hook size compatible with your yarn.
- Additional Supplies: Scissors and a yarn needle.
Crocheting Your First Granny Square
Before joining the squares, you need to crochet them. If you’re new to this, check out “TubaCrochet” on YouTube for a beginner-friendly tutorial on crochet how to join granny squares (Tutorial Video). Their Free Crochet Pattern section is a treasure trove for beginner crochet projects.


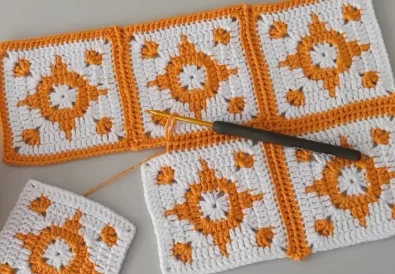
Joining Techniques: Bringing Squares Together
Joining granny squares is a creative process. There are several techniques to choose from, each offering a unique look and texture. Some popular methods include the whipstitch, slip stitch, and single crochet join. For detailed instructions, refer to our Crochet Square Joining Tutorial.
Creating a Masterpiece: Design and Layout
Firstly, decide on the layout of your squares. Then, choose a joining method that complements your design. Whether it’s a blanket, bag, or scarf, the arrangement of colors and patterns can significantly impact the final look.
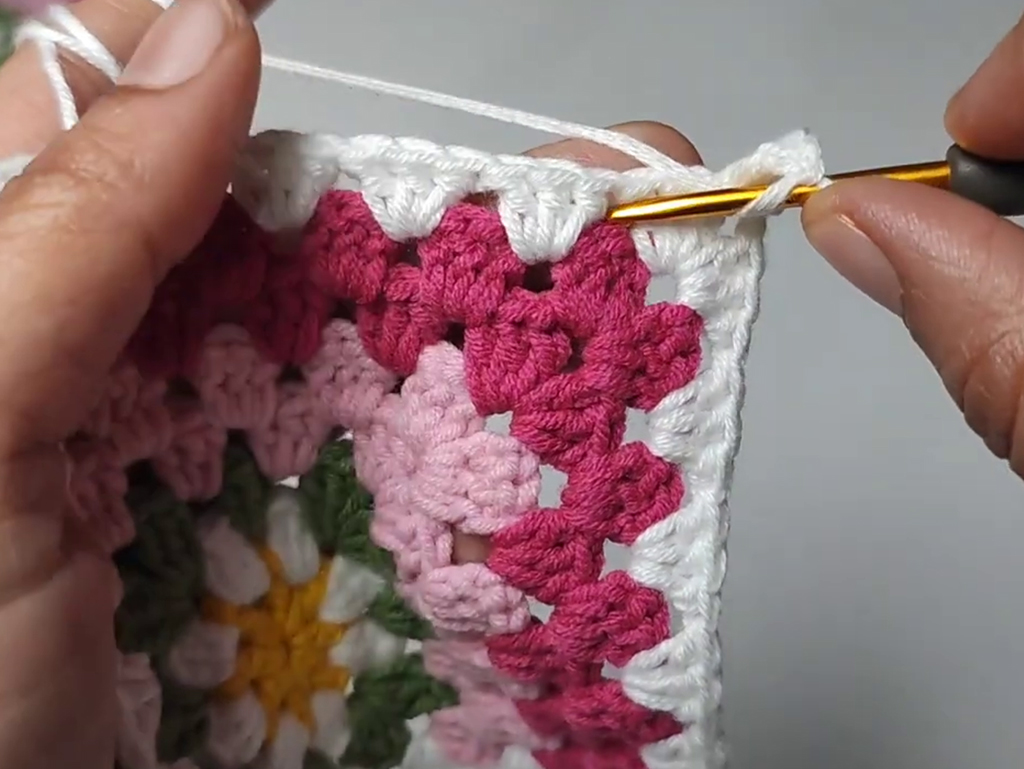
Finishing Touches: Edging and Care
After joining your squares, consider adding an edging for a polished look. A simple border can elevate your project from homemade to Handmade Style.
Join Our Crochet Community
We encourage you to share your creations and experiences. Leave a comment, post your project photos, and interact with fellow crafters. Your insights enrich our crochet community.
Discover More
For more inspiration and tutorials, continue exploring our channel. From Home Crochet Ideas to Crochet Square Joining Methods, there’s always something new to learn.
In conclusion, joining granny squares is a delightful and rewarding process. Each square you connect brings you closer to creating something truly special. So, grab your hook and let’s crochet together!