

Welcome to our latest crochet tutorial where you’ll learn how to crochet a Crochet Placemat with Tassels—perfect for adding warmth and charm to your home this fall! This easy crochet placemat pattern is ideal for beginners, with simple instructions that guide you through each step. Whether you’re looking for a festive addition to your Thanksgiving table or just want to cozy up your dining space, this project has got you covered. It’s a DIY crochet placemat that’s quick, fun, and perfect for fall decor.
This crochet placemat design is both versatile and beginner-friendly, making it an excellent project even for those new to crocheting. The added tassels give it a fun, seasonal touch, making your table setup feel extra festive. Let’s dive into the details and get you started on crafting this handmade crochet placemat!
Crochet Placemat with Tassels: A Festive Fall Decor Idea
A Cozy Crochet Project for Autumn
Fall is the perfect time to pull out your yarn and hooks! This Autumn Crochet Placemat adds a handmade touch to your home, with warm, cozy colors that reflect the season. It’s an inviting Crochet Table Decor piece, sure to make your fall gatherings extra special. Think of it as a blend of style and function: a crocheted placemat that not only protects your table but also serves as a seasonal decorative element.
Perfect for Thanksgiving and Fall Gatherings
The Crochet Placemat for Thanksgiving is the ideal project to get you in the spirit of the season. Whether you’re hosting family for a big feast or just decorating for the season, this crochet placemat fits right in. It’s simple enough to make multiple placemats to cover your dining table, creating a unified and festive look. Plus, the tassels add a playful twist, making these placemats even more fun for your guests.
Why You’ll Love this Crochet Placemat Pattern
Easy Crochet Placemat for Beginners
This easy crochet placemat pattern is perfect for beginners. It’s designed with simplicity in mind, using basic stitches that are easy to follow. If you’re new to crochet or just want a quick project, this is the one for you.
Quick and Simple to Crochet
With this free crochet placemat pattern, you can whip up a placemat in no time! It’s a quick crochet project that you can complete in just a few hours, making it perfect for weekend crafting. Whether you’re crocheting for yourself or as a gift, this project is sure to please.
Free Crochet Placemat Pattern
Not only is this tutorial easy, but the pattern is also free! You can follow along with the steps below, or download the complete written pattern in PDF format here.
Versatile and Adaptable Design
This DIY crochet placemat is very adaptable. You can change the colors to suit your decor or even make adjustments to the size if you prefer larger or smaller placemats. The tassels are a fun addition, but you can leave them off if you prefer a simpler look.
Gather Your Supplies: What You’ll Need for Your Crochet Placemat
Choosing the Right Yarn
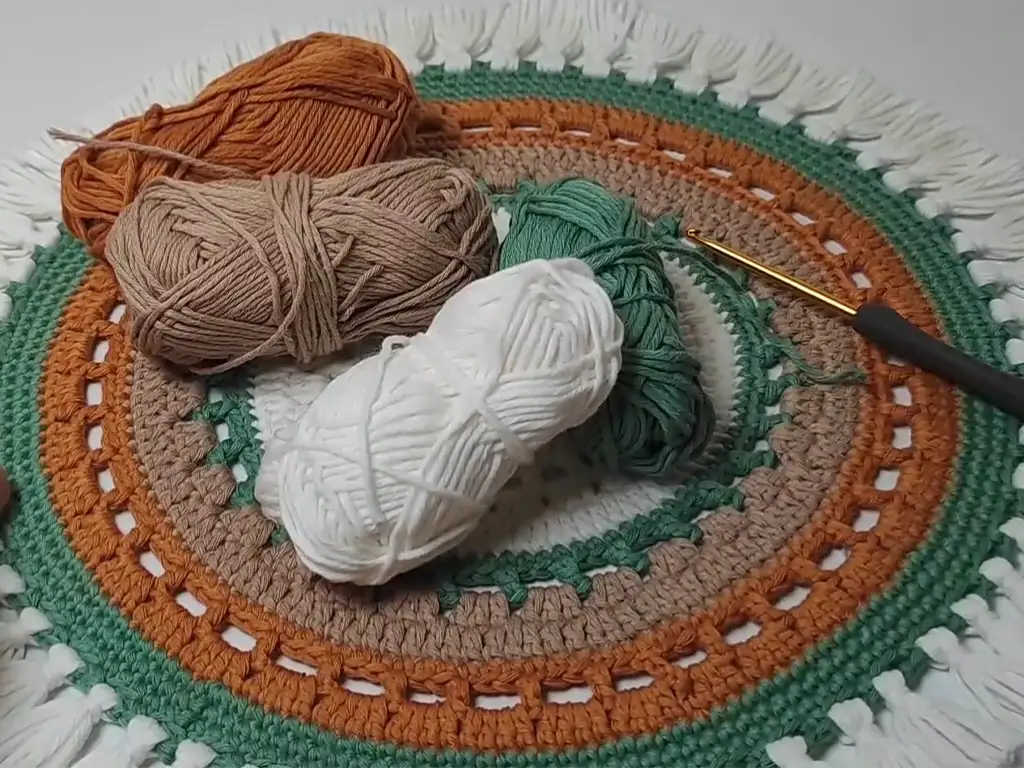
For this project, we recommend using medium-weight (worsted) yarn in fall colors such as rust, mustard, and burnt orange. These colors will give your Autumn Crochet Placemat the seasonal feel you’re looking for. A soft acrylic or cotton yarn works best, as it’s durable and easy to work with.
- Yarn type: Worsted weight yarn
- Colors: Rust, mustard, burnt orange, or any fall color of your choice
- Yardage: Approximately 150-200 yards per placemat

Selecting the Correct Crochet Hook
For this crochet placemat pattern, you’ll need a size H (5.0mm) crochet hook. This hook size ensures that your stitches are tight enough to form a sturdy placemat, but not so tight that the project becomes stiff.
Other Essential Supplies
In addition to your yarn and hook, here’s what else you’ll need:
- Scissors
- Tapestry needle (for weaving in ends)
- Measuring tape (to ensure correct sizing)
- Optional: A felt-tip pen to mark stitch counts
Step-by-Step Crochet Placemat Tutorial
Now that you’ve gathered your supplies, it’s time to start crocheting your round crochet placemat. Follow the steps below, and soon you’ll have a beautiful, handmade placemat with tassels!
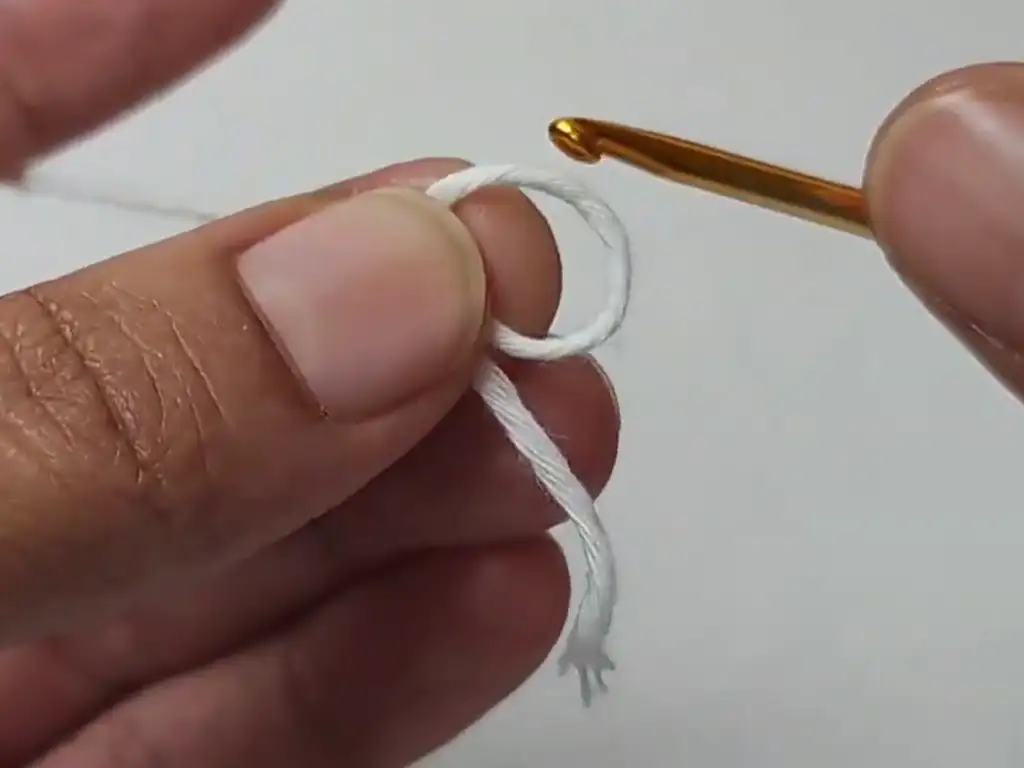
Creating the Foundation Round
Step 1: Start with a magic ring (or chain 4 and join to form a ring). 2: Chain 2 (counts as your first half double crochet). Step 3: Work 11 half double crochets into the ring. Join with a slip stitch to the top of the chain-2. (12 stitches)


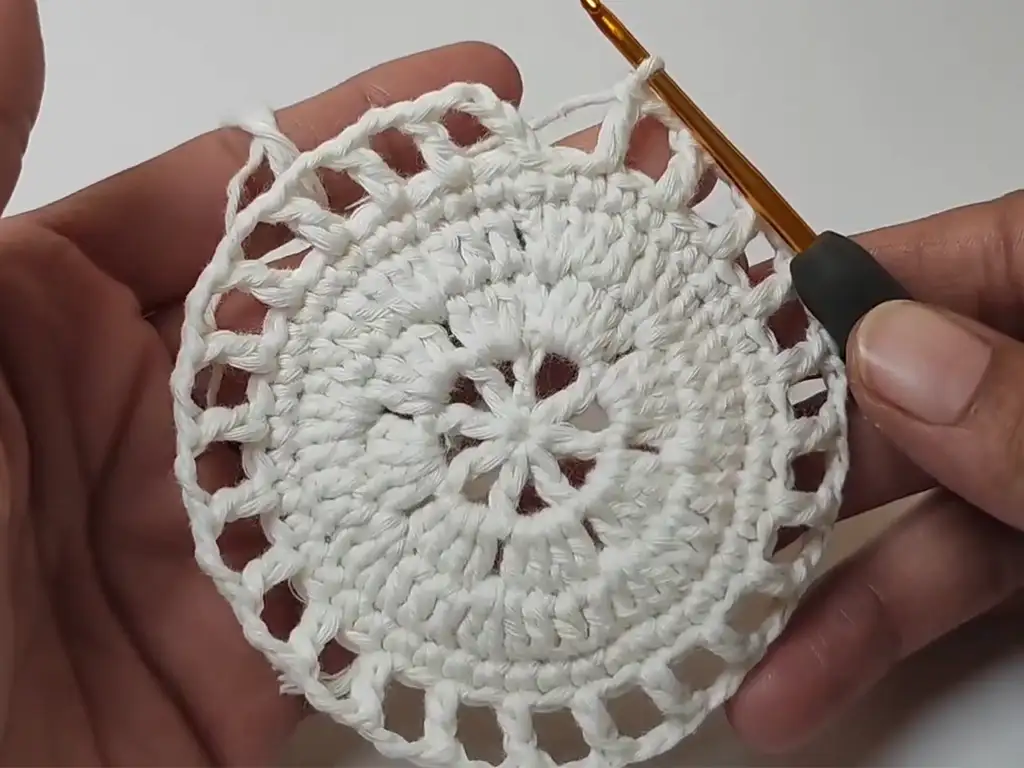
Working the First Few Rounds
Round 1: Chain 2. Work 2 half double crochets into each stitch around. Join with a slip stitch. (24 stitches)
Round 2: Chain 2. 1 half double crochet in the first stitch, 2 half double crochets in the next stitch. Repeat from * around. Join with a slip stitch. (36 stitches)
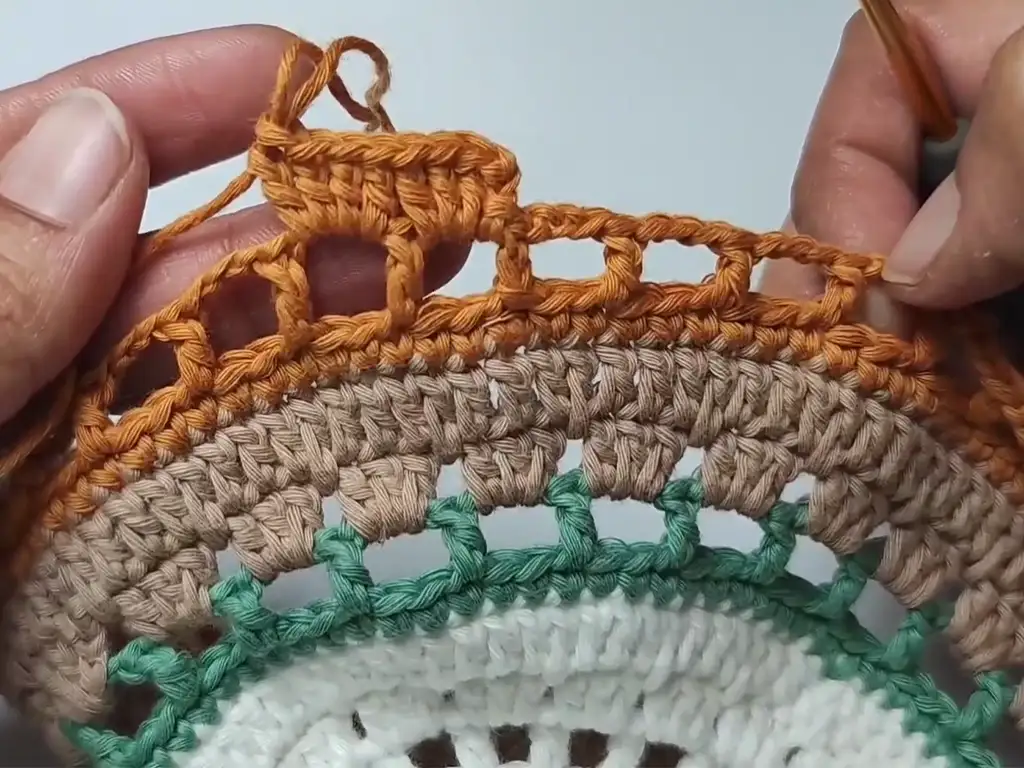
Introducing Color Changes
At this point, you can introduce different colors to create a striped effect. Simply switch yarn colors at the start of a new round by pulling through the new color in the final yarn over of the previous stitch.
Creating the Box Stitch Pattern
Round 3: Chain 3 (counts as a double crochet). Skip one stitch, double crochet in the next stitch, chain 1. Repeat from * around. Join with a slip stitch.
Round 4: Chain 2. Work 1 half double crochet into each stitch (and chain space) around. Join with a slip stitch.


Completing the Final Rounds
Round 5: Chain 2. Work 2 half double crochets in each stitch around. Join with a slip stitch.
Round 6: Repeat Round 2. Fasten off and weave in ends.
Adding a Touch of Charm: Creating Tassels for Your Placemat
Cutting and Preparing the Tassel Yarn
For the tassels, cut 10-inch lengths of yarn in your desired color. You’ll need about 3 tassels per side, or more if you prefer.
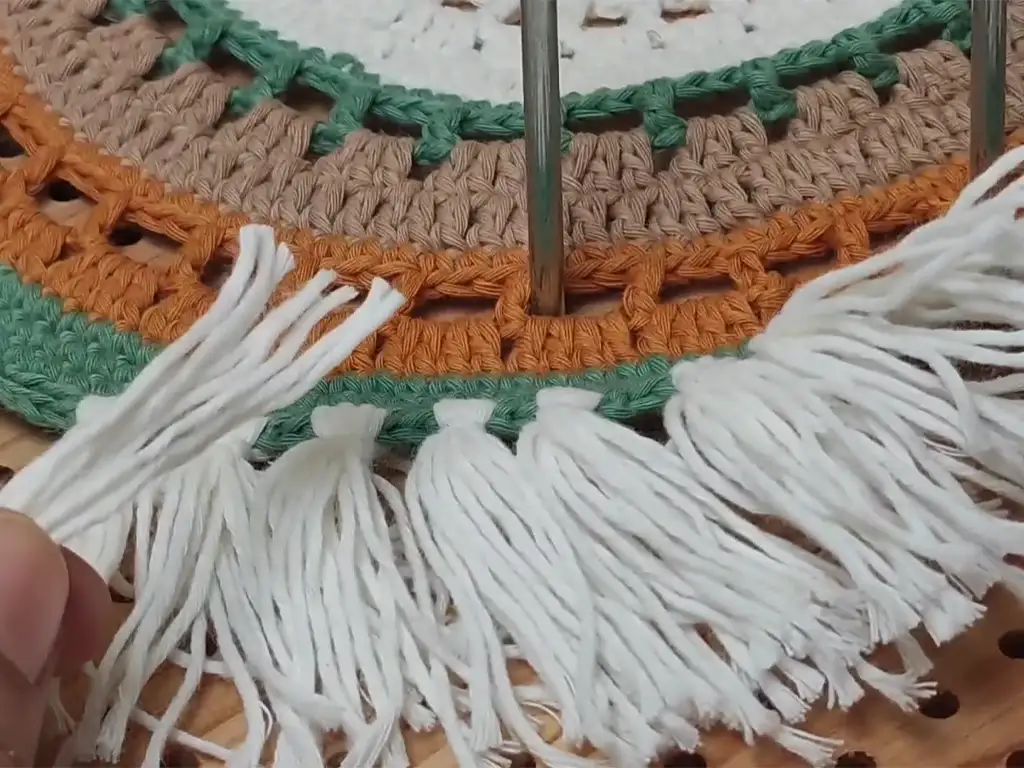
Attaching the Tassels to the Crochet Placemat
Fold each group of yarn strands in half, pull the folded loop through a space at the edge of your placemat, then pull the yarn ends through the loop to secure the tassel.
Trimming and Finishing Your Tassels
After attaching all your tassels, trim them evenly to your desired length. Your tassel crochet placemat is now complete!


Styling Tips: How to Incorporate Your Crochet Placemats into Your Decor
Setting a Festive Table
Your crocheted placemat is perfect for setting a cozy fall table. Pair it with rustic tableware, pumpkins, and candles to complete the look.
Adding Warmth to Your Kitchen
Use your crochet placemats to bring warmth to your kitchen counters or dining table. They make wonderful crochet table decor for everyday use.
Crochet Placemat Gift Ideas
These placemats also make excellent handmade gifts. Pair them with a set of crochet coasters for a thoughtful fall gift idea.
Crochet Placemat Variations and Customization Ideas
Changing the Colors and Design
You can easily switch up the colors for a different look. Try using muted tones for a more modern style or bright, bold colors for a fun, lively table.
Adding More or Fewer Tassels
Adjust the number of tassels based on your personal style. Adding more tassels will give a playful, boho feel, while fewer tassels offer a sleeker design.
Crocheting Different Sizes and Shapes
Feel free to experiment with different sizes by adding or subtracting rounds. You can also create matching coasters by using the same pattern with fewer rounds.
Creating a Matching Coaster Set
To complete your Crochet Home Decor, make a set of matching crocheted coasters using the same pattern. Simply stop after the second or third round for a coaster-sized circle.
Conclusion: Download the Free Crochet Placemat Pattern
Now that you’ve completed your DIY Crochet Placemat, you can download the full written pattern here for free! Be sure to share your finished projects with us on Instagram at @TubaCrochet, TikTok at tiktok.com/@tubacrochet, and Facebook at facebook.com/tubacrochet.
You can also watch the full video tutorial from @TubaCrochet on YouTube: Watch Now.
Other Crochet Projects You’ll Love
This crochet placemat is just the start of your crocheting journey! There are many other patterns out there, and we encourage you to explore and experiment with different designs. If you love this easy crochet placemat tutorial and crochet table decor, why not try another project? This is just a delightful introduction to the world of crocheted projects.
- Crochet Coaster
- Crochet Table Runner
- Crochet Blanket
- Crochet Throw Pillow
As a result of this, you’ll have a beautiful and unique crochet placemat to enjoy!


