
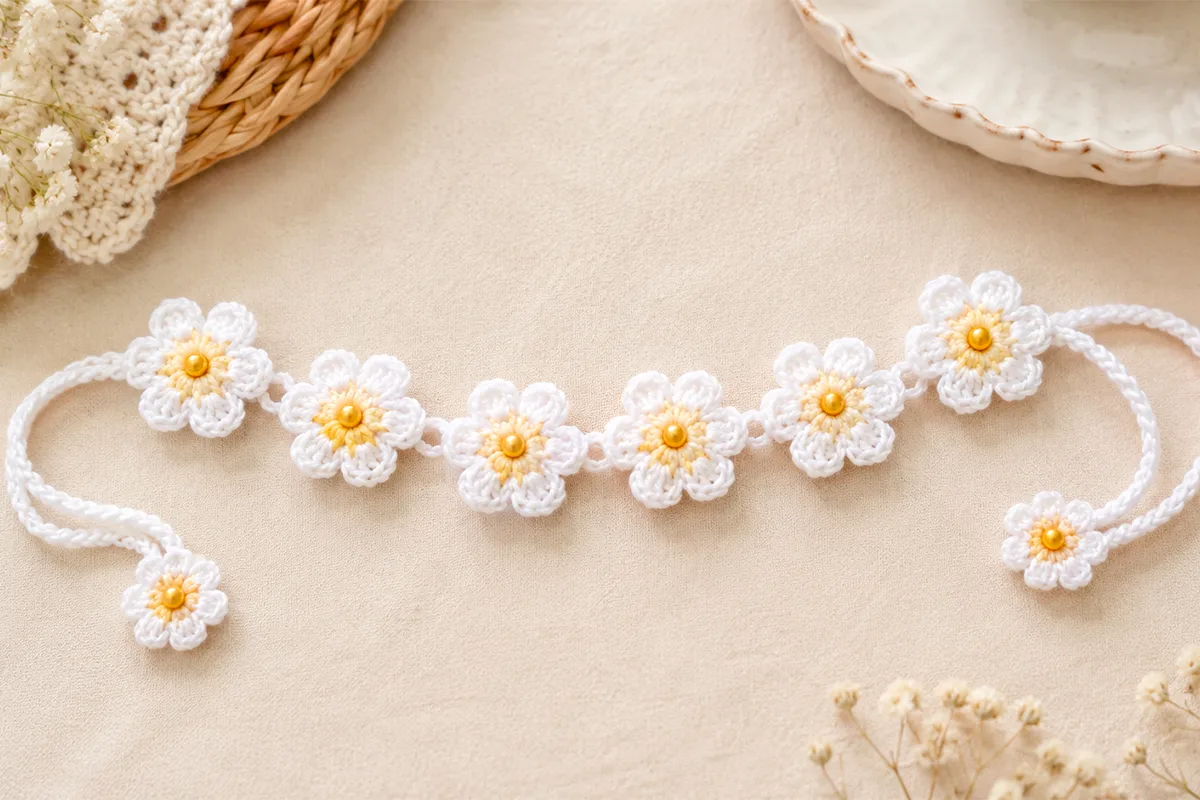
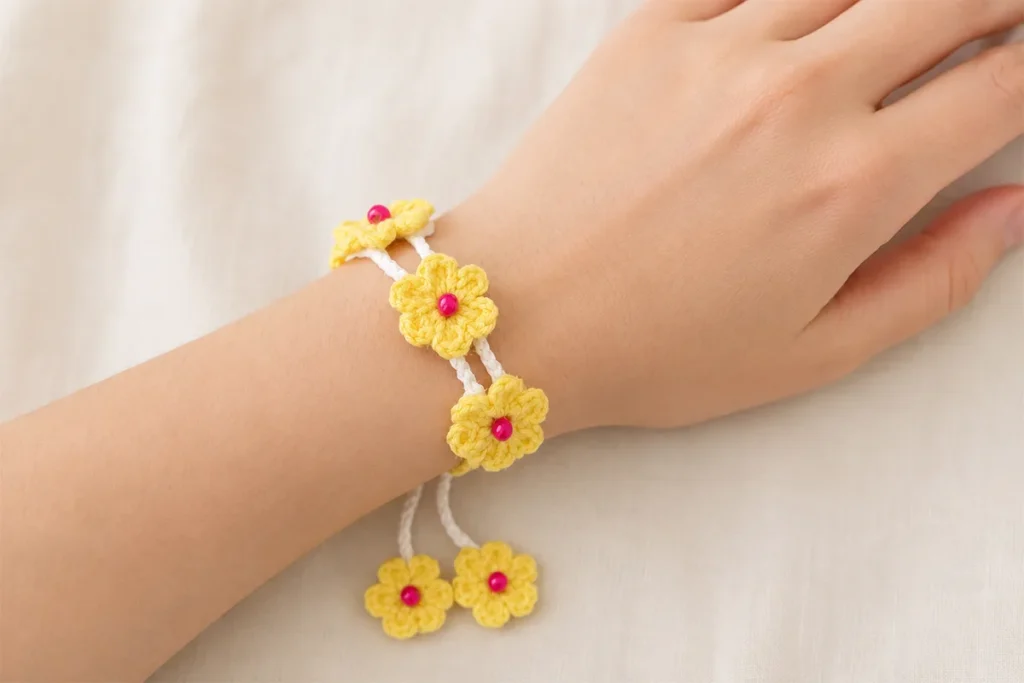
This crochet daisy bracelet is made with small six-petal flower motifs joined with simple chain sections. A bead sits in the center of each daisy, and two extra flowers finish the ends of the bracelet ties.
The sample uses eight flowers in total: six for the main bracelet and two for the tie ends. You can add or remove flowers to get a better fit for your wrist.
The flower motif itself uses basic chains, double crochets, and slip stitches. The joining section needs a little more attention, but once the ch-4 and ch-5 pattern becomes familiar, the construction is easy to follow.
If you enjoy making small handmade accessories, you may also like this easy crochet bracelet pattern.
Materials You’ll Need for the Crochet Daisy Bracelet
You will need:
- Cotton yarn for the flower motifs
- White yarn for joining the flowers
- 2.20 mm crochet hook
- Beads for the flower centers
- Glue for attaching the beads
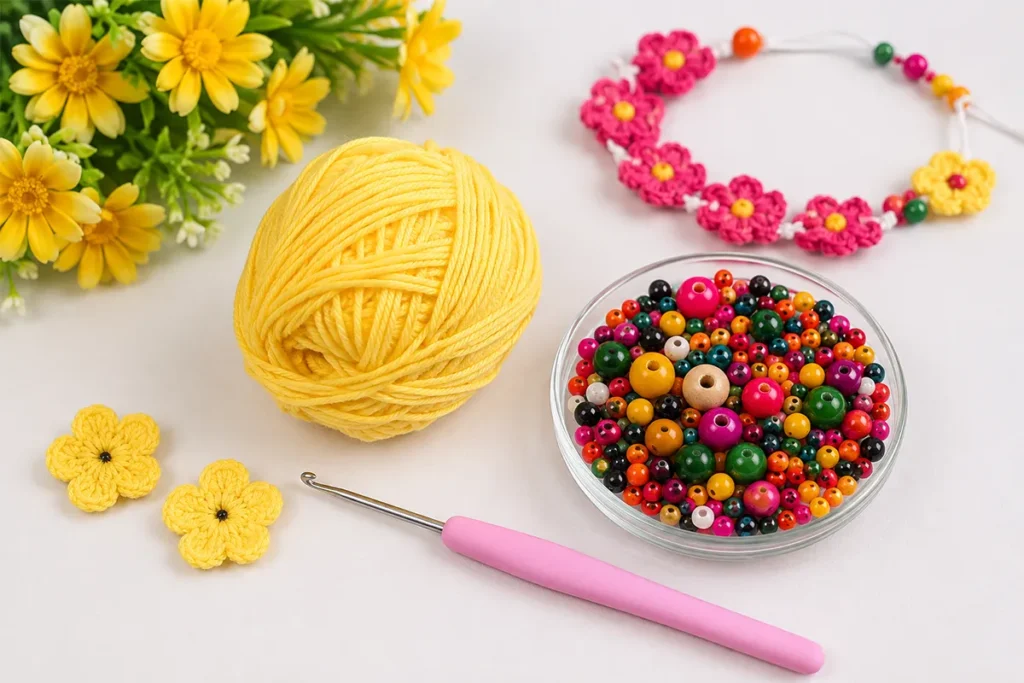
The source does not specify a yarn weight, bead size, or particular type of glue, so those details are left open.
Download the Crochet Daisy Bracelet Written Pattern
Prefer to keep the pattern handy while you crochet?
Download the printable Crochet Daisy Bracelet Pattern and save it to your phone, tablet, or computer for easy reference.
[Download the Free Crochet Daisy Bracelet PDF Pattern]
The PDF includes the flower motif, joining instructions, bracelet ties, stitch abbreviations, and finishing steps used in this tutorial.
US Crochet Abbreviations
This pattern uses US crochet terminology.
- ch = chain
- dc = double crochet
- sl st = slip stitch
- MR = magic ring
Before You Start
Make 8 flowers in total:
- 6 flowers for the main bracelet
- 2 flowers for the tie ends
You can add or remove flowers to fit your wrist.
For the joining section, keep these two chain counts in mind:
- ch 4 between the two connection points within the same flower
- ch 5 when moving from one flower to the next
How to Crochet the Daisy Flowers
Make all eight flowers the same way.
Daisy Flower Motif
Step 1
Make a magic ring.
Step 2
Chain 2.
Step 3
Work 2 double crochets into the magic ring.
Step 4
Chain 2.
Step 5
Make a slip stitch into the magic ring.
That completes the first petal group.
Step 6
For the next petal, work:
- ch 2
- 2 dc into the magic ring
- ch 2
- sl st into the magic ring
Step 7
Continue the same sequence until you have 6 petal groups around the ring.
Each petal follows this sequence:
ch 2, 2 dc into MR, ch 2, sl st into MR
Once all six groups are complete, you should have a small six-petal daisy.
Step 8
Chain 1 and fasten off.
Pull the yarn tail to close the magic ring. Tie the beginning and ending yarn tails together, then weave them through the stitches on the back.
Step 9
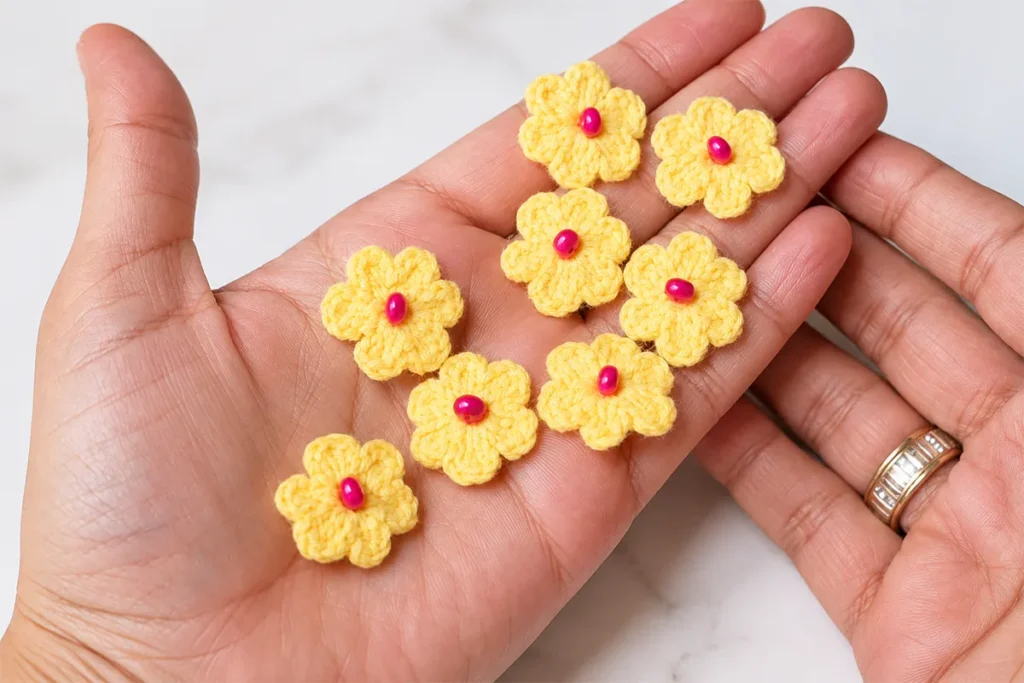
Glue a bead into the center of the flower.
You can use any bead color you like.
Repeat the same steps until you have 8 finished flowers.
Set 2 flowers aside for the tie ends. The other 6 flowers will form the main bracelet.
If you enjoy working with small flower motifs, you can also try this crochet chrysanthemum flower pattern.
How to Join the Crochet Daisy Bracelet Flowers
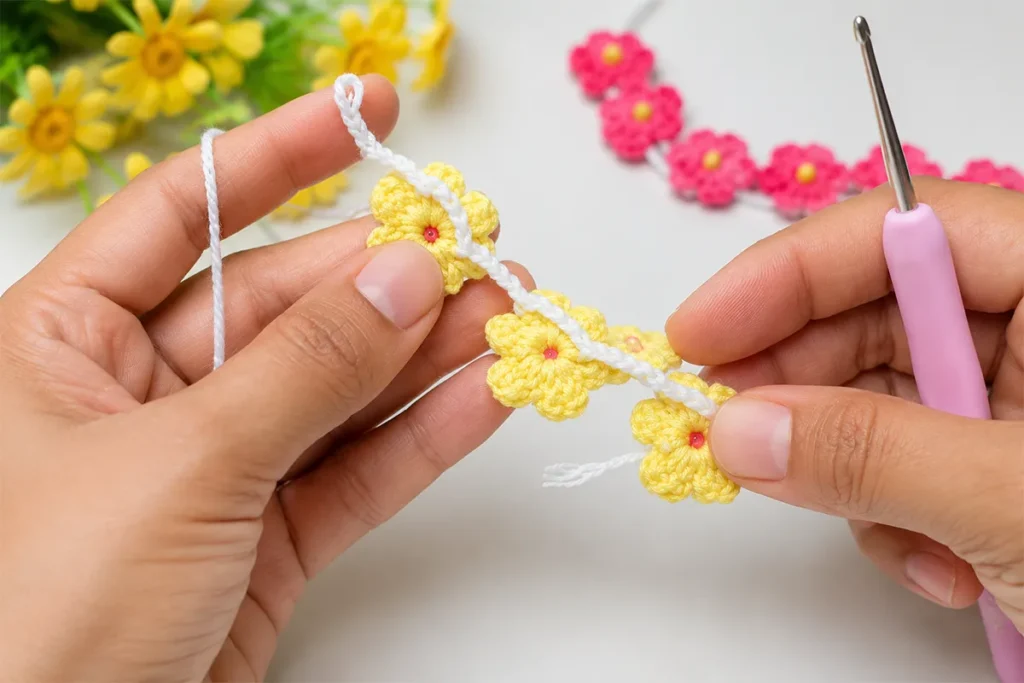
Use white yarn to join the six main flowers.
You will first join the flowers along one side. After making the first tie, you will work back along the opposite side and add the second line of chain connections.
Join the First Side
Step 1
Take the first flower.
Choose any petal and join the white yarn behind one of the double crochet stitches on that petal.
Step 2
Chain 4.
Step 3
After the petal where you joined the yarn, skip one petal.
On the following petal, make a slip stitch behind one of the double crochet stitches.
That gives you the first short connecting chain across the flower.
Step 4
Chain 5.
This chain takes you from the first flower to the second flower.
Step 5
Move to the second flower.
On any petal, make a slip stitch behind one of the double crochet stitches.
Step 6
Chain 4.
Step 7
Skip one petal.
On the next petal, make a slip stitch into one of the double crochet stitches.
Step 8
Chain 5.
Move to the next flower.
On the next flower, make a slip stitch into a loop on the back of any petal.
Continue Across All Six Flowers
Repeat the same joining sequence across the remaining flowers:
- Join the next flower with a slip stitch through a loop on the back of a petal.
- Chain 4.
- Skip one petal.
- Make another slip stitch on the next petal.
- Chain 5 to move to the following flower.
Continue until all 6 main flowers are joined in a row.
Remember:
ch 4 within each flower
ch 5 between flowers
Make the First Bracelet Tie
After joining all six main flowers, finish the first side on the last flower.
Step 1
After the final ch-4 section and slip stitch, chain 2.
Step 2
Move to the petal immediately after the petal where you made the last slip stitch.
Make another slip stitch into a loop on the back of this petal.
Step 3
Make the first tie chain.
Chain 22.
You can adjust the length of this tie chain as needed.
Step 4
Take one of the two flowers you set aside earlier.
After making the tie chain, make a slip stitch into any loop on the back of this flower.
Step 5
Chain 1 and fasten off.
Weave the yarn end through the stitches on the back.
The first tie is finished.
Join the Opposite Side of the Crochet Daisy Bracelet
Now return to the six main flowers and join the opposite side with white yarn.
Step 1
Join the white yarn through a loop on the petal where you made the last slip stitch.
Step 2
Chain 4.
Step 3
Skip one petal.
Make a slip stitch on the next petal.
Step 4
Chain 5.
Move to the next flower.
Step 5
Do not use the same point as the previous slip stitch.
Instead, make a slip stitch into a loop on the back of the next petal.
Step 6
Chain 4.
Step 7
Skip one petal.
Make another slip stitch on the next petal.
Step 8
Continue across the remaining flowers in the same way.
Keep using:
- ch 4 within each flower
- ch 5 between flowers
Repeat the sequence until you reach the end.
Finish the Second Tie
When you reach the end of the opposite side:
Step 1
Chain 4.
Step 2
Skip one petal.
Make a slip stitch on the next petal.
Step 3
For the second tie, chain 22 or 23.
Step 4
Take the final flower you set aside.
Make a slip stitch into any loop on the back of the flower to attach it to the tie.
Step 5
Chain 1 and fasten off.
Weave all remaining yarn ends through the stitches on the back of the bracelet.
Adjusting the Crochet Daisy Bracelet Size
The sample uses 6 flowers for the main bracelet section.
If you need a different size, add or remove flowers to fit your wrist.
The first tie uses 22 chains and can be adjusted to the length you need. The second tie uses 22 or 23 chains.
Finishing the Bracelet
Once all the yarn ends are woven in, use steam from an iron to shape the flowers and straighten the chain sections.
After shaping, your crochet daisy bracelet is ready to wear.
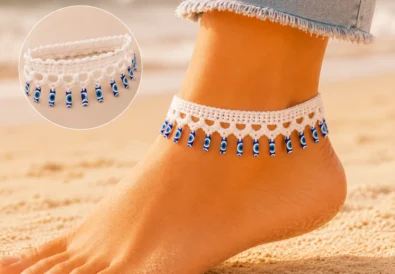
You can also wear the same design as an anklet.
Another finished version is shown with pink and yellow beads, so you can choose bead colors that work with the flowers you make.
For another small flower project, try this crochet tulip keychain pattern.
Pattern at a Glance
Flower — Make 8
Start with:
MR
Repeat 6 times:
ch 2, 2 dc into MR, ch 2, sl st into MR
Then:
ch 1 and fasten off
Close the magic ring, secure and weave in the yarn ends, then glue a bead into the center.
Use:
- 6 flowers for the main bracelet
- 2 flowers for the tie ends
Main Bracelet Joining
Within each flower:
ch 4
Between flowers:
ch 5
Repeat across all six main flowers.
First Tie
ch 22
Attach one extra flower with a slip stitch.
Opposite Side
Join the white yarn and work back across the other side.
Again use:
ch 4 within each flower
ch 5 between flowers
Do not reuse the previous slip-stitch point when moving to the next petal.
Second Tie
ch 22–23
Attach the final flower.
Chain 1 and fasten off.
Weave in all remaining ends and shape the flowers and chains with steam.
Want to keep the pattern for later?
[Download the Free Crochet Daisy Bracelet PDF Pattern] and save it for your next crochet session.
Crochet Daisy Bracelet FAQ
Is this crochet daisy bracelet beginner-friendly?
The flower motifs use basic chains, double crochets, and slip stitches. The joining section has more placement steps, so beginners may want to work through that part slowly and follow the petal sequence in order.
What yarn should I use for this crochet daisy bracelet?
Cotton yarn is used for the flowers, with white yarn for joining the motifs. The source does not specify a yarn weight.
What size crochet hook is used?
A 2.20 mm crochet hook is used for this project.
How many flowers do I need for one bracelet?
The sample uses 8 flowers in total. Six make up the main bracelet, while the other two are attached to the ends of the ties.
How can I adjust the bracelet to fit my wrist?
Add or remove flowers from the main bracelet section. The sample uses six flowers, but the flower count can be changed to suit your wrist.
How are the daisy flowers joined together?
The flowers are joined with white yarn using slip stitches and chain sections. Use ch 4 within each flower and ch 5 between flowers.
How long are the bracelet ties?
The first tie uses 22 chains and can be adjusted as needed. The second tie uses 22 or 23 chains.
Can I wear this crochet daisy bracelet as an anklet?
Yes. The finished design can also be worn as an anklet.
How do I make the flowers and chains lie flatter?
After weaving in the yarn ends, gently shape the flowers and straighten the chain sections with steam.
Stay Connected with Crochet Craftsman
Find more crochet tutorials, written patterns, and project ideas here: