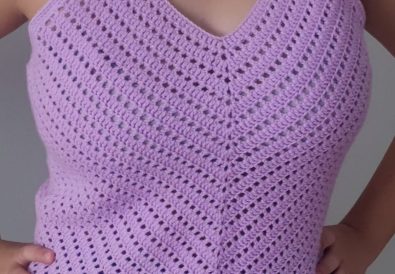
Learn how to crochet a beautiful vintage bralette with this easy, step-by-step DIY pattern. Perfect for beginners!
Crocheting your own bralette is not only a fun and creative project, but it also lets you create a unique, handmade piece of clothing that fits perfectly. If you love a touch of vintage charm, this pattern is ideal. It’s designed with beginners in mind, so even if you’re new to crochet, you can tackle this with confidence. This bralette is perfect for adding a touch of retro style under summer dresses or on its own as a cute and comfy top.
Overview
- Difficulty level: Beginner
- Potential uses: Underwear, layering piece, summer top, festival fashion
Materials
Before we dive in, here’s what you’ll need:
- Yarn: Choose a soft, breathable yarn like cotton or a cotton blend in your favorite color. Light fingering or sport weight yarn is ideal.
- Crochet hook: The appropriate size hook will depend on your chosen yarn. Check the yarn label for recommendations.
- Scissors
- Darning needle (for weaving in loose ends)
- Stitch markers (optional, but helpful)
Understanding the Pattern
Let’s break down some of the crochet terms and techniques you’ll encounter in this pattern:
- Chain stitch (ch): The most basic crochet stitch, forming the foundation of many projects.
- Single crochet (sc): A short, versatile stitch used often in crochet projects.
- Double crochet (dc): Adds height to your work and creates a more open fabric.
- Slip stitch (sl st): For joining stitches or moving across your work without adding height.
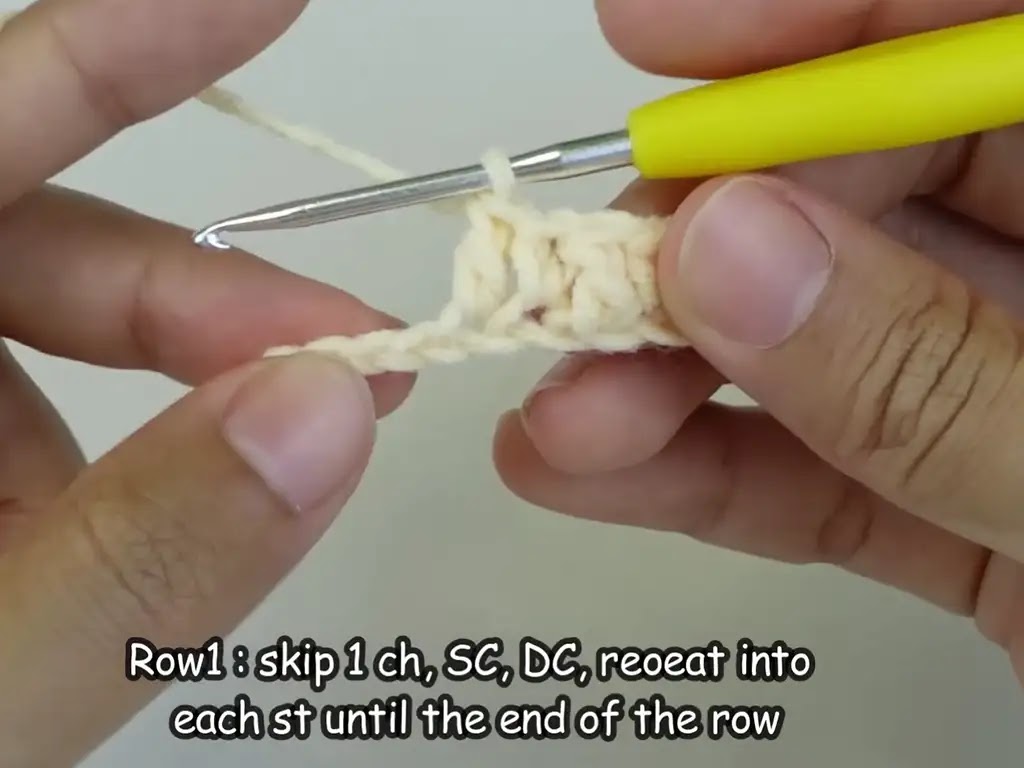
- Lemon Peel Stitch: A textured stitch created by alternating single and double crochets – it adds lovely detail to this bralette.
Step by Step Written Pattern
Cups
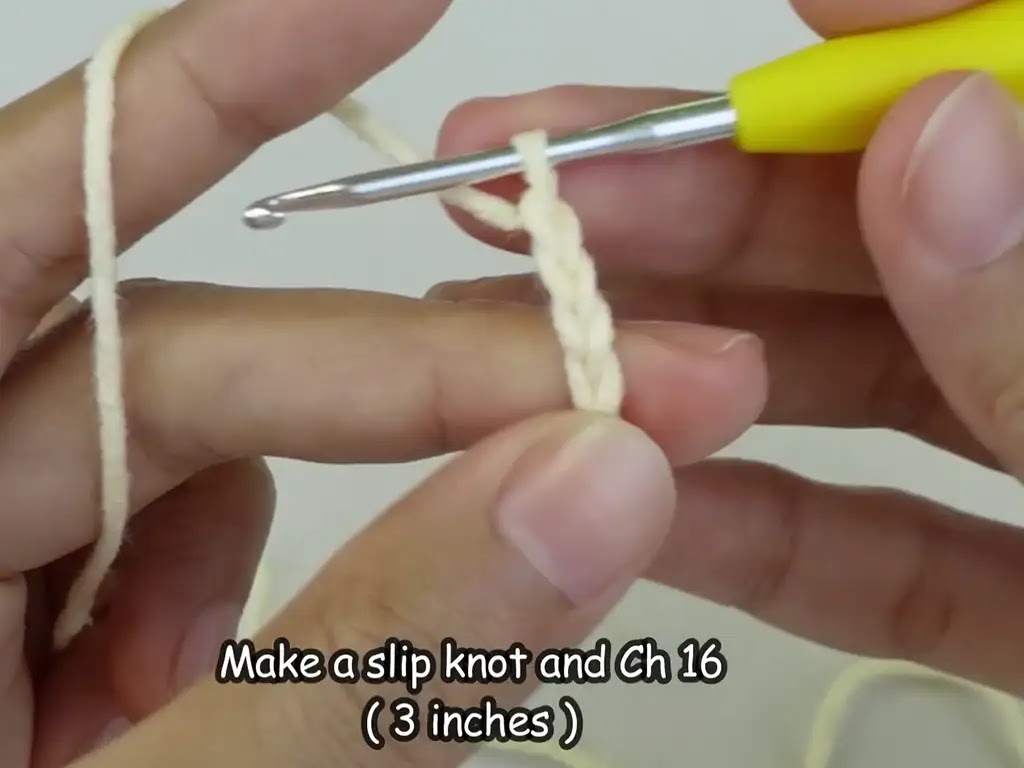
- Make a slip knot.
- Chain 16. (This will be about 3 inches in length.)
- Row 1: Skip one chain, single crochet into the second chain, then work a double crochet into the next chain. Alternate single crochet and double crochet across the row. (This is the foundation of the lemon peel stitch.)
- Row 2: Chain 2 (counts as a double crochet), turn your work. Double crochet into the first stitch, then alternate single crochet and double crochet across the row.
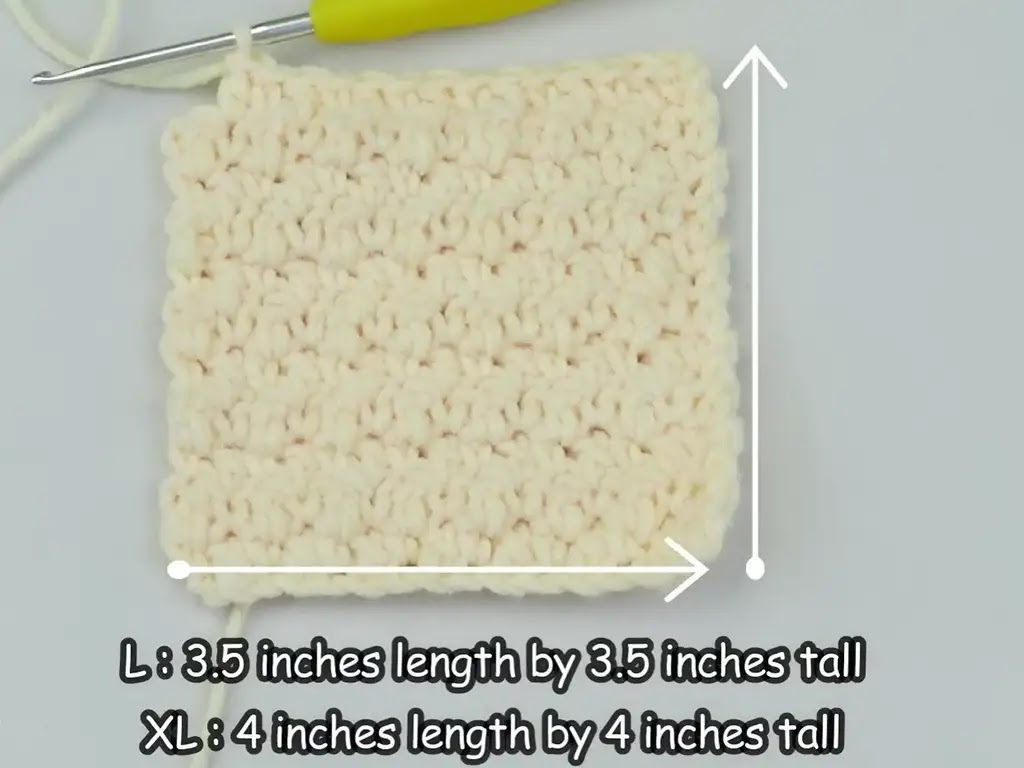
- Repeat Rows 2 and 3 until you have 11 rows total.
- Bottom of the Cup: Chain 1, turn your work. Work the lemon peel stitch into the side of your rows. Increase into the last stitch (make 3 stitches in the same loop). Continue with the lemon peel stitch across the new side you’ve created.
- Repeat Row 6 for 13 rows on one cup, and 14 rows on the other (this slight difference accommodates different bust sizes).


Connecting the Cups
- Position Cups: Lay the cups side by side, with the “right sides” facing together where the underarm would be.
- Joining: Starting at the last stitch of the second cup, double crochet two together across both cups. This means inserting your hook through the last stitch of the second cup AND the corresponding stitch of the first cup, working a double crochet as if they were one.
Bottom Band
- Rows 1-4: Continue working the lemon peel stitch for four rows.
- Row 5: Chain 2, turn your work. Skip the first stitch, and double crochet into the next. Chain 1, skip one stitch, double crochet into the next. Repeat from * to* across the row.
- Row 6: Chain 1, turn your work. Single crochet into each double crochet and into each chain-1 space.
- Rows 7 – 10: Repeat the lemon peel stitch for four more rows.
- Row 11: Repeat Row 5.
- Rows 12 -13: Repeat Row 6.
Back Band
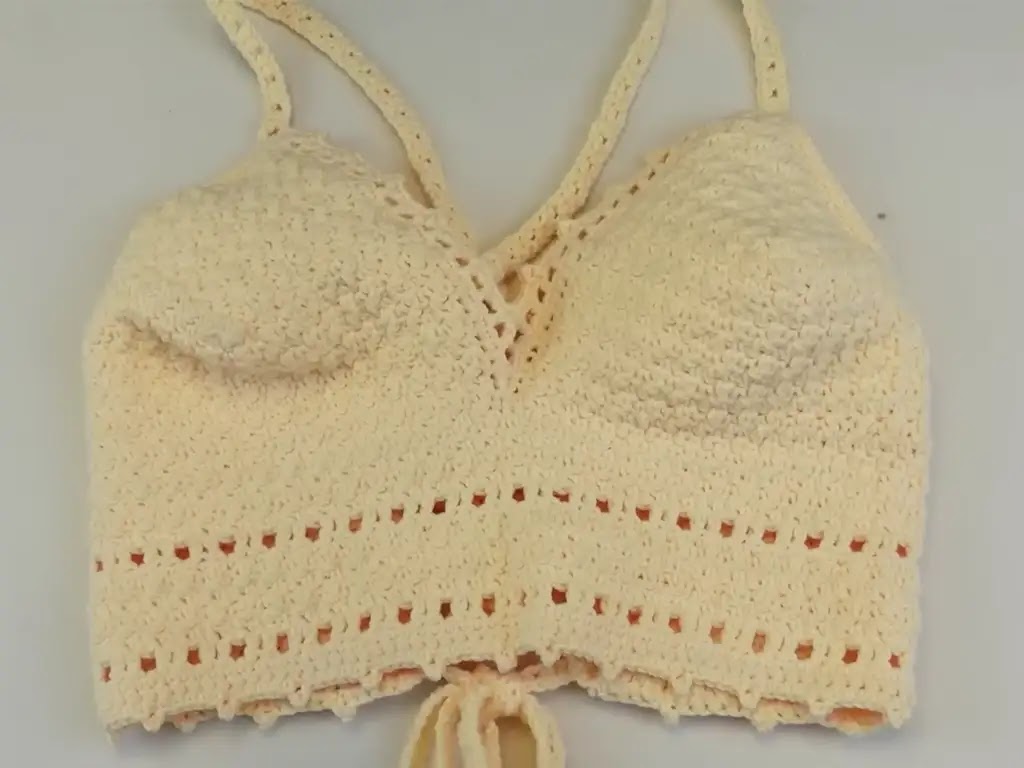
- Row 1: Starting at the corner of the band, ch 1 and sc along the back edge of your piece until you reach the second “cup row” indicated in the transcript.
- Rows 2-13: Repeat rows 2 and 3 (lemon peel stitch). This will typically be about 4 inches.
- Row 14: Ch 3, skip 2 ch, sl st into the next ch to create a loop.
- Row 15: Turn, sl st into the small “bump” of your chain 3 loop. Sc into the next 5 sts, ch 3, skip 2, sl st, turn.
- Rows 16 – end: Repeat row 15 to create small loops for lacing.
Straps (Make 2)
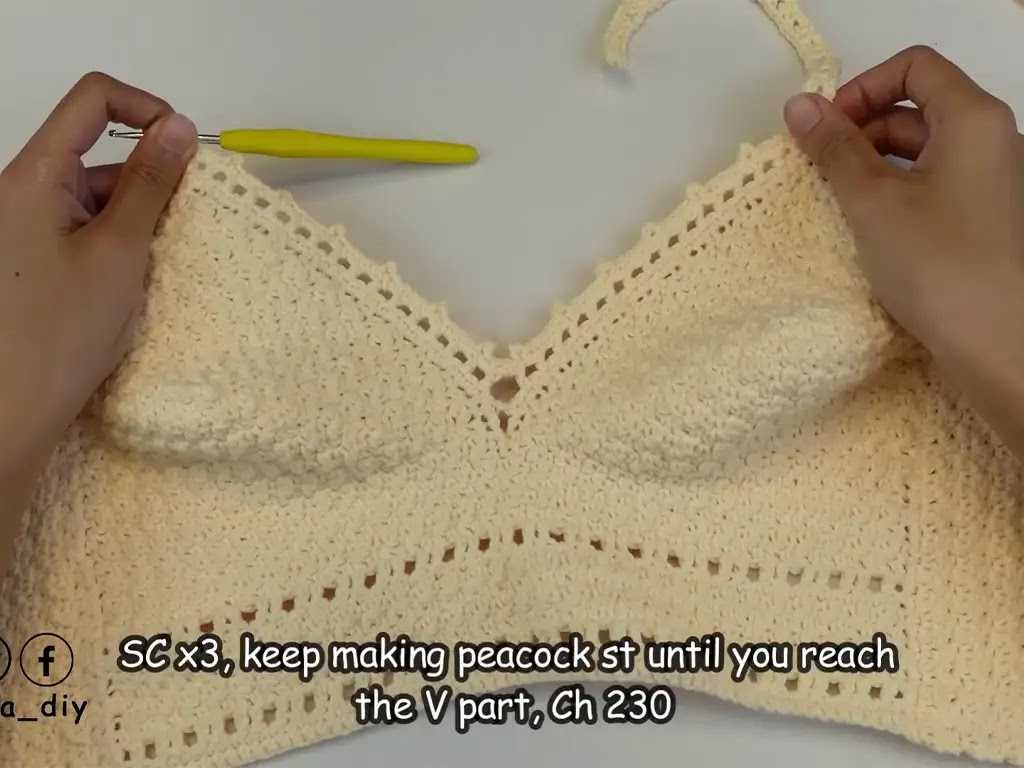
- Chain: Chain 232 (or desired length).
- Row 1: Skip 2 ch, hdc into the next ch, ch 1, skip 1 ch, hdc into the next 2 ch. Repeat between * until the end of the chain. Turn.
- Row 2: Ch 1, sc into each hdc and each chain-1 space.
- Rows 3-: Ch 1, sc into the first 5 sts, ch 3, skip 2, sl st to create a peacock “eye”. Sc 5, then repeat the peacock stitch across to the end. Turn
Finishing Touches
- Straps: Attach your yarn to the V-shaped section at the top of the cups. Chain 232 (or adjust the length as desired). Skip two chains, and half double crochet into the next. Chain one, skip one, and repeat this pattern across. Work decorative “peacock stitches” along your straps for a whimsical touch. You can find tutorials for this on the Chenda DIY YouTube channel: https://www.youtube.com/@chendadiy
- Weave in Ends: Use a darning needle to secure any loose ends of yarn.
- Customize: Consider adding beads, charms, or other embellishments to personalize your bralette!
Get Inspired, Share Your Work, and Connect
I hope you love your handmade vintage bralette! If you make one, I’d love to see it. Share your projects on Instagram ([https://www.instagram.com/tubacrochets?igsh=MW0wNjA2ZTcwbjUyMw==]) or TikTok (tiktok.com/@tubacrochet. For even more visual guidance, check out the video tutorial on Chenda DIY’s YouTube channel (https://www.youtube.com/watch?v=TzTfxzUlGBU).
Conclusion
Crocheting your own clothing is an empowering and satisfying experience. With this classic vintage bralette pattern, you can embrace your creativity and add a unique, handmade piece to your wardrobe. Feel free to leave comments, ask questions, and let’s build a supportive community of crochet lovers!


