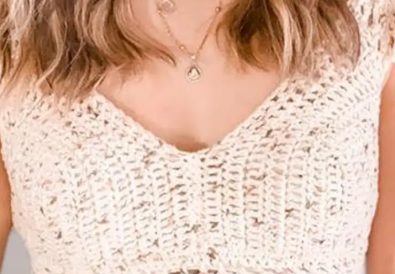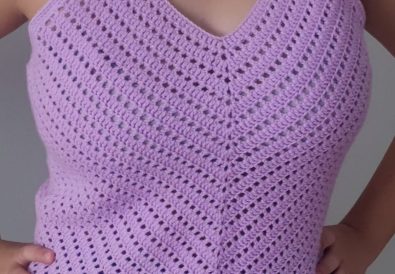
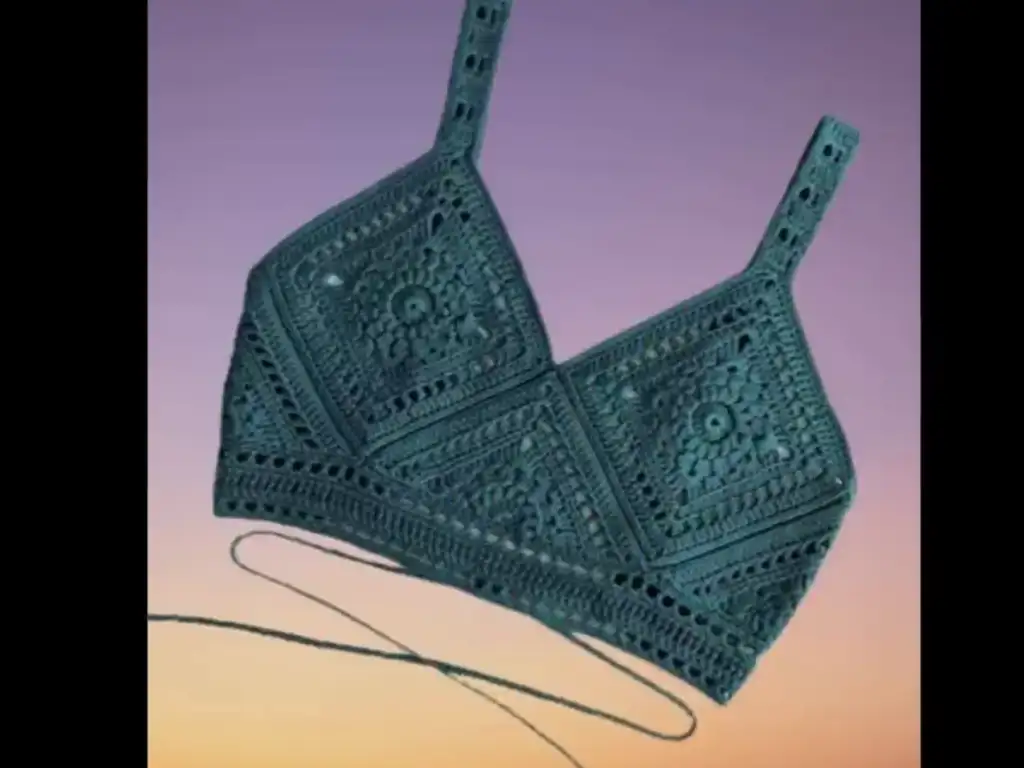
Are you ready to embrace the warmth of summer with a handmade crochet top? This easy-to-follow crochet top tutorial will guide you through creating a breezy and beautiful granny square top perfect for those sunny days. You’ll learn how to crochet individual granny squares, join them together seamlessly, and finish off with a few easy details. This crochet top for beginners project will have you feeling confident and stylish in no time!
Crochet Top Tutorial: Getting Started
This crochet top is all about the classic granny square motif. It’s a simple, repetitive pattern that’s easy to memorize, making it a great choice for those new to crochet. But don’t be fooled by its simplicity – the end result is a beautifully textured and eye-catching top that you’ll be proud to wear.
Firstly, gather your materials and prepare your workspace. Crocheting can be a relaxing and rewarding experience, so make sure you have everything you need to get started smoothly.
Materials You’ll Need for This Crochet Top Tutorial
- Yarn: For this crochet top tutorial, we’ll be using approximately 150-200 grams of cotton yarn. I recommend using a light worsted weight yarn in a color of your choice. In this tutorial, the creator used a vibrant coral color, perfect for a summer vibe.
- Crochet Hook: You’ll need a 2.5mm crochet hook, but feel free to adjust the size depending on your yarn and tension. Indeed, having the right hook size will make a difference!
- Scissors: For snipping yarn.
- Tapestry Needle: For weaving in ends.
- Optional: Stitch markers, measuring tape.
Understanding the Crochet Top Pattern & Abbreviations
This crochet top tutorial uses standard US crochet terminology. To begin, let’s familiarize ourselves with the abbreviations:
- ch – chain
- sl st – slip stitch
- sc – single crochet
- hdc – half double crochet
- dc – double crochet
- udc – unfinished double crochet (explained later in the crochet tutorial)
Gauge & Sizing
Gauge isn’t critical for this project, but certainly aim for consistency in your stitches. The pattern is written for a size small/medium, but you can easily adjust it by adding or subtracting granny squares. Consequently, you can customize the fit to your liking!
Step by Step Crochet Top Tutorial with Granny Squares
Now, let’s get to the heart of this crochet top tutorial: creating the beautiful granny squares!
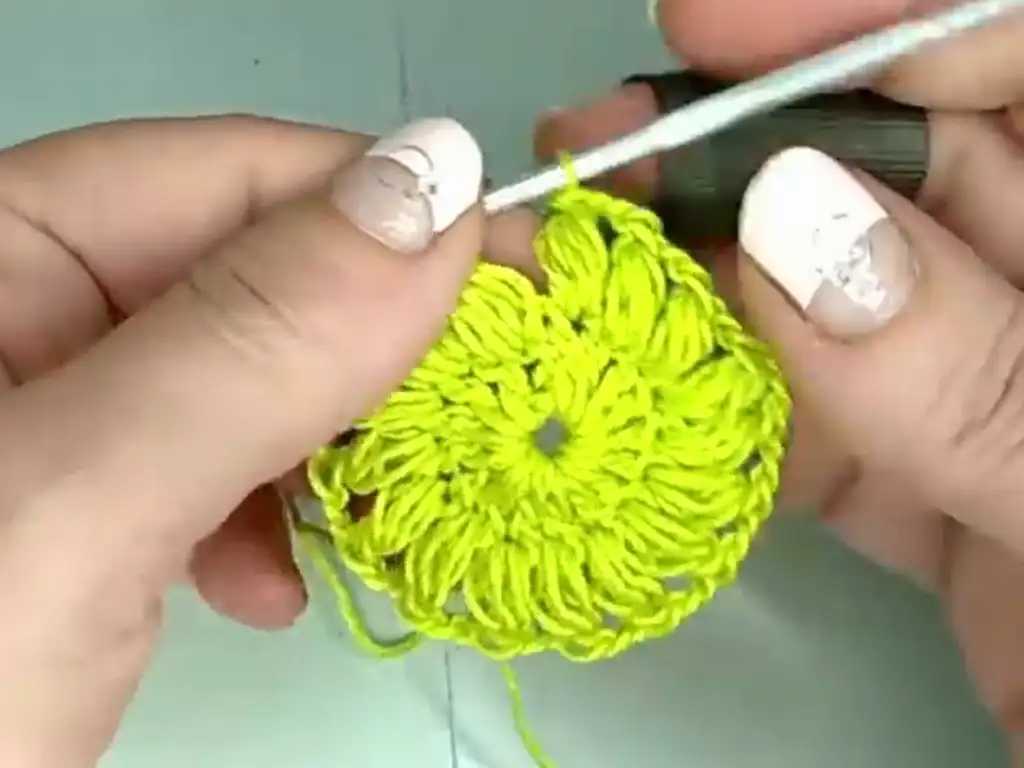
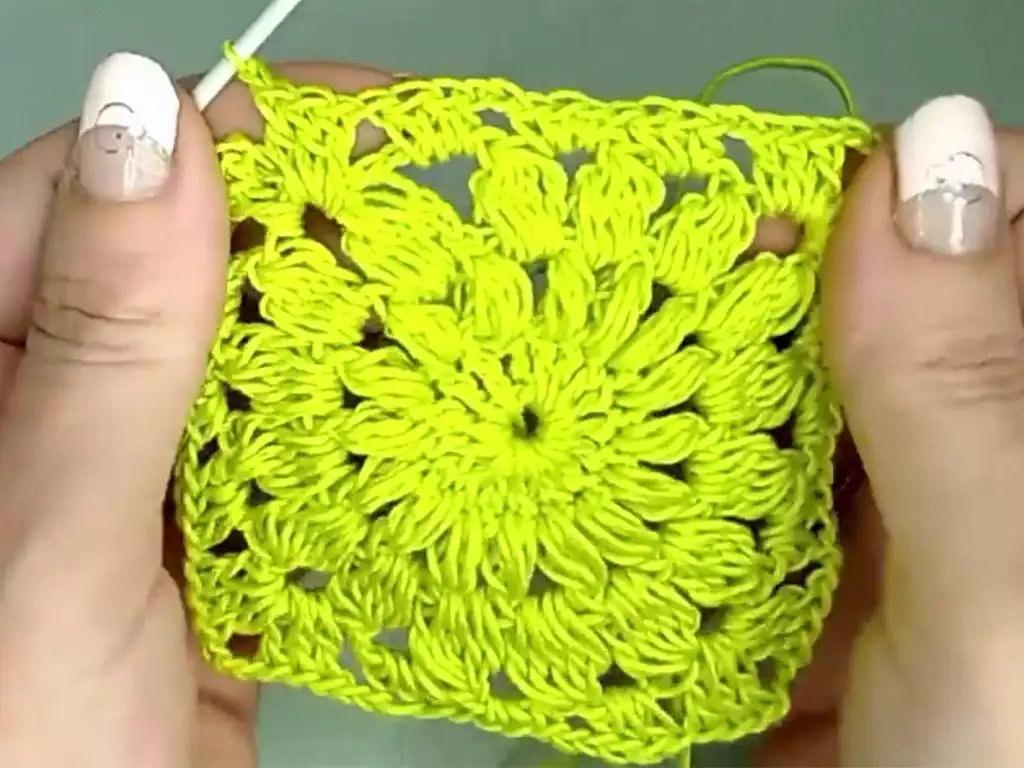
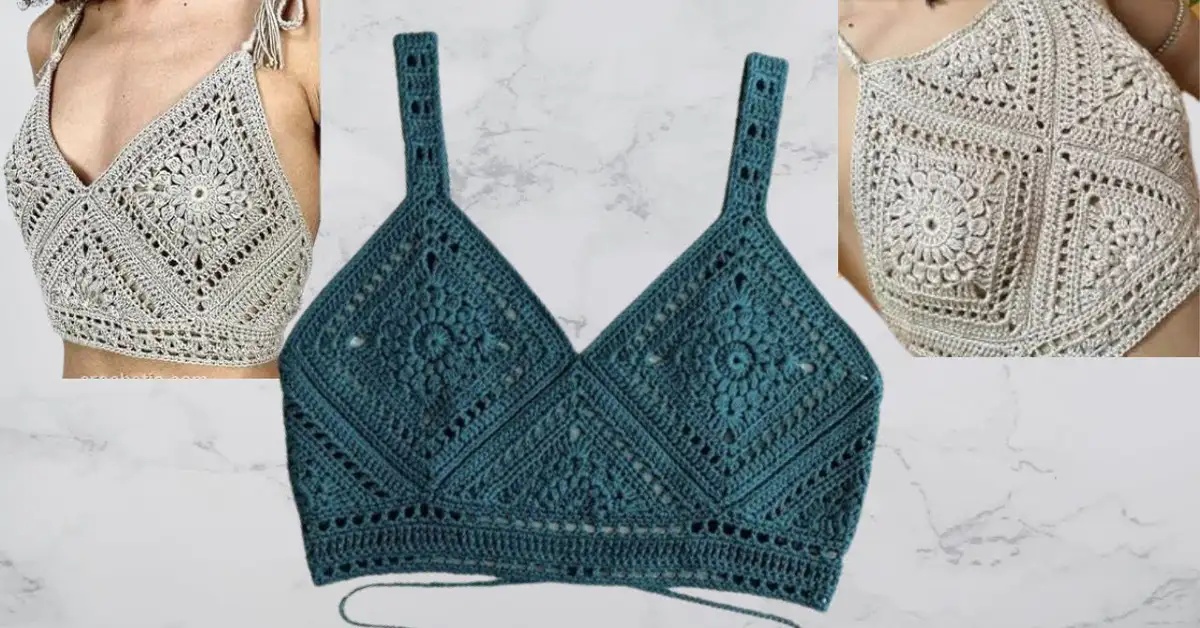
Creating the Granny Squares
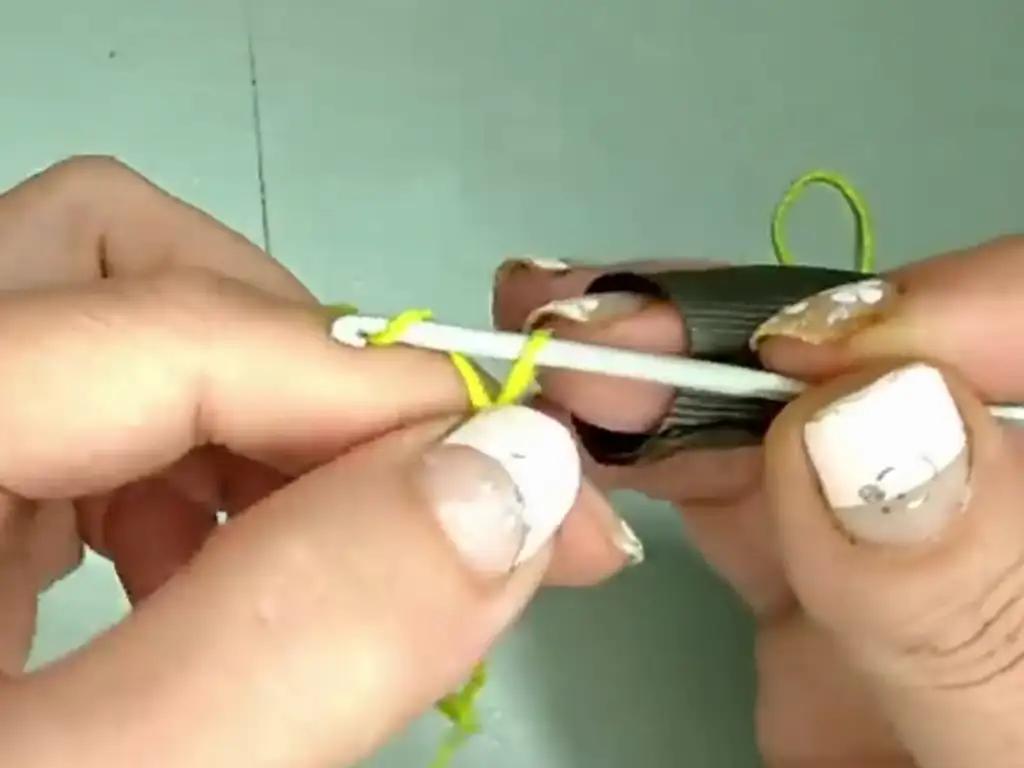
This crochet top is made up of classic granny squares. Afterward, we’ll join them together to form the top. Each crochet square is worked in rounds, starting from the center and building outwards. To illustrate, you’ll start with a chain ring and work your way around, increasing stitches in each round to create the square shape. For instance, the first round might be single crochets, the next double crochets, and so on. This creates the beautiful texture and visual appeal of the granny square top.
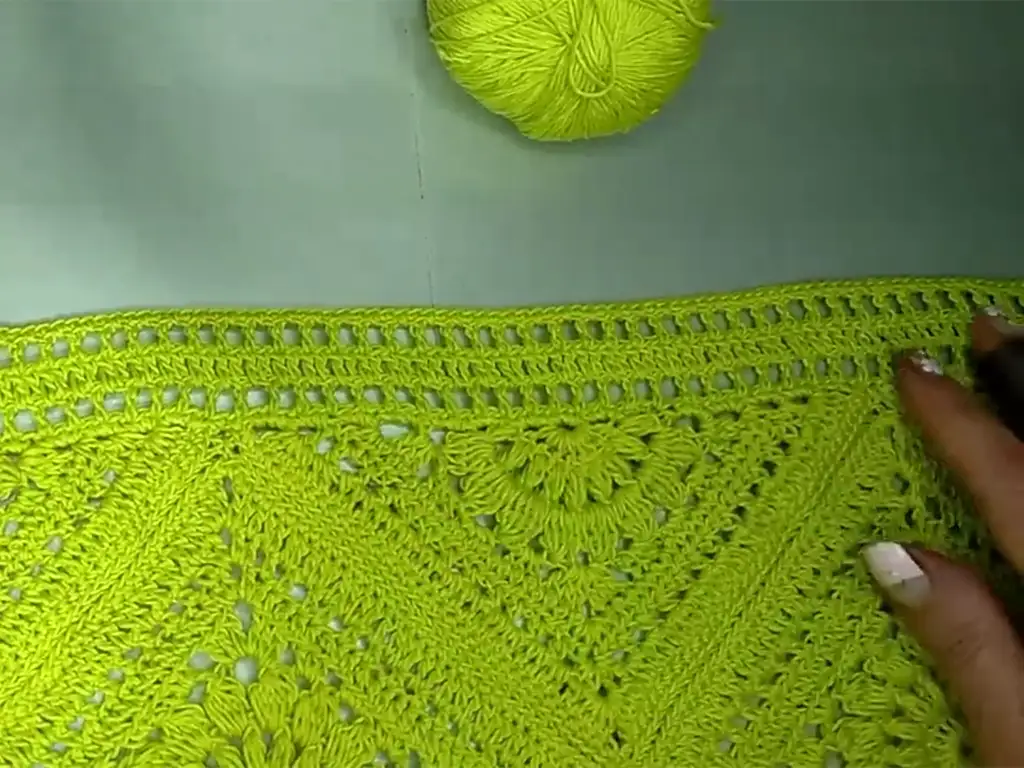
Joining the Granny Squares: A Seamless Crochet Top Tutorial
Once you have your granny squares crocheted, it’s time to join them. This crochet top tutorial uses a seamless joining method, resulting in a polished and professional look. In other words, you’ll be joining the squares as you go, creating a continuous fabric without any visible seams. To put it another way, it’s like magic! This technique is a bit more advanced, but the crochet tutorial provides clear instructions and helpful tips. Ultimately, it’s worth the effort for a truly stunning crochet top.


Shaping the Neckline and Armholes
After joining the granny squares, you’ll shape the neckline and armholes. This is done by strategically decreasing stitches in specific areas. In fact, it’s this shaping that transforms the flat fabric into a wearable garment. To wrap up this section, remember to follow the pattern carefully and use stitch markers if needed to keep track of your progress.
Easy Crochet Top Tutorial for Beginners: Video Guide
Sometimes it’s easier to grasp new techniques visually. @estherysumundodecrochet has a fantastic crochet top tutorial video that walks you through each step!
Watch the Crochet Top Tutorial Video Here:
Besides the written instructions, you can also follow along with this helpful video crochet tutorial by @estherysumundodecrochet (https://www.youtube.com/@estherysumundodecrochet).
Crochet Top Tutorial Video: Key Techniques Explained
The video crochet tutorial provides a visual demonstration of the key techniques used in this pattern. In particular, it shows you how to create the granny squares, join them seamlessly, and shape the neckline and armholes. Undoubtedly, watching the video will make the process even easier!


Mastering the Granny Square: A Crochet Top Tutorial Essential
Granny Square Basics
The granny square is a fundamental crochet motif, and mastering it opens up a world of possibilities. To sum it up, it’s a versatile building block for countless projects. This crochet top tutorial focuses on the classic granny square, but there are countless variations you can explore. In short, the granny square is a must-learn for any crocheter!
Tips for Perfect Granny Squares
For instance, make sure your tension is consistent throughout the square to prevent it from becoming wonky. As you can see from the crochet tutorial, neat and even stitches are key to a beautiful finished product. Moreover, don’t be afraid to frog (rip back) your work if you make a mistake. In conclusion, practice makes perfect!
Crochet Top Tutorial: Assembling Your Summer Top
Connecting the Front and Back Panels
Once you have your front and back panels crocheted, it’s time to join them. This crochet top tutorial suggests using a simple slip stitch seam. However, you can also use a different joining method if you prefer. Ultimately, the choice is yours!
Adding the Straps or Sleeves
Then, you’ll add the straps or sleeves. After that, you’ll be ready to wear your new crochet top! The crochet tutorial provides instructions for basic straps, but you can get creative and customize them to your liking. As a result, you can make your crochet top truly unique!

Finishing Touches: Crochet Top Tutorial for a Polished Look
Weaving in Ends
Next, you’ll weave in any loose ends. This step is important for a neat and professional finish. In general, you’ll use a tapestry needle to thread the ends through the back of your stitches, securing them in place. To sum up, this step will make your crochet top look polished and complete.
Crochet Top Tutorial: Blocking Your Finished Top
Finally, block your finished crochet top. This helps to even out the stitches and give it a professional look. Briefly, you’ll soak the top in lukewarm water and then pin it to shape while it dries. In summary, blocking is the final step to achieving a beautiful and well-shaped crochet top.
Crochet Top Tutorial: Customization and Variations
Crochet Top Tutorial: Choosing Different Yarn Colors and Textures
This crochet top tutorial uses a solid color yarn, but feel free to experiment with different colors and textures. For example, you could use a variegated yarn for a more playful look, or a textured yarn for added interest. Therefore, don’t be afraid to get creative and make it your own!
Crochet Top Tutorial: Adding Edgings and Embellishments
You can also add edgings and embellishments to personalize your crochet top. Besides adding a simple border, you could also add fringes, tassels, or even beads. In addition, you can embroider designs onto the granny squares for a truly unique touch. Consequently, the possibilities are endless!
Crochet Granny Square Top Pattern
Here’s the written pattern, adapted from @estherysumundodecrochet’s tutorial, for a single granny square. Remember, you’ll need to create multiple squares and join them according to your desired top size and layout.
Granny Square (make 8)
Round 1:
- Make 5 ch.
- Sl st in the first ch forms a ring.
- Ch 3 (counts as a dc).
- 16 dc in the ring. (17)
- Sl st in the 3rd ch of the beginning ch-3.
Round 2:
- Bobble Stitch: Yarn over, insert hook into next st, pull up a loop, yarn over, pull through 2 loops, yarn over, insert hook into same st, pull up a loop, yarn over, pull through 2 loops, yarn over, insert hook into same st, pull up a loop, yarn over, pull through 2 loops, yarn over, pull through all loops on hook. Ch 2.
- Repeat Bobble Stitch around. (16 bobbles)
- Sl st in the top of the first bobble.
Row 3:
- Ch 12, sl st in the space between the next two bobbles.
- Cluster Stitch: Ch 2, udc in the same space, udc in the same space, udc in the same space, udc in the same space, udc in the same space, yarn over, pull through all loops on hook. Ch 3.
- Repeat Cluster Stitch around. (16 clusters)
- Sl st in the 2nd ch of the beginning ch-2.
Row 4:
- Sl st the center of the next 3-ch space.
- Ch 3 (counts as a dc).
- 2 dc in the same space.
- Ch 1, 3 sc in the next 3-ch space.
- Repeat steps 4 and 5 around. (4 corner clusters of 3 dc, 3 ch, 3 dc; 16 groups of 3 sc between clusters)
- In the last corner, make 3 dc, ch 1, sl st in the top of the beginning ch-3.
Round 5:
- Ch 2 (counts as a hdc).
- Hdc in the back loop only of each st around. (64)
- In the corner spaces, make 2 hdc, ch 2, 2 hdc.
- Sl st in the 2nd ch of the beginning ch-2.
Round 6:
- Ch 2 (counts as a hdc).
- Hdc in the next st.
- Ch 1, skip next st, hdc in the next st.
- Repeat step 3 around. (32 hdc, 32 ch-1 spaces)
- In the corner spaces, make 2 hdc, ch 2, 2 hdc.
- Sl st in the 2nd ch of the beginning ch-2.
Row 7:
- Ch 3 (counts as a dc).
- Dc in each st and ch-1 space around. (64)
- In the corner spaces, make 3 dc, ch 3, 3 dc.
- Sl st in the 3rd ch of the beginning ch-3.
Row 8:
- Ch 1.
- Sc in each st around. (64)
- In the corner spaces, make 3 sc in the ch-3 space.
- Sl st in the first sc.
Half Granny Square (make 4)
Round 1:
- Make 5 ch.
- Sl st in the first ch forms a ring.
- Ch 3 (counts as a dc).
- 9 dc in the ring. (10)
- Turn the work.
Round 2:
- Ch 2 (counts as a hdc), hdc in the next st.
- Continue hdc in each st across. (9)
- Turn the work.
Row 3:
- Bobble Stitch: (as described in Round 2 of Granny Square).
- Repeat Bobble Stitch across. (9 bobbles)
Row 4:
- Ch 3 (counts as a dc), dc in the next st.
- Ch 1.
- Cluster Stitch: (as described in Round 3 of Granny Square).
- Repeat Cluster Stitch across, ending with 3 dc in the last st.
Continue following Rounds 4-8 of the Granny Square pattern, adjusting stitch counts as needed maintains the half-square shape.
Assembly:
Arrange your squares and half-squares according this crochet granny square top pattern. Join them using your preferred method, referring this crochet top easy tutorial. Remember crochet granny square clothing requires careful joining.
Adding Straps:
Crochet granny square top with straps are trendy! Use the crochet top for beginners with video tutorial how attach straps comfortably.
Remember this crochet top for beginners uses US terms. If you’re looking for free crochet patterns for summer tops, you’ll find many online! Consider exploring summer easy crochet top patterns for beginners or easy crochet summer tops patterns for free for beginners for more options. This crochet top pattern is a great starting point for exploring crochet square motif designs.
Other Crochet Projects You’ll Love
Now that you’ve mastered this crochet top tutorial, why not try your hand at other crochet summer top patterns? First of all, check out our crochet granny square top pattern for a similar design with a twist. Secondly, explore our collection of crochet summer clothing patterns for more warm-weather inspiration. Finally, don’t forget to browse our crochet clothes section for a wide range of stylish and trendy crochet tops!
Conclusion We hope you enjoyed this crochet top tutorial! This easy crochet top pattern is a fantastic project for beginners and a fun way to add a handmade touch to your summer wardrobe. In addition, you can personalize it with different yarn colors and embellishments. Be sure to share your finished crochet tops with us on Instagram (https://www.instagram.com/tubacrochet_), TikTok (tiktok.com/@tubacrochet) and Facebook (https://www.facebook.com/tubacrochet/)! We can’t wait to see your creations! Don’t hesitate to leave a comment below if you have any questions or want to share your experience with this crochet top tutorial. Happy crocheting!