This free crochet Christmas tree pattern is perfect for beginners, and the result is a delightful, handmade decoration that adds a touch of homemade charm to your holiday décor. Whether adorning your own tree or gifted to a loved one, this little crochet tree ornament is sure to bring a smile. So grab your hooks and yarn, and let’s get started!
Crochet Christmas Tree Pattern: A Beginner-Friendly Guide
This crochet Christmas tree pattern is a fantastic project for beginners. It introduces basic stitches and techniques, like the magic ring and double crochet. The pattern uses simple shaping, making it easy to follow. Plus, it’s a quick project, ideal for those new to crochet. You’ll be amazed at how easily a simple granny square transforms into a festive tree!
Materials for Your Crochet Christmas Tree
- Himalaya Himagurumi Cotton Yarn (white and green): This yarn is perfect for amigurumi and ornaments due to its soft texture and vibrant colors.
- Filyarn Glittery Yarn: This adds a touch of sparkle to your Christmas crochet tree. Specifically, silver or gold complements the festive theme beautifully.
- Brown Yarn: Any brown yarn will do for the tree trunk. Choose a worsted weight for a sturdy base.
- 2.75mm Crochet Hook: This hook size works well with the chosen yarns, creating a tight stitch for a neat finish.
- Scissors: Sharp scissors are essential for clean yarn cuts.
- Yarn Needle: A yarn needle is needed for weaving in loose ends and sewing the tree together.
Understanding the Crochet Christmas Tree Pattern Abbreviations
Before we dive into the pattern, let’s familiarize ourselves with some standard US crochet terms:
- ch: chain
- sl st: slip stitch
- sc: single crochet
- dc: double crochet
- tr: triple crochet
- st(s): stitch(es)
- sp: space
- beg: beginning
Special Stitches for the Crochet Christmas Tree Pattern
The magic ring technique is used to begin this crochet Christmas tree pattern. It creates a tight center, perfect for ornaments. Additionally, the pattern includes double crochet stitches throughout, forming the main structure. In other words, you don’t need any fancy stitches to craft this lovely Christmas ornament. Ultimately, this makes the project very approachable for beginners.
Free Christmas Tree Ornament Crochet Pattern: Getting Started
Now that we’ve covered the basics, let’s get into the project. This easy pattern creates a small crochet Christmas tree ornament, ideal for hanging on your Christmas tree or using as a festive gift tag. As a result of this, this makes a great handmade gift for friends and family.
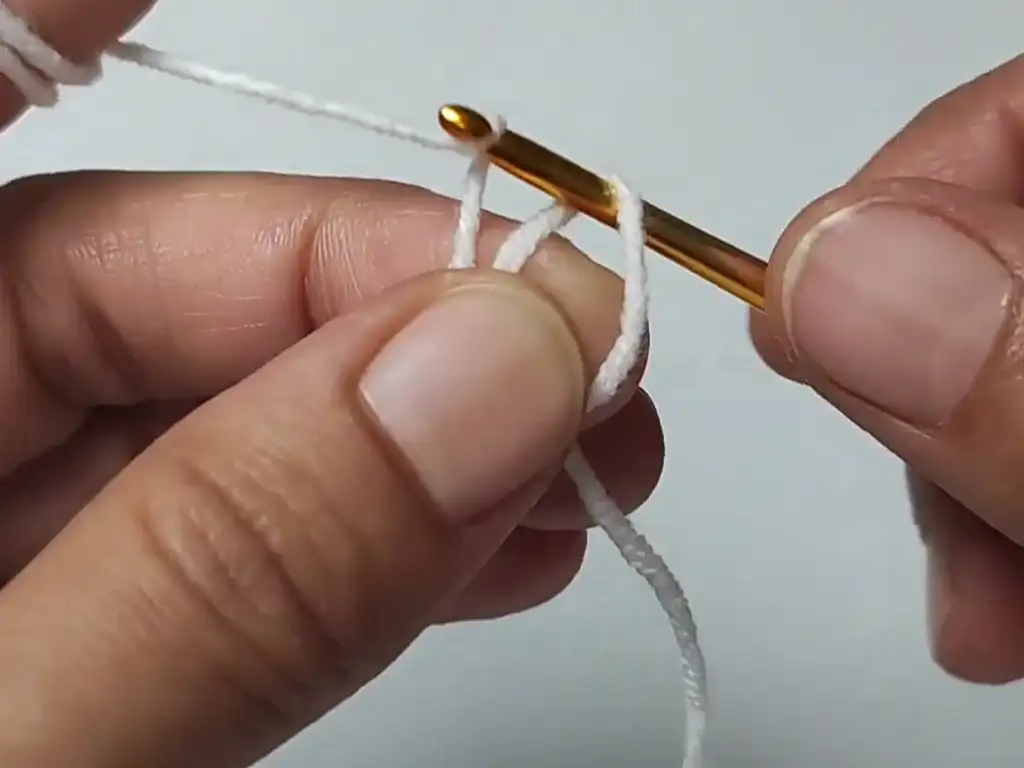

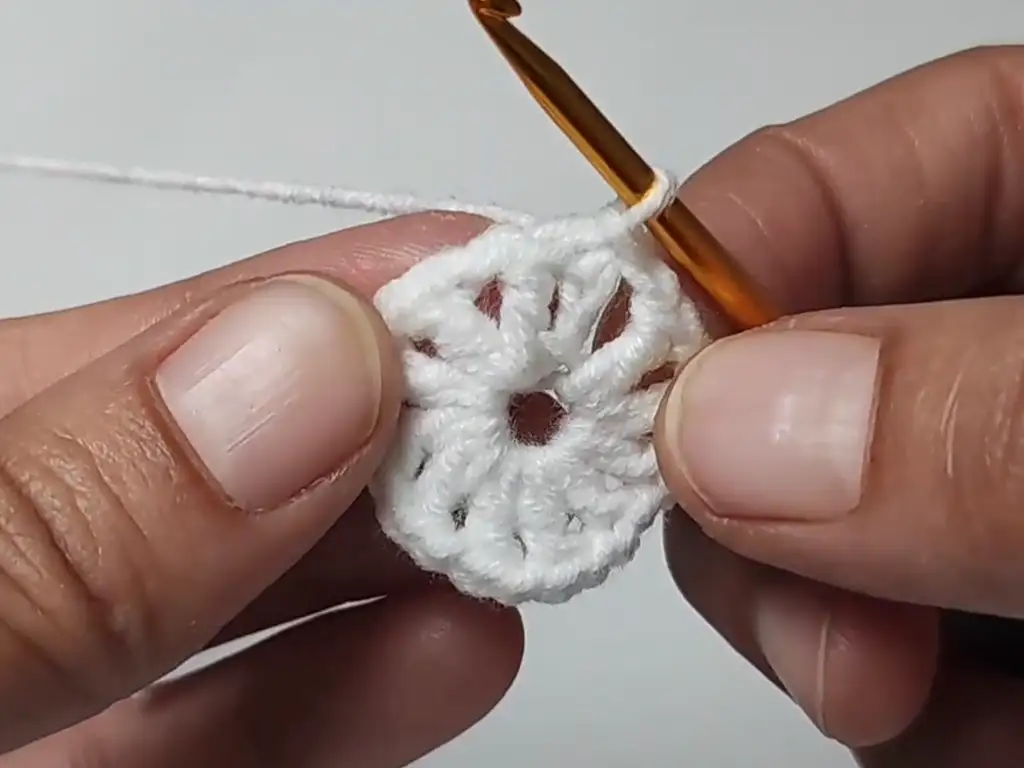
The Magic Ring: Foundation of Your Crochet Christmas Tree
The magic ring is a key technique in this crochet Christmas ornament pattern. While it can seem intimidating, there are tons of tutorials online. Definitely check them out if you’re not yet familiar.
Working the First Round of the Crochet Christmas Tree Pattern
After the magic ring, the first round forms the granny square crochet tree’s base. Essentially, this establishes the Christmas tree granny square shape, which we will then build upon.
Changing Colors in Your Crochet Christmas Tree Pattern
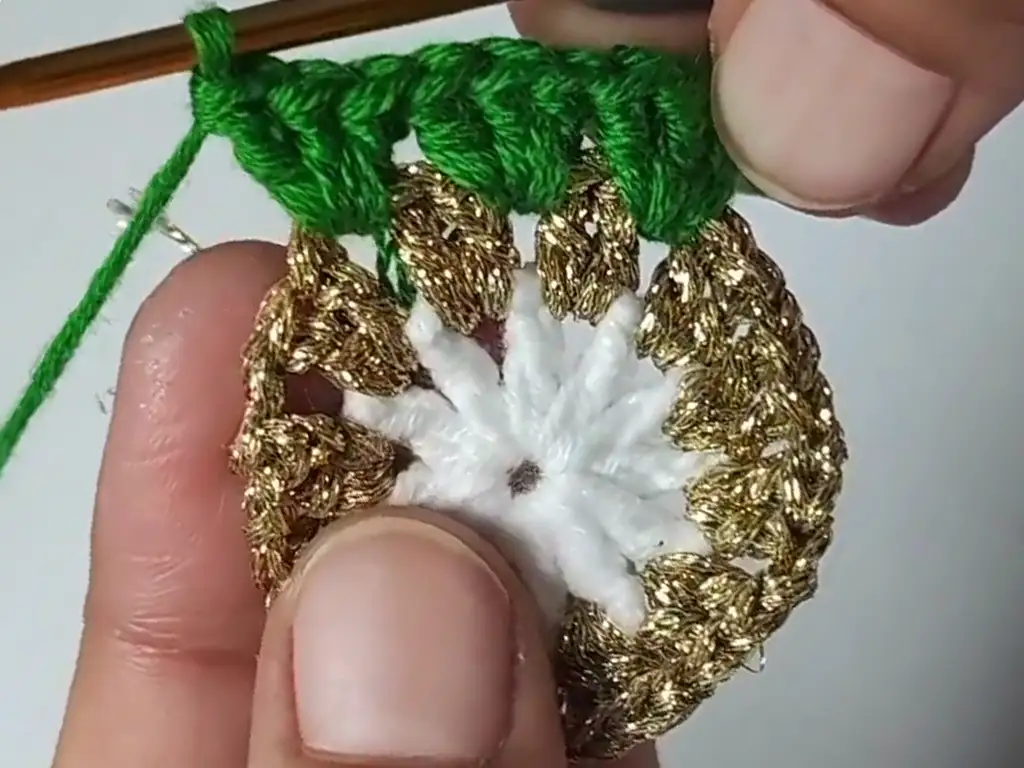
Switching between white, green, and glittery yarn adds visual interest. First of all, ensure smooth transitions by carrying the unused yarn along the edge of your work. In this tutorial, we will also explain the technique in the step-by-step instructions.
Making Your Own Crochet Christmas Tree Ornament
With the crocheting done, let’s transform the flat granny square crochet tree into a 3D ornament. Moreover, this part is surprisingly simple. It involves folding, sewing and then adding the trunk, making it easier to see the final form. In short, it’s a fulfilling part of the process.
Shaping the Crochet Christmas Tree: Folding and Sewing
Folding and sewing the crocheted square transforms it. The flat square becomes a charming little tree. It’s quite satisfying seeing this crochet Christmas tree take shape.
Adding Embellishments to Your Crochet Christmas Tree Ornament
Personalize your crochet tree pattern. Add beads, buttons, or a star to the top. Alternatively, a bit of embroidery can add extra flair. Embellishments make each crochet Christmas tree ornament unique. Consequently, your creativity truly shines with this customization.
Customizing Your Crochet Christmas Tree Pattern
Feel free to experiment with different yarn colors and weights. Additionally, consider adding extra rounds to your granny square. This will change the size of your Christmas crochet tree. You can also try incorporating different stitch patterns for a unique touch.


Easy Crochet Christmas Tree Pattern: Step-by-Step Instructions
Here are the step-by-step instructions for this crochet Christmas tree pattern:
(Download the free PDF pattern here: https://crochetstrends.com/wp-content/uploads/2024/11/Crochet-Christmas-Tree-Granny-Square-Pattern.pdf)
White (Round 1):
- Make a magic ring.
- Ch 5 (counts as dc and ch-1 sp).
- 11 dc into ring, ch 1 after each dc. (12 dc)
- Sl st to 3rd ch of beg ch-5.
Glittery Yarn – Doubled (Round 2):
- Join glittery yarn (doubled) in any ch-1 sp.
- Ch 3 (counts as dc).
- Dc in same sp. (2 dc)
- Ch 1, 2 dc in next ch-1 sp. Repeat from * around.
- Sl st to top of beg ch-3.
Green (Round 3):
- Join green yarn in any ch-1 sp.
- Ch 3 (counts as dc).
- 2 dc in same sp. (3 dc)
- 3 dc in each ch-1 sp around.
- Sl st to top of beg ch-3.
White (Round 4):
- Join white yarn in any sp between two 3-dc groups.
- Ch 3 (counts as dc).
- 2 dc in same sp.
- 3 dc in next sp between 3-dc groups. Repeat from * twice.
- 3 dc, ch 2, 3 dc in same sp (corner). Repeat around.
- Sl st to top of beg ch-3.
Glittery Yarn-Doubled (Round 5):
- Join yarn in any sp between 3-dc groups.
- Ch 3 (counts as dc).
- 2 dc in same sp.
- 3 dc in next sp between 3-dc groups. Repeat from * twice.
- 3 dc, ch 2, 3 dc in corner sp. Repeat around.
- Sl st to top of beg ch-3.
Tree Trunk (Brown):
- Join brown in magic ring.
- Ch 3 (counts as tr).
- 5 or 6 tr in ring. Fasten off.
Finishing:
- Fold square in half diagonally. Sew edges together.
- Sew bottom edges together for the trunk, leaving a small hole.
- Insert the trunk. Secure.
Creating the Base of the Crochet Christmas Tree (Round 1)
This round establishes the foundation. It’s a simple circle of double crochets worked into the magic ring. Make sure your stitches are relatively tight to create a solid base for the subsequent rounds.
Adding Detail to Your Crochet Christmas Tree Pattern (Round 2)
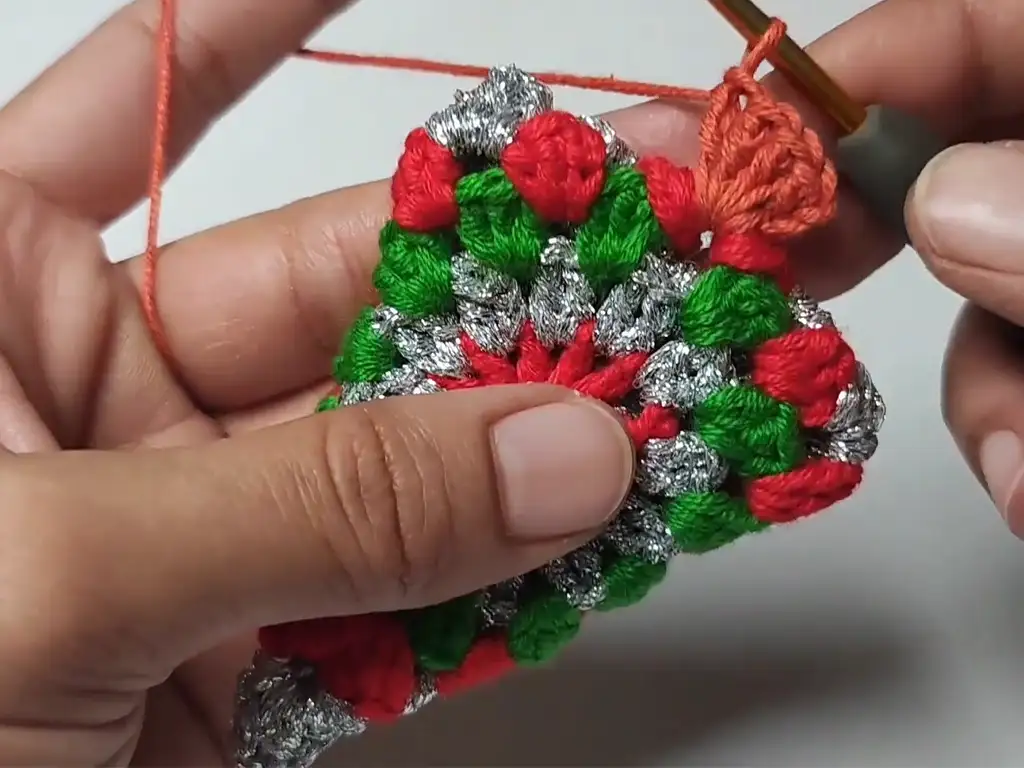
Here’s where the glittery yarn comes in! This round adds a touch of sparkle and helps the tree shape begin to emerge. Because the glittery yarn is often thin, the creator of this design, @TubaCrochet (https://www.youtube.com/@TubaCrochet), doubles it up, so definitely do the same if your glitter yarn is on the thinner side!
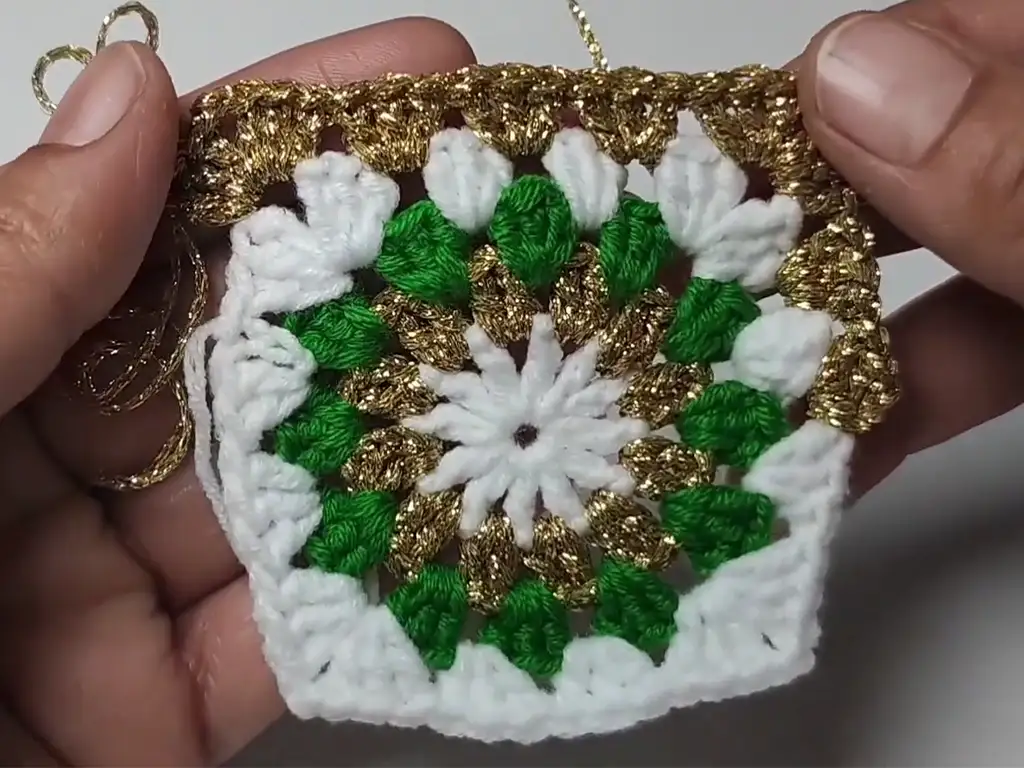
Round 3 and Beyond: Expanding Your Crochet Christmas Tree
Each round adds height and width to the tree shape. The corners, created by the chain-2 spaces, contribute to the overall granny square design but become the tree’s points when folded.
Tips for Increasing/Decreasing Size:
- Larger Tree: Continue the pattern, repeating rounds 4 and 5 with your color changes, adding two more 3-dc groups between each corner. This maintains the tree shape as you increase its size.
- Smaller Tree: Make a smaller tree by stopping at Round 3 or 4. However, you’ll still follow the same shaping instructions, so consider where the points of the tree will fall with fewer rounds.
Trick from the Video: @TubaCrochet suggests using the glittery yarn doubled as it can be quite thin. This creates a fuller, more sparkly effect. This Crochet Christmas Tree design comes from her YouTube channel, and you can watch her tutorial here: https://www.youtube.com/watch?v=wzvAnaAgpmc&t=1s.
Other Crochet Projects You’ll Love:
- Crochet Snowflakes
- Granny Square Patterns
- Crochet Snowman Pattern
- Crochet Pumpkin Placemat
- Crochet Pumpkin Basket
We hope you enjoyed this crochet Christmas tree pattern. It’s such a rewarding project that adds a splash of handmade charm to your holiday season. Show off your creations, share your thoughts in the comments below and don’t forget to share your finished projects on Instagram (https://www.instagram.com/tubacrochet_/), TikTok (tiktok.com/@tubacrochet) and Facebook (https://www.facebook.com/tubacrochet/)! Happy crocheting!


