
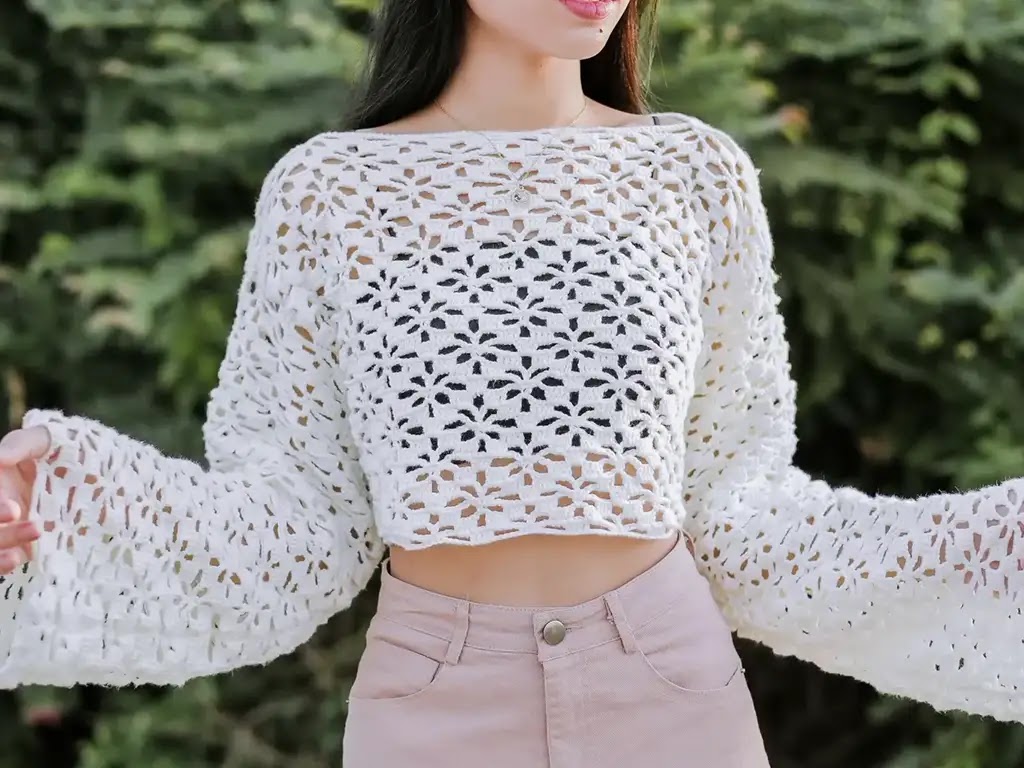
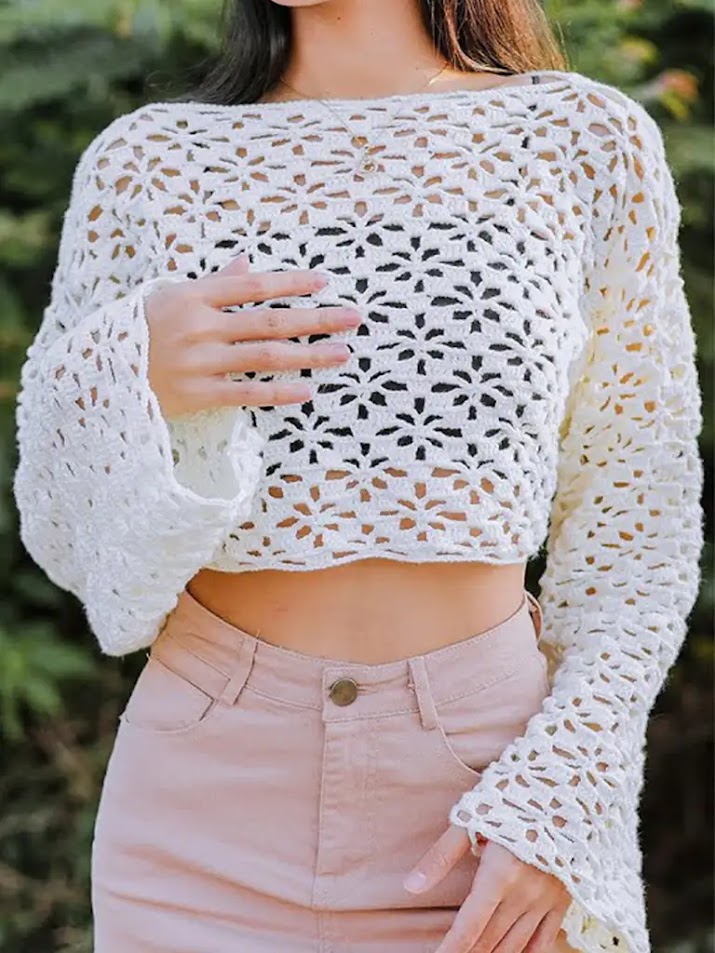
Learn how to crochet a gorgeous floral lace sweater with this free, easy pattern – perfect for beginners!
Crocheting your own clothing is incredibly rewarding. If you’re new to crochet or simply looking for a beautiful project, this floral lace sweater pattern is the perfect place to start. Its classic design has a touch of vintage charm, while the openwork lace creates a breezy, wearable garment. This pattern is easy to follow, making it an excellent choice for beginners.
Overview
- Difficulty: Beginner-friendly
- Uses: This versatile sweater can be dressed up or down. Pair it with jeans for a casual look or a skirt for a dressier occasion.
Materials
- Yarn: Choose a lightweight yarn in your desired color. Mercerized cotton is excellent for breathability, while a soft wool blend offers warmth and a touch of vintage style.
- Crochet Hook: Refer to your yarn label for the recommended hook size.
- Scissors
- Yarn Needle
- Stitch Markers (optional, but helpful)
Pattern Notes
- Gauge: Not critical for this pattern, but consistent tension helps with evenness.
- Customization: Easily adjust the length of the body and sleeves by adding or subtracting rows within the repeating pattern.
Crochet Techniques
This pattern uses basic crochet stitches and techniques. If you’re a beginner, here’s a quick guide:
- Chain Stitch (ch): The foundation for most crochet projects.
- Single Crochet (sc): A basic, versatile stitch.
- Double Crochet (dc): Creates taller stitches and adds open space.

Tips and Tricks
- Practice Tension: Consistent tension makes for even stitches and a neat finished look.
- Count Your Stitches: Counting, especially at the end of each row, prevents mistakes.
- Stitch Markers: These help track your progress on larger pieces.
- Video Tutorial: If you’re a visual learner, check out the Chenda DIY YouTube channel (https://www.youtube.com/@chendadiy) for a detailed video walkthrough of this pattern (https://www.youtube.com/watch?v=u71MaudlmOc).
Step by Step Written Pattern
Front and Back Panels (Make Two)
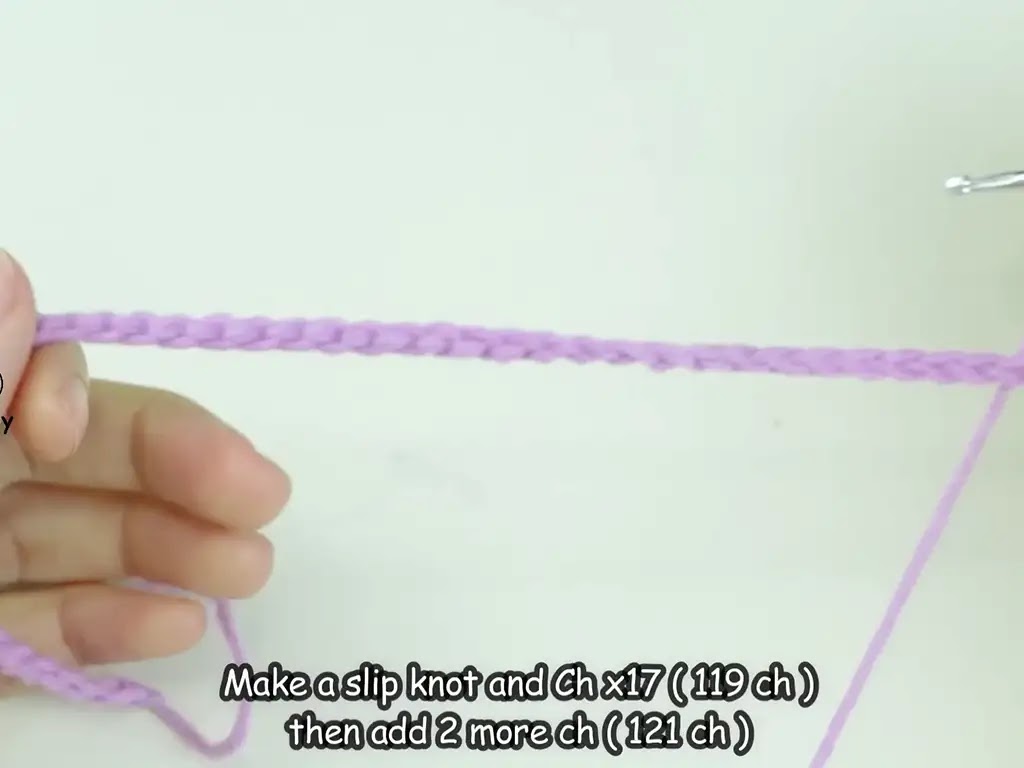
oundation Chain: Chain a multiple of 17 + 2. (For example, 119 + 2 = 121 chains for a small size).
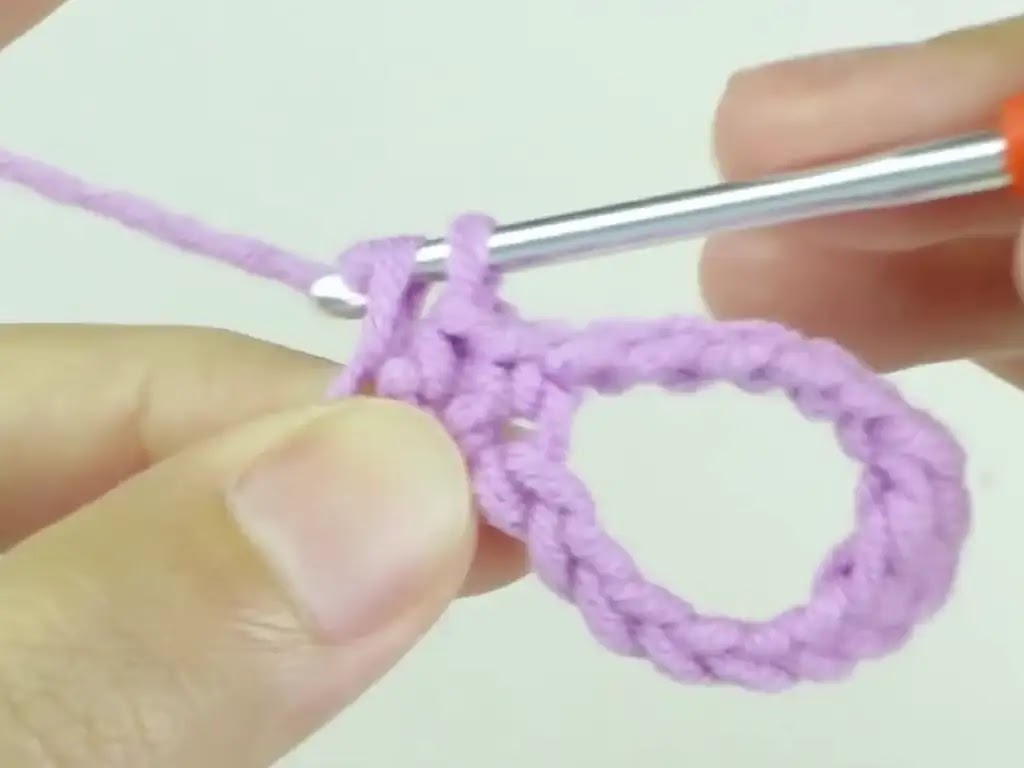
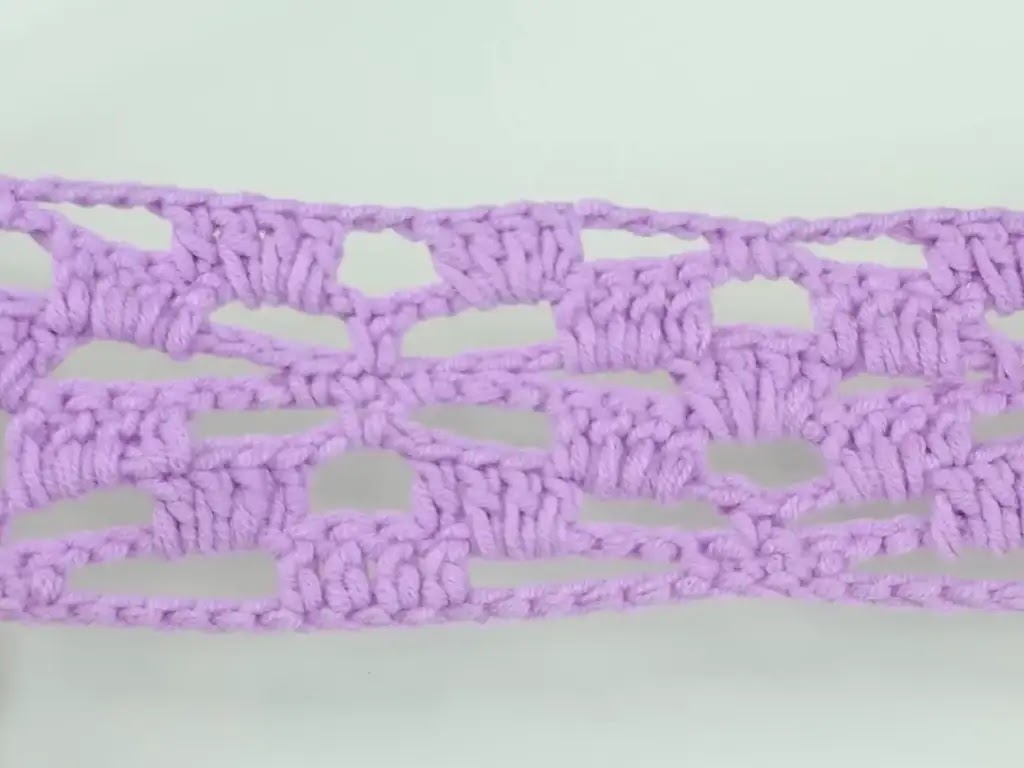
Row 1:
- Skip 3 chains, dc into the 4th chain.
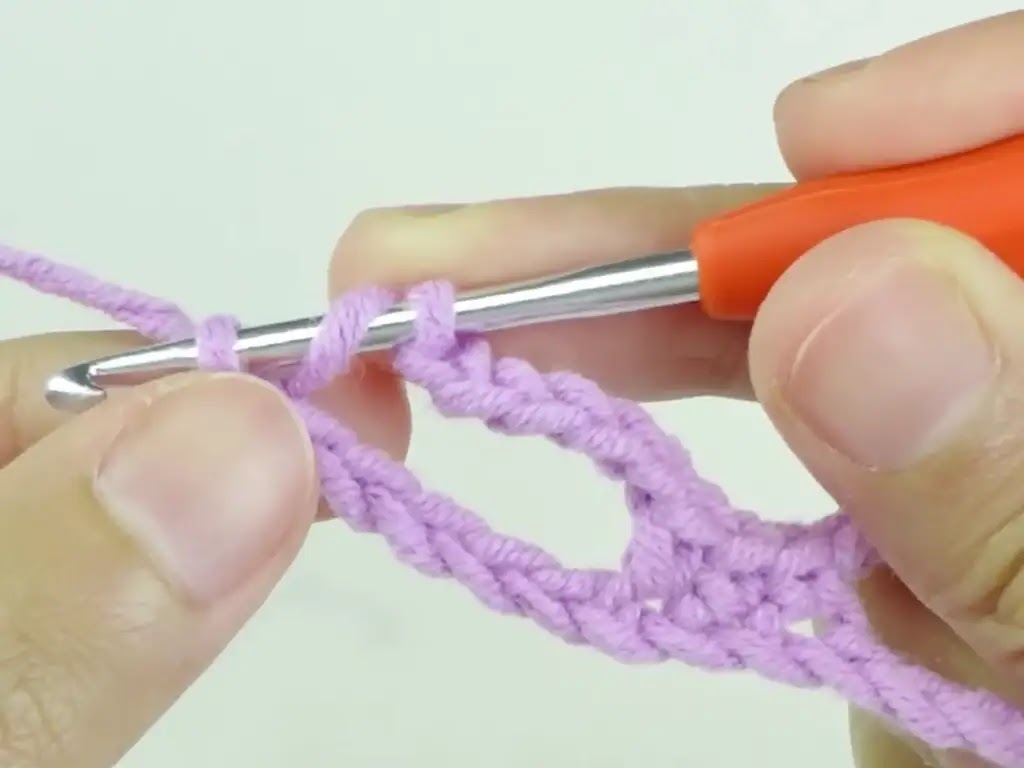
- Ch 5, skip 5 chains, sc into the next 3 chains, ch 5, skip 5 chains, dc into the next 4 chains
- Repeat from * to * across the row.
- End with 2 dc in the last chain.
Row 2:
- Ch 3 (counts as dc), dc in the next dc.
- Ch 4, sc in the middle sc of the 3 sc group below, ch 4, 3 dc in the next ch 5 space
- Repeat from * to * across.
- End with dc in the top of the turning chain.
Step 3- 37: Repeat rows 1 and 2.
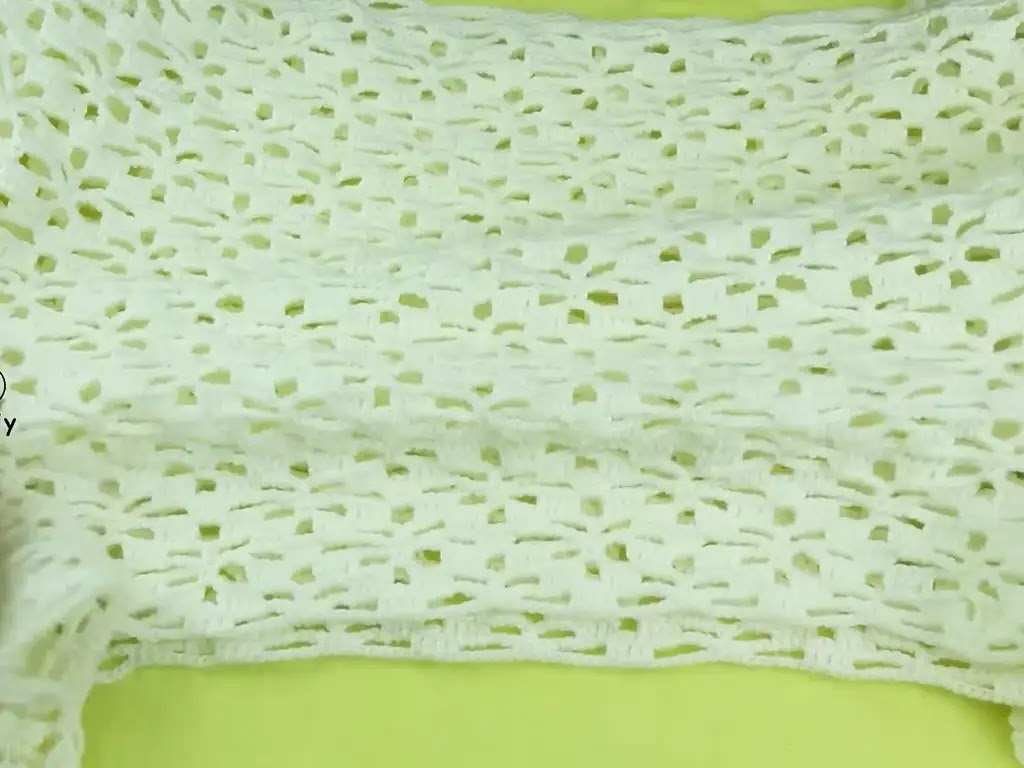
Finishing (For Each Panel):
- After row 37, ch 1, sc across the edge for a neat border.
- Ch 1, and fasten off.
Sleeves (Make Two)
Foundation Chain: Chain a multiple of 17 + 2. Adjust the length for your desired sleeve length.
- (Example: 102 + 2 = 104 for a standard sleeve).
Rows 1-61: Repeat rows 1 and 2 from the body pattern. Adjust the number of rows for a longer or shorter sleeve.
Finishing (For Each Sleeve):
- Ch 1, sc across the edge for a border.
- Ch 1, and fasten off.
Sleeves (Make Two)
- Foundation Chain: Chain a multiple of 17 + 2. (Adjust the length for your desired sleeve length).
- Rows 1-61: Repeat rows 1 and 2 from the body pattern. (Adjust for a longer or shorter sleeve).
- Finishing: Chain 1, sc across the edge for a border, chain 1, and fasten off.
Assembly
Shaping Note: The slight shaping of the sweater comes from where you attach the sleeves, not through specific increases or decreases within the main body.
- Shoulder Seams: Match the front and back panels, aligning the top edges. Using your yarn needle, sew them together for approximately 25 stitches on each side, leaving space for the neckline.
- Sleeves: Fold each sleeve in half and mark the center. Attach the sleeves to the armholes. Begin attaching a few stitches before the shoulder seam and finish a few stitches after, creating a slightly curved shape at the top of the sleeve for a natural fit.
- Side Seams: With the sweater turned inside out, sew up the sides and sleeve seams.
- Finishing Touches: Weave in all loose ends.
Share and Inspire!
I’d love to see your finished sweaters! Share them on Instagram (https://www.instagram.com/tubacrochets?igsh=MW0wNjA2ZTcwbjUyMw==) or TikTok (tiktok.com/@tubacrochet [invalid URL removed]) – let’s build a crocheting community together!
Conclusion
There’s something so special about wearing a garment you made yourself. I hope this pattern inspires you to pick up your crochet hook and create something beautiful. If you have any questions, please leave a comment below!


