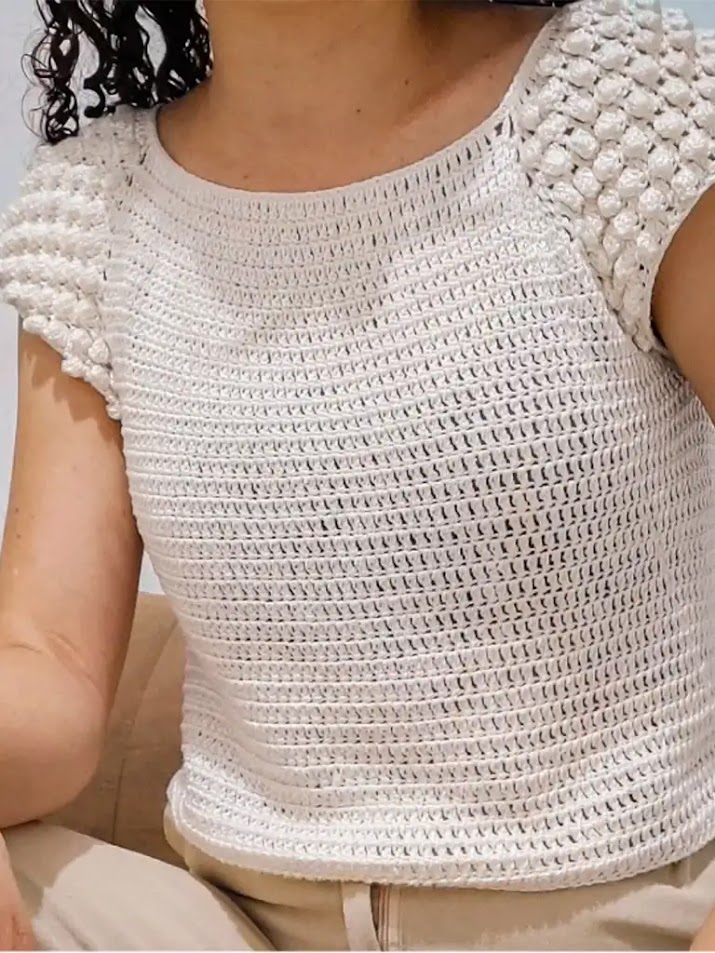
Learn to crochet a breezy summer blouse with this simple DIY pattern – free & beginner-friendly!
There’s something so satisfying about wearing something you made yourself. This easy-to-follow crochet blouse pattern is perfect for those summer days and nights when you want a lightweight, stylish top. With its airy design and simple stitches, it’s ideal for beginners and experienced crocheters alike! Whether you’re heading to the beach, a picnic, or just enjoying a casual day out, this comfy blouse will become your go-to summer favorite.
Crochet Basics
If you’re a crochet newbie, don’t worry! This pattern uses basic stitches and techniques, making it a great way to learn. Here’s a quick refresher:
- Chain Stitch (ch): The foundation of most crochet projects.
- Single Crochet (sc): A versatile and compact stitch.
- Double Crochet (dc): Creates taller stitches for an open, lacy effect.


Let’s Get Crafting
Materials:
- Seda Ingá Yarn: A beautiful blend of silk and other fibers, offering softness, drape, and a subtle sheen. Choose your favorite color!
- Crochet Hook: Size 2mm (or size appropriate for your chosen yarn)
- Scissors
- Stitch Markers (optional, but helpful)
- Tapestry Needle
Pattern Notes
- Skill Level: Beginner
- Sizing: The pattern includes instructions for multiple sizes.
- Customization: Feel free to adjust the length or add embellishments to make it your own!
Step by Step Written Pattern
1. Foundation Chain & Starting Rows:
- Work your foundation chain as per the video instructions.
- Follow the video for the first few rows that establish the blouse’s shape.
2. Body (Worked in the round for seamlessness):
- Row 1: Double crochet (dc) into each stitch across.
- Row 2 (Increase Row): Dc in the first stitch, 2 dc in the next stitch Repeat this pattern around the entire row.
- Row 3: Dc in each stitch across.
- Repeat Rows 2 & 3 until you reach your desired width for the body section.
3. Splitting for Sleeves:
- Row 1: When you reach the desired body length, work in dc until you reach the number of stitches you want for your first sleeve opening. Chain a small number (e.g., 5-8) to skip those stitches, then continue in dc to the next sleeve opening. Repeat the chaining process, and dc to the end of the row.
- From here on, you’ll work mostly flat (turning at the end of rows)
4. Sleeve Section:
- Row 1 (Increase): Dc in the first stitch, 2 dc in the next across the entire sleeve section.
- Row 2: Dc in each st across.
- Repeat Rows 1 & 2 for a few more sets, increasing the sleeve’s width.
- Rows (Adjust as Needed): Once comfortable with the width, continue in dc with no increases until you reach the desired sleeve length.
- Repeat steps 3 & 4 for the second sleeve.
5. Back & Shoulders:
- After both sleeves are complete, join the two shoulder areas with a chain (length dependent on your desired neckline/shoulder width).
- Work several rows in dc across this back section to achieve the desired length.
6. Finishing
- Edging: Work 1-2 rounds of single crochet (sc) around the entire blouse – bottom, sleeves, and neckline – for a neat finish.
- Weave in Ends: Secure all loose yarn ends with a tapestry needle.


Notes:
- Increase/Decrease: You can adjust the rate at which you increase or taper the sleeves for a more fitted or flared look.
- Customization: Adapt stitch choices. Instead of dc, try half-double crochet or a shell stitch pattern for different textures.
- Sizing: The starting chain and row counts are crucial for different sizes. Refer to the tutorial’s sizing chart closely.
Tips and Tricks
- Check your gauge: Make a swatch to ensure your stitches match the pattern’s tension.
- Use stitch markers: Mark the beginning of rows or important sections.
- Don’t be afraid to try: If you make a mistake, it’s easy to unravel and try again!
Watch and Learn
For a complete visual demonstration of this beautiful crochet blouse pattern, be sure to check out Débora Vilarins’ fantastic YouTube tutorial: https://www.youtube.com/watch?v=fA8R8CSMGOo
Her clear instructions and close-up shots make it incredibly easy to follow along.
Share Your Creations!
I’d love to see your finished blouses! Tag me on Instagram @tubacrochets?igsh=MW0wNjA2ZTcwbjUyMw== or TikTok @tubacrochet and use the hashtag #SummerCrochetDIY. Let’s inspire each other!
Conclusion
Crocheting your own clothes is rewarding, relaxing, and surprisingly simple with the right resources. This breezy blouse pattern is a fantastic starting point for your summer wardrobe. Embrace the joy of handmade fashion and let your creativity shine! If you have any questions, leave a comment below – happy crocheting!


