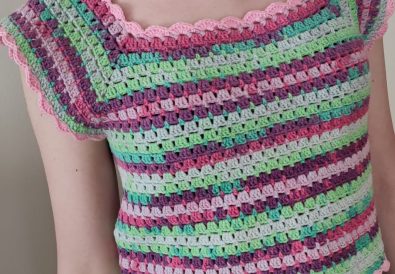
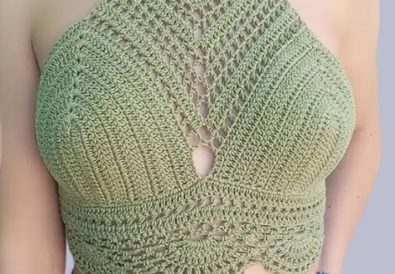
Create your own dreamy crochet top with this FREE, easy, beginner-friendly pattern & tutorial! Customizable design, perfect for summer vibes.
Get ready to unleash your crochet creativity with this versatile and beginner-friendly tank top pattern! Whether you’re new to the world of hooks and yarn or a seasoned crocheter, this project promises a fun and rewarding experience. With endless possibilities for customization, it’s perfect for adding a unique, handmade touch to your summer wardrobe.
Written Model: Easy Crochet Tank Top Pattern
Gauge:
- A gauge swatch is recommended, but not crucial for this beginner-friendly pattern.
Pattern Overview
- Difficulty Level: Beginner
- Potential Uses: Versatile for beach days, festivals, layering, and everyday casual wear.


Materials
- Yarn: Choose your favorite summer-friendly yarn. Experiment with cotton, acrylic, or blends in various colors and thicknesses.
- Crochet Hook: A 4mm hook is recommended, but adjust according to your chosen yarn.
- Scissors
- Yarn Needle (for sewing elements later)
- Stitch Markers (optional, but helpful)
Crochet Know-How: Techniques & Terms
Let’s brush up on the basics for this project:
- Chain Stitch (ch): The backbone of most crochet projects.
- Slip Stitch (sl st): Used to seamlessly join rounds or transition between stitches.
- Double Crochet (dc): A common stitch that adds height and structure.
- Half Double Crochet (hdc): A slightly shorter stitch, ideal for tighter rows.
- Single Crochet (sc): Often used for creating borders or ribbed effects.
- Decrease: Working two stitches together as one to create a tapered shape.
Notes:
- This pattern is written with instructions for a small/medium size. To adjust for a larger size, simply start with more foundation chain stitches and work additional rows before shaping the armholes.
- You can customize the length of the top and straps to your preference.
- This pattern is designed to be worked flat and seamed at the shoulders (optional).
Step-by-Step Written Pattern
Remember, personalize this pattern to fit your unique style and measurements!
Instructions:
1. Foundation Chain:
- Chain a multiple of 2 (such as 80, 84, 88) to comfortably fit around your shoulders.
2. Body:
- Row 1: ch 3 (counts as first dc), dc in each ch across, sl st to join (turning chain does not count as a stitch).
- Row 2: ch 3, dc in each dc across, sl st to join.
- Repeat Row 2 until the piece reaches the desired length for the underbust area of your top.


3. Armhole Shaping:
- Mark a few stitches on each side of the chain you started with (approximately 1/3 of the total stitches) to indicate the beginning and end of your armholes.
- Row 1 (Decrease Row): ch 1, skip the first stitch, dc in the next stitch, 2 dc together, dc in each stitch until you reach 2 stitches before your marker. Work another decrease (2 dc together), dc in the last stitch before the marker, sl st to join.
- Row 2: ch 3, dc in each dc across, sl st to join. (Note: No decreases in this row)
- Repeat Rows 1 and 2 until the armhole opening reaches your desired depth.
4. Shaping the Top (Optional):
- If you want a more fitted top, continue decreasing on each side (as instructed in Row 1 of armhole shaping) until you reach the desired width for the top of the tank.
5. Straps:
- Option 1 (Separate Straps):
- Chain the desired length for your straps (consider starting with a longer chain and adjusting later).
- Dc in each chain across until the end.
- Repeat for the second strap.
- Sew the straps securely to the top of the front and back pieces.
- Option 2 (Crocheted Straps):
- With the right side of your top facing you, chain from the corner where the shoulder and armhole meet.
- Create your desired strap design using dc or other stitches (e.g., stripes, textured patterns).
- Continue chaining until the strap reaches the desired length.
- Fasten off and weave in the ends.
- Repeat for the second strap, attaching it securely to the opposite corner.
6. Finishing (Optional):
- You can add a single crochet border around the neckline and armholes for a polished look.
- Weave in all loose ends securely.
Descending Rows (for a wider neckline):
- Instead of working a decrease row (Row 1 of armhole shaping), crochet two dc stitches in each stitch across the marked section for the armhole. This will create a wider opening.


Ascending Rows (for a higher neckline):
- After completing the desired length for the underbust area, work one row of single crochets across the entire piece. This will create a slightly higher neckline. You can continue adding rows of single crochets for a higher, mock neck look.
Tips and Customization Ideas
- Colors: Play with vibrant stripes, a classic single color, or mix and match for a unique look!
- Texture: Incorporate different stitches within the top’s main body for extra visual interest.
- Length: Adjust the top to be a short and flirty crop or a longer, flowier tank.
- Tie-Back: Try a long chain instead of straps for an adjustable and stylish lace-up back detail.
Get Inspired, Share, and Connect!
If you need more inspiration, check out my YouTube channel (https://www.youtube.com/@amazingishgrace) for a full video tutorial (https://www.youtube.com/watch?v=SqF2bP0chGM). And don’t forget to share your amazing creations on Instagram (https://www.instagram.com/tubacrochet_/) and TikTok (tiktok.com/@tubacrochet).
Conclusion
Enjoy the relaxing journey of creating your own crochet top! The customization possibilities are truly endless. Feel free to ask any questions in the comments. Happy crocheting!


