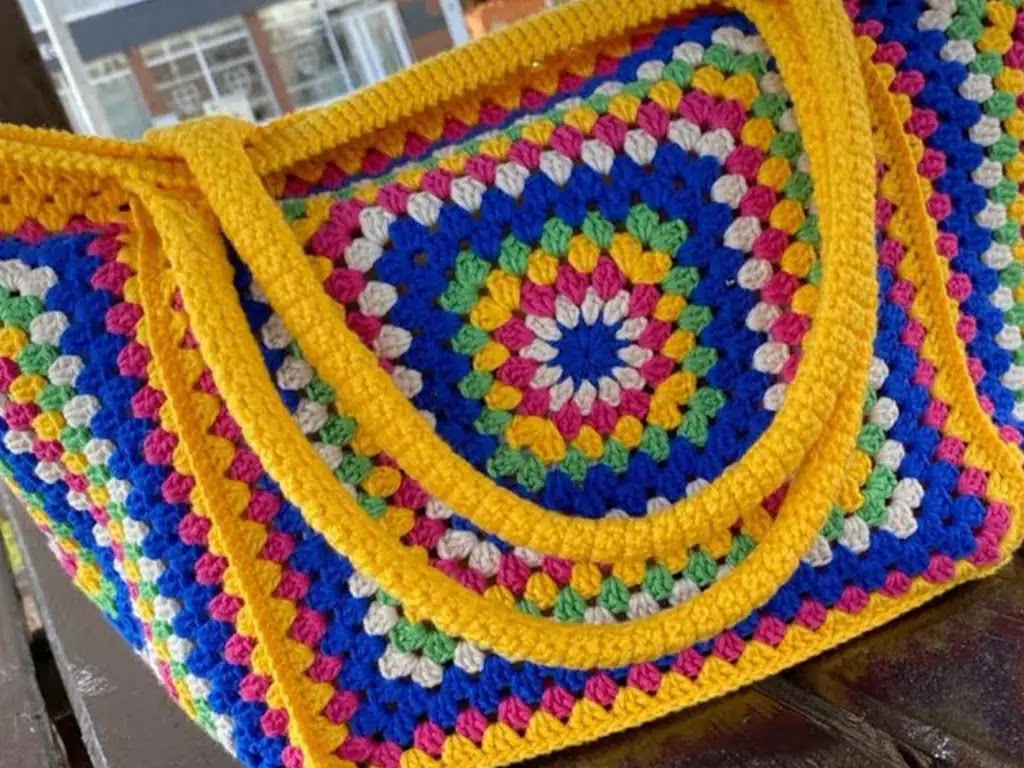
Discover how to crochet a DIY summer beach bag! Easy, granny square pattern perfect for beginners, with step-by-step tutorial.
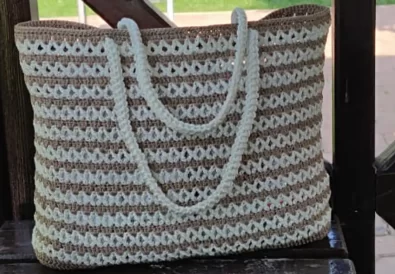
Whether you’re a seasoned crocheter or a curious beginner, this free crochet bag pattern is the perfect summer project. It uses the timeless granny square, a classic motif that anyone can master. The result is a stylish and practical tote bag ideal for the beach, farmers’ markets, or everyday errands. This pattern is especially beginner-friendly, with clear instructions and helpful tips along the way.
About This Pattern
- Difficulty level: Beginner
- Potential uses: Beach bag, summer tote, market bag, everyday carryall
- Style: Versatile, with a touch of classic granny square charm
Materials
- Yarn: Alize Cotton Gold, or a similar medium-weight cotton yarn in your favorite colors (at least 5 colors recommended)
- Hook: 2.75mm crochet hook
- Other: Scissors, yarn needle, stitch markers (optional)
Basic Techniques You’ll Need
If you’re a crochet newcomer, don’t worry! Here are the basics:
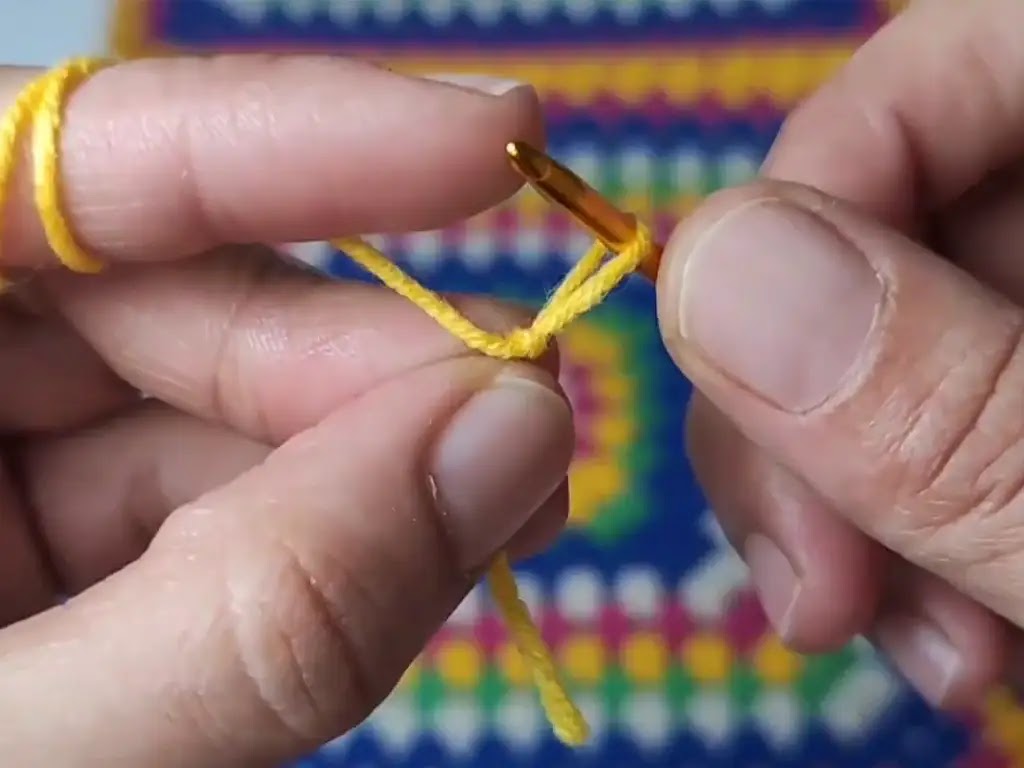
- Chain Stitch (ch): The foundation of many crochet patterns.
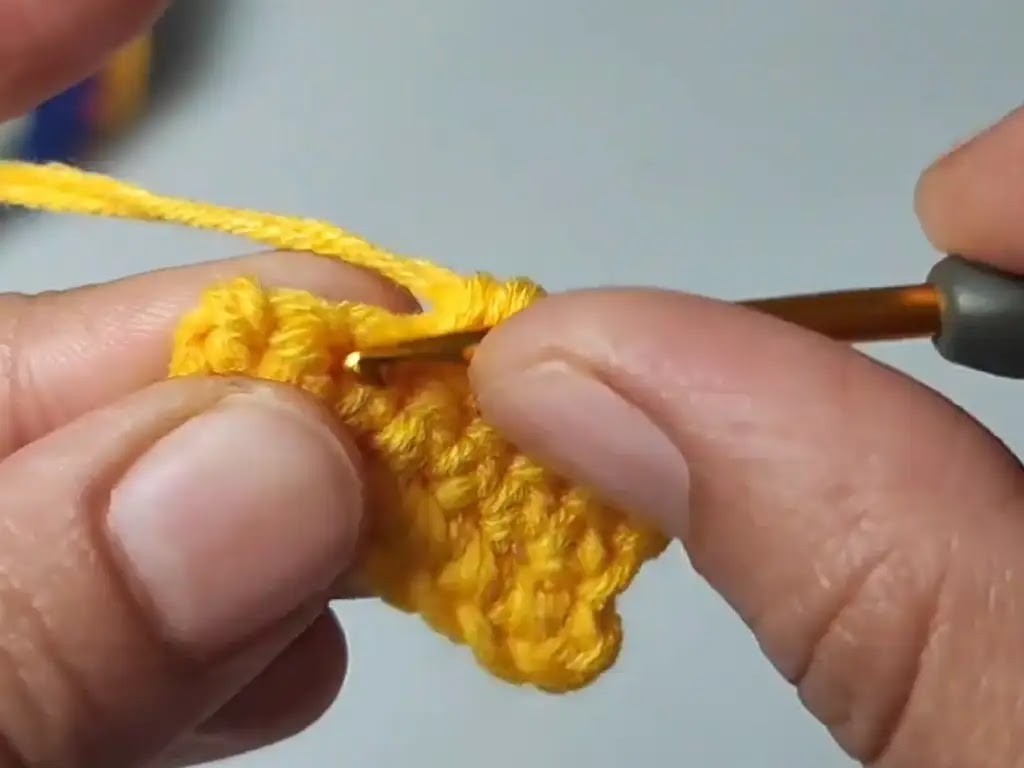
- Single Crochet (sc): A short, versatile stitch.
- Double Crochet (dc): A taller stitch, great for creating space.
- Slip Stitch (sl st): Used for joining rounds or moving across stitches.
Techniques You’ll Practice
- Basic crochet stitches: Chain stitch (ch), single crochet (sc), double crochet (dc), slip stitch (sl st)
- Granny square construction: A simple, repetitive motif perfect for beginners
- Joining squares: Seaming techniques for a neat finish
- Creating bag handles: Options for both a simple crocheted handle and the use of purchased handles.

Tips and Tricks
- Color play: Be bold with your color choices! This pattern is a great way to use up yarn scraps or create a fun gradient effect.
- Tension: Keep your stitches even for a balanced look. Don’t worry if you’re new to crochet – your tension will improve with practice.
- Count your stitches: This is especially important when creating the granny squares and joining them together.
- Reference video: I have a detailed step-by-step video tutorial on my YouTube channel, Tuba Crochet (https://www.youtube.com/watch?v=4yNURCGl_gQ), to guide you through the entire process.
Step by Step Written Pattern
Granny Square (Make 5)
Round 1:
- Starting in the middle of any group of 2 double crochets from the granny squares, chain 3 (counts as the first double crochet).
- Make 2 more double crochets into the same space.
- Skip the next stitch, 3 double crochets into the next stitch
- Repeat from * to * all the way around.
- At the junction points of two squares, make 3 double crochets into the chain space at the corner.
- Finish the round with a slip stitch into the top of the first chain-3.
Round 2:
- Chain 3 (counts as the first double crochet).
- 2 double crochets in the same space.
- 3 double crochets into the next stitch.
- Repeat from * to * all the way around.
- Slip stitch into the top of the first chain-3.
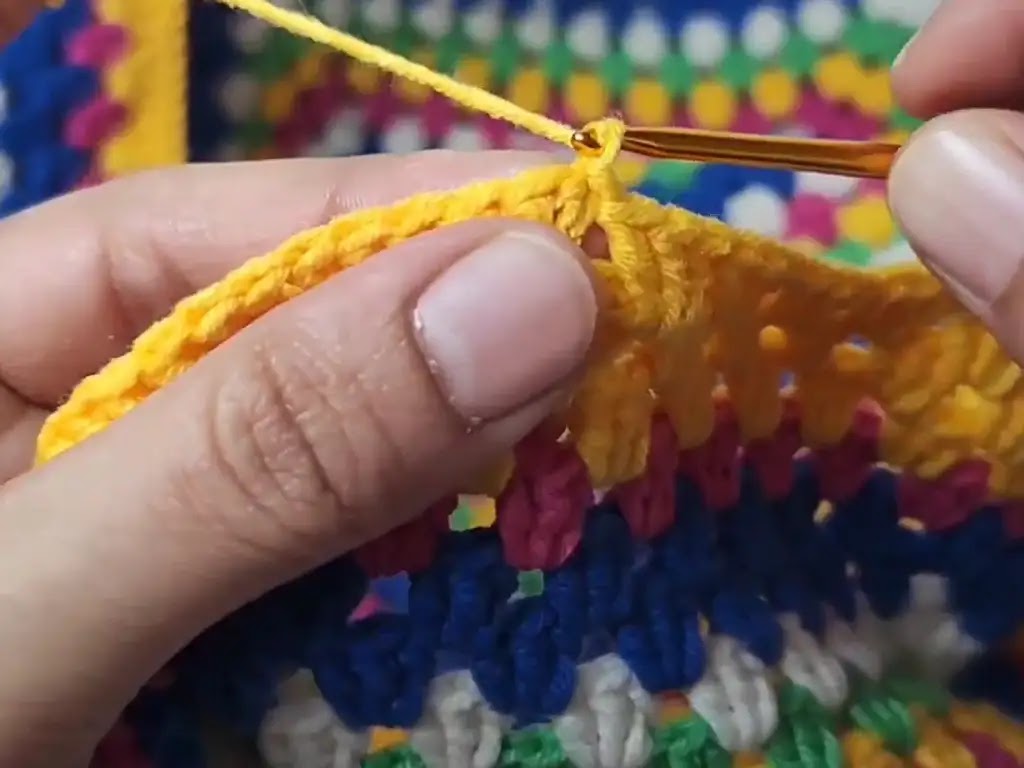
Step 3:
- Chain 1, single crochet into the same space.
- Single crochet into the top of each double crochet from the previous round.
- Repeat from * to * all the way around.
- Slip stitch into the top of the first chain-1.
Step 4: Repeat Round 3
Round 5 – onward (Single Crochet Rounds):
- Repeat Round 3 for a desired number of rows (the designer used 5 rows total for the top)
Final Round (Reverse Single Crochet):
- Chain 1
- Working from right to left, insert your hook into the top of the next single crochet of the previous round, yarn over, and pull through both loops on the hook.
- Continue with reverse single crochet all the way around.
- Finish with a slip stitch into the top of the first chain-1, then weave in ends.
Shaping Notes:
- The increasing happens naturally in Rounds 1 and 2 by placing 3 double crochets into single spaces. This creates a slight flare at the top of the bag.
- Rounds 3 through your last single crochet round maintain the shape without further increasing or decreasing.
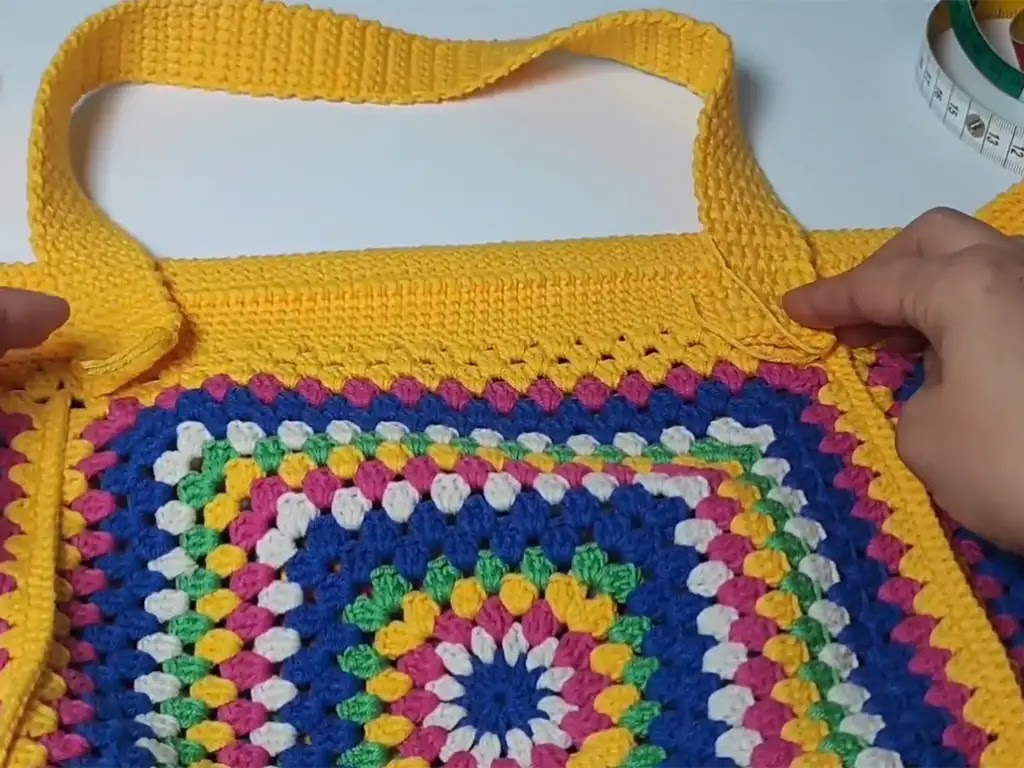
Assembling the Bag
- Join your squares: Lay out your squares and sew them together using a matching color yarn.
- Bottom and sides: Join the side squares to the base, ensuring a secure seam.
- Top edging: Work several rows of single crochet around the top opening for stability. Add a final row of reverse single crochet for a decorative touch.
- Handles: Crochet two sturdy handles or use ready-made ones. Attach them securely to the bag.
Customization and Creativity
The beauty of this project is its endless versatility. Here are some ideas:
- Experiment with color: Play with contrasting colors or a soft ombre effect.
- Add embellishments: Sew on buttons, beads, or tassels for a unique touch.
- Change the size: More or fewer granny squares can make a smaller or larger bag
- Line your bag: Add a fabric lining for durability and style.
Watch, Share, and Inspire
For a detailed visual tutorial, be sure to check out my YouTube video: https://www.youtube.com/watch?v=4yNURCGl_gQ. It’s great for beginners who want to see the techniques in action.
I’d love to see your creations! Share your finished bags on Instagram (@tubacrochets) or TikTok (@tubacrochet) – let’s inspire each other.
Conclusion
I hope you enjoyed this free crochet bag pattern. It’s a wonderful project to practice your skills, get creative, and make something both useful and beautiful! Don’t hesitate to leave a comment with your questions or feedback – happy crocheting!