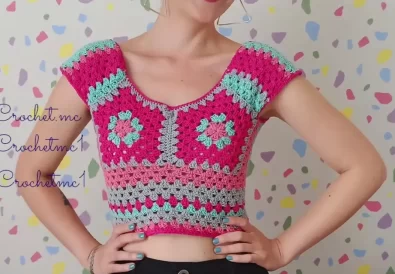
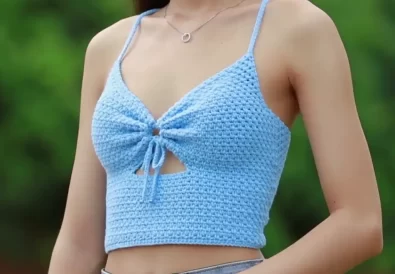
Are you ready to add a touch of timeless elegance to your summer wardrobe? If you love handmade pieces and a hint of vintage flair, this blog post is for you. Today, we’ll guide you through creating a gorgeous Crochet Ruffled Lace Top. It’s a surprisingly quick and easy project, even if you’re new to crochet!
This charming top is the perfect blend of delicate lace and playful ruffles. It exudes a vintage vibe that’s both romantic and effortlessly stylish. Plus, with customizable straps and length, you can tailor it perfectly to your style. Whether you’re heading to a beach picnic, a summer festival, or just enjoying a sunny afternoon out, this top will make a statement.


Let’s get started!
Gather Your Supplies: Choosing the Perfect Yarn & Hook for Your Crochet Ruffled Lace Top
- Yarn: Opt for a lightweight yarn like cotton, silk-cotton blends, or a soft acrylic blend. These will give your top a beautiful drape and a comfortable feel for warm weather. Feel free to explore different colors to match your personal style!
- Hook: The hook size will depend on your chosen yarn. Refer to the yarn label for recommendations.
- Scissors: For cutting your yarn.
- Needle: To weave in any loose ends.
- Stitch Marker (Optional): To mark specific points in your pattern.
Crochet Ruffled Lace Top Basics: Mastering Essential Stitches
This pattern uses a few fundamental crochet techniques:
- Slip Knot: The starting point of any crochet project.
- Chain Stitch (ch): One of the most basic stitches.
- Double Crochet (dc): A taller stitch, perfect for creating a sturdy fabric foundation.
- Cross Double Crochet: Adds a lovely texture to your work.
- Single Crochet (sc): A shorter stitch for tighter fabric and decreases.
- Slip Stitch (sl st): Used for joining pieces discreetly.
If you’re new to crochet, don’t worry! There are tons of fantastic online resources for learning these stitches.


Creating the Dreamy Ruffles: Your Crochet Lace Top’s Signature Element
The ruffles are what truly make this top stand out. The technique is simple but creates an incredibly eye-catching effect. By strategically working chains and stitches into spaces, you’ll transform your top into a ruffled masterpiece.
Customizing Your Crochet Ruffled Lace Top: Straps, Length, and Finishing Touches
One of the best things about this pattern is its versatility. The straps are made of chains, so you can easily adjust the length to your preference. Similarly, you can make the top longer or shorter by adding or removing rows.
Crochet Ruffled Lace Top: Step by Step Pattern
Now let’s dive into the written pattern, inspired by the wonderful tutorial by @chendadiy on YouTube ([https://www.youtube.com/@chendadiy]). Remember, you can always watch her video ([https://www.youtube.com/watch?v=0GbAOlwEuKk]) for additional visual guidance!


Written Pattern
Notes:
This pattern is worked flat from the bottom up.
Chain counts at the beginning of rows do not count as stitches unless otherwise specified.
Gauge swatch is not necessary for this project, but creating one is recommended to ensure proper yarn and hook size for your desired drape.
Back Panel:
- Foundation Chain: Chain a multiple of 4 + 2 (e.g., 42, 46, 50) to determine the desired width of the back panel.
- Row 1: sc in the 2nd chain from hook, ch 3 (counts as first dc), dc in each ch across, turn. (stitch count = number of foundation chains – 1)
- Row 2: ch 2 (does not count as a stitch), dc in each dc across, turn.
Lace Pattern (Repeat Rows 4-7 throughout):
- Row 4: ch 1, dc2tog, ch 2, skip 2 stitches, dc in next stitch; repeat from * to * across, turn.
- Row 5: ch 2, sc in each dc and ch-space across, turn.
- Row 6: ch 1, dc in each sc and ch-space across; repeat, turn.
- Row 7: ch 2, sc in each dc across, turn.
Ruffle Section:
- Row 8: ch 3, dc in next stitch, ch 5, skip 2 stitches; repeat from * to * across, turn. (This row creates the base of the ruffles.)
Ruffled Rows (Repeat Rows 9-12 for desired ruffle height):
- Row 9: ch 2 (does not count as a stitch), sc in ch-space from previous row, ch 3, sc in top of dc from previous row; repeat from * to * across, turn.
- Row 10: ch 1, dc in each sc and ch-space across; repeat, turn.
- Row 11: ch 2, sc in each dc across, turn.
- Row 12: ch 3, dc in next stitch, ch 7, skip 2 stitches; repeat from * to * across, turn. (Each row increases the chain spaces in the ruffles, creating a more pronounced effect.)
Body of Top (After completing desired number of ruffled rows):
- Continue with the lace pattern (Rows 4-7) until the top reaches your desired length.
Shaping the Armholes:
- Row X (first shaping row): Work the lace pattern (Rows 4-7) until the last 3-4 stitches. Skip the last stitches, sl st to join, turn. (Number of skipped stitches depends on your desired armhole size. Adjust as needed for a larger or smaller armhole.)
- Row X+1: ch 2, sc in each sc and ch-space across until reaching the skipped stitches from the previous row, turn.
- Continue working the lace pattern (Rows 4-7) for the next few rows, skipping the same number of stitches at the end of each row.
- Decrease Row: Work the lace pattern (Rows 4-7) until the last 5-6 stitches. Skip the last stitches, sl st to join, turn. (Gradually decrease the number of skipped stitches as you go higher to shape the armhole curve.)
- Continue working the lace pattern (Rows 4-7) for a few more rows, decreasing one stitch at the end of each row.
Neckline Shaping:
- Row X (first neckline shaping row): Work the lace pattern (Rows 4-7) across the back panel. When you reach


Styling Your Vintage Inspired Crochet Ruffled Lace Top: Outfit Ideas
This top is incredibly versatile! Pair it with high-waisted jeans or a flowing skirt for a bohemian look. Dress it down with denim shorts for a casual summer vibe. Add a straw hat and sandals to complete your beachy ensemble.
Other Crochet Projects You’ll Love
Inspired to try more crochet projects? Here are a few ideas:
Conclusion I hope you enjoy creating your own Crochet Ruffled Lace Top! Share your finished projects on Instagram (@tubacrochet_) or TikTok (tiktok.com/@tubacrochet) – I’d love to see your creations. And don’t forget to leave a comment; let’s build a community of crochet lovers!


