Have you been eyeing those gorgeous crochet granny squares but felt a bit intimidated to try? Well, good news! This beginner-friendly crochet square pattern is your gateway to the wonderful world of crochet. With this simple crochet square tutorial, you’ll be creating beautiful handmade crochet gifts and crochet home decor pieces in no time.
Introduction to the Granny Square Crochet Pattern
Welcome to the wonderful world of granny squares! These iconic squares are a classic crochet motif that has been used for generations to create everything from blankets and afghans to tablecloths and bags. They’re incredibly versatile, allowing you to explore endless color combinations and stitch variations. Whether you’re a beginner or a seasoned crocheter, the granny square crochet pattern is a must-learn!
The granny square crochet pattern is a beginner-friendly design, making it ideal for new crocheters. You can use it to create a wide range of projects, from cozy crochet baby blankets to stylish crochet home decor.
Materials Needed for Your Granny Square Crochet Pattern
- Yarn: You’ll need two colors of yarn for this particular pattern. The video uses Alize Cotton Gold, a soft cotton yarn, in shades of purple and white. However, you can choose any colors you like! Make sure the yarn is a medium weight (worsted weight) for a nice stitch definition.
- Crochet Hook: A 2.75 mm crochet hook is recommended for this pattern, but you can adjust it slightly depending on your yarn and desired stitch gauge.
- Scissors: For cutting your yarn.
- Yarn Needle: To weave in the ends of your yarn.
Abbreviations:
- ch – chain
- dc – double crochet
- sl st – slip stitch
- sp – space
Sizing Tips:
- To make a smaller square, stop after Row 4.
- To make a larger square, add more rows.
- To increase the size of the square, add a chain at the beginning of each row.
- To decrease the size of the square, work two double crochets together in the first stitch of the previous row.
Mastering the Double Crochet for Your Granny Square Crochet Pattern
The double crochet (dc) is a fundamental stitch in crocheting, and it’s the primary stitch used in this granny square crochet pattern.
Here’s how to make a dc:
- Yarn over (yo): Wrap the yarn around your crochet hook.
- Insert hook: Insert your hook into the designated stitch.
- Yarn over and pull through (yo and pull): Wrap the yarn around your hook and pull it through the loop on your hook.
- Yo and pull through two loops: Wrap the yarn around your hook and pull it through the remaining two loops on the hook.
Color Changing Techniques in the Granny Square Crochet Pattern
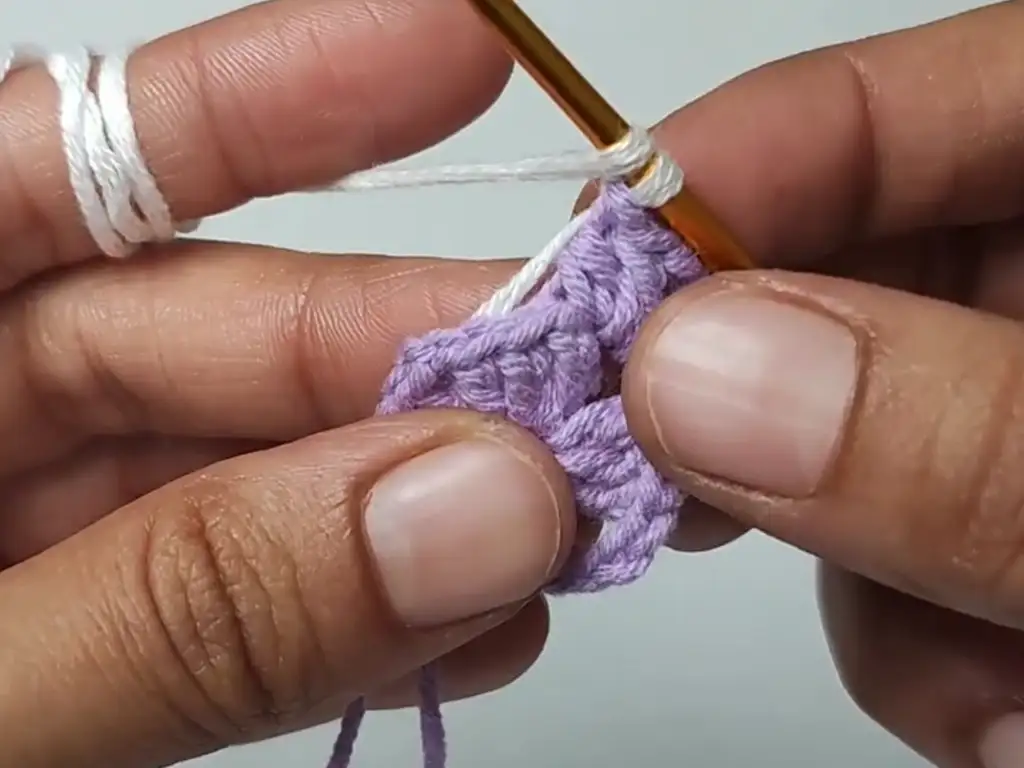
The beauty of this granny square crochet pattern lies in its color changes. To switch colors, simply follow these steps:
- Work your last stitch with your current color.
- Drop the current color.
- Pick up the new color and work the next stitch.
Step by Step Guide: How to Start Your Granny Square Crochet Pattern
Let’s get started! This pattern is a great easy crochet tutorial for crochet for beginners.
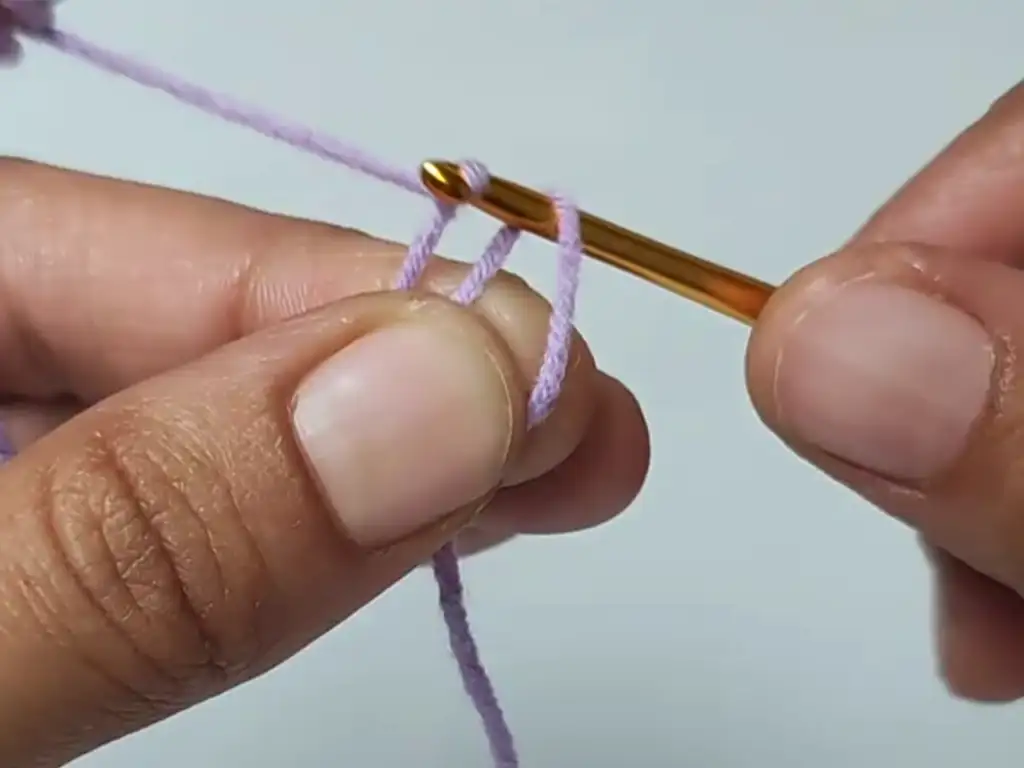
First, you’ll need to make a magic ring. This technique creates a neat, invisible starting point for your crochet work.
- Wrap the yarn around your finger twice.
- Slip the yarn loop over your finger, creating a ring.
- Hook the yarn with your crochet hook and pull it through the loop.
- Continue working the stitches into the ring according to the pattern instructions.
Written Crochet Pattern:
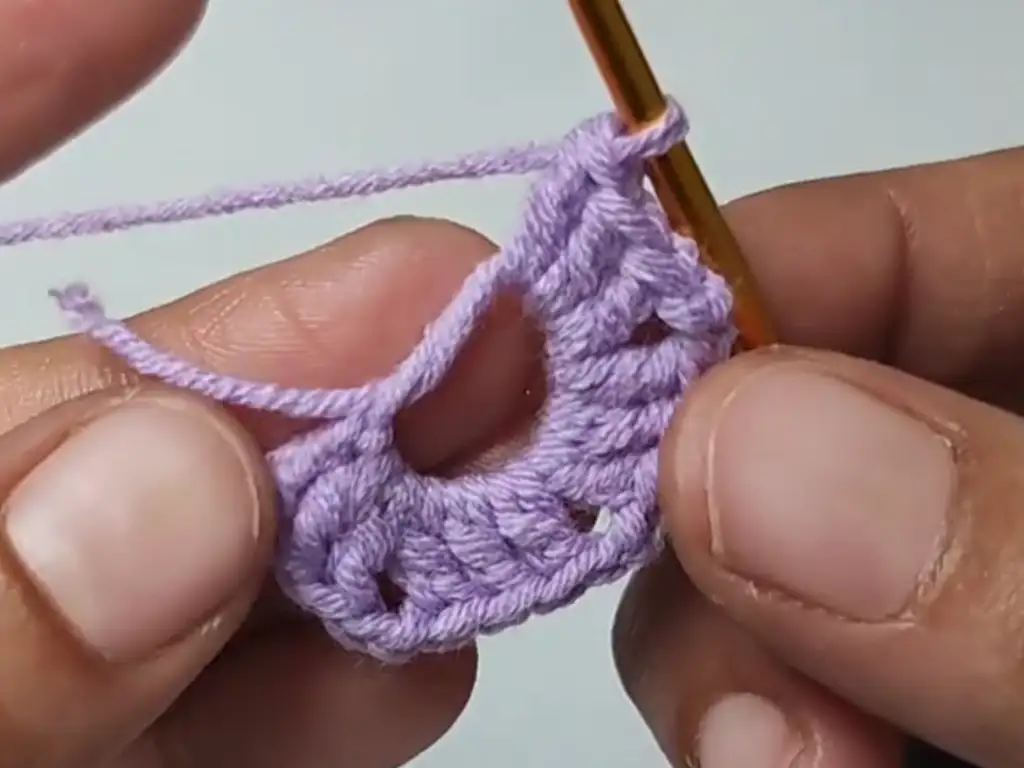
First Row
- 3 ch (counts as 1 dc).
- 2 dc in the ring.
- 2 ch.
- 3 dc in the ring.
- 2 ch.
- 3 dc in the ring.
- 2 ch.
- 3 dc in the ring.
- 2 ch.
- Sl st in the top of the first ch, joining the round.
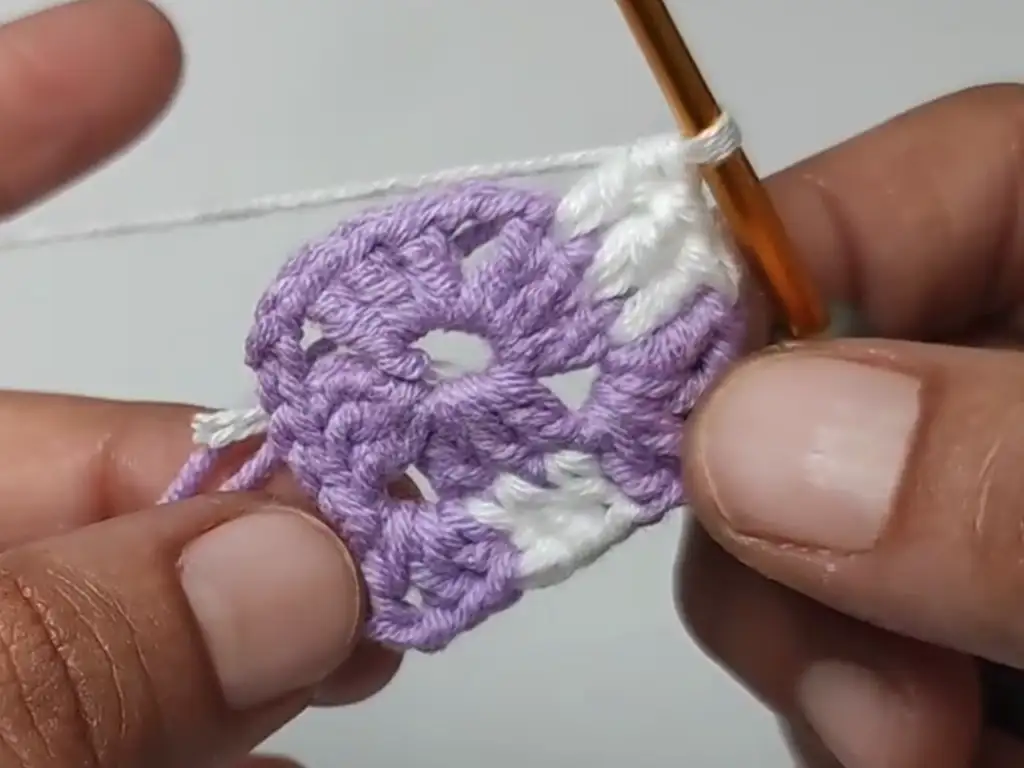
Second Row
- 3 ch (counts as 1 dc).
- 1 dc in the same stitch as the last ch.
- 2 ch.
- 2 dc in the next stitch.
- Switch to white yarn for the last dc.
- 3 dc in the next stitch (working over the bottom 3 dc).
- Continue working purple from the bottom.
- Switch to purple yarn for the last dc.
- 2 dc, 2 ch, 2 dc in the next ch-2 space.
- Continue working white from the bottom.
- Switch to white yarn for the last dc.
- 3 dc in the next stitch (working over the bottom 3 dc).
- Continue working purple from the bottom.
- Repeat steps 9-13 three more times, working the corner dc in each ch-2 space.
- Switch to purple yarn for the last dc.
- Sl st in the top of the first ch, joining the round.
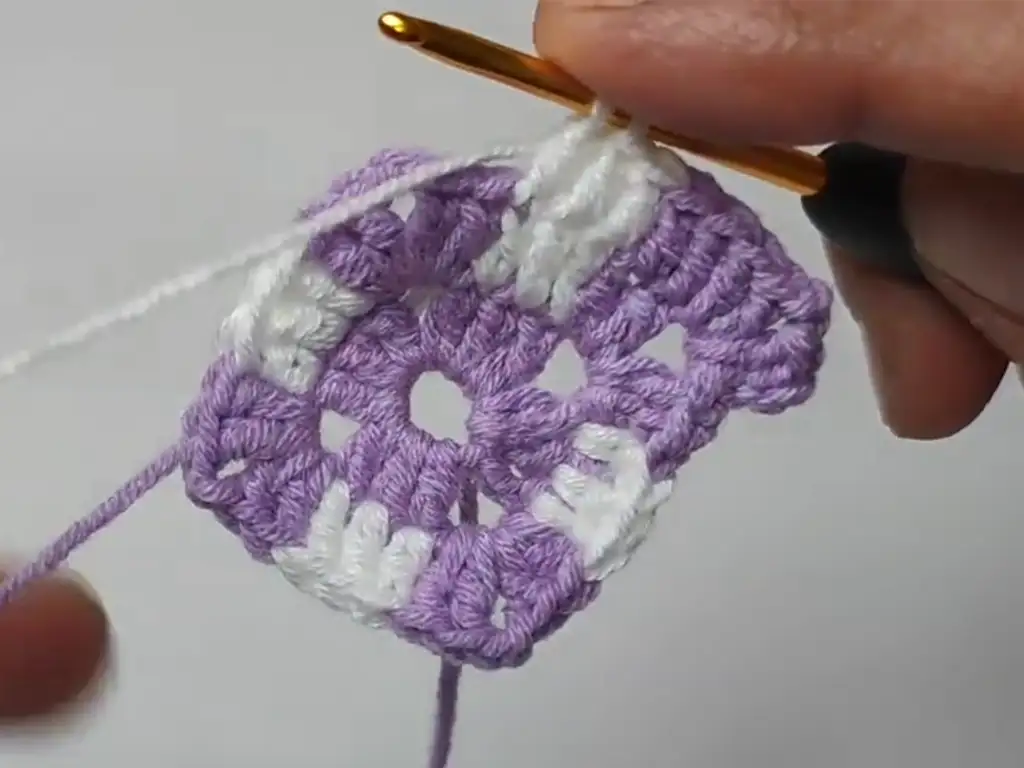
Third Row
- 3 ch (counts as 1 dc).
- 1 dc in the same stitch as the last ch.
- 2 ch.
- 2 dc in the next stitch.
- 2 dc in the next stitch (working over the bottom 2 dc in purple).
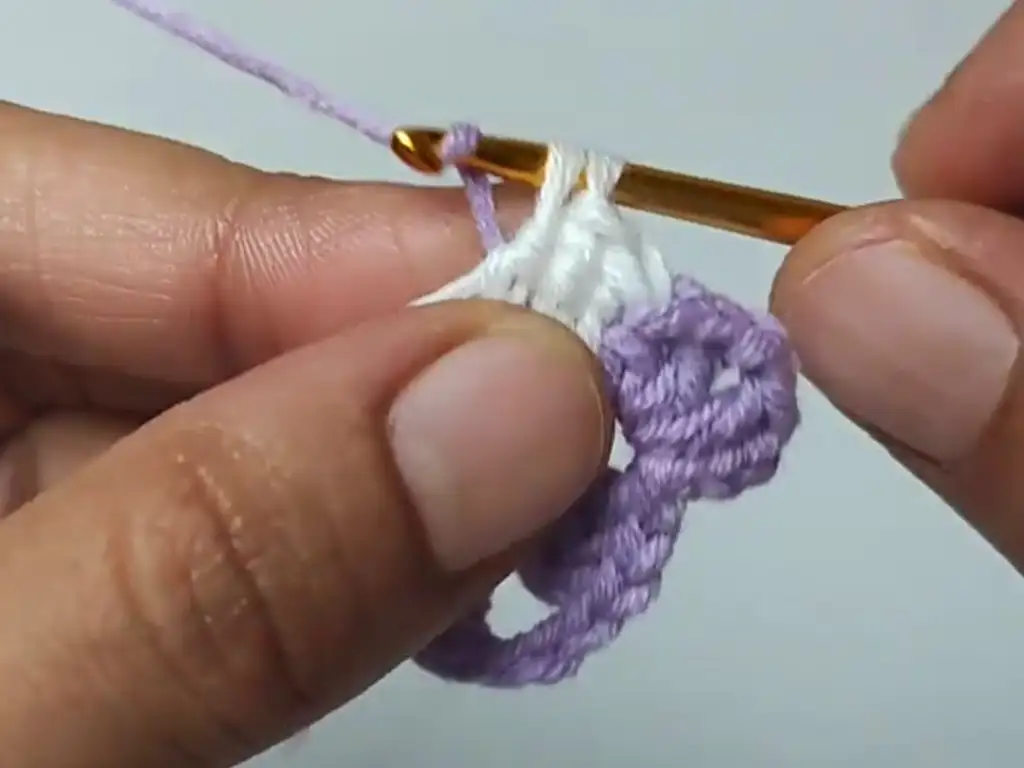
- Switch to white yarn for the last dc.
- 3 dc in the next stitch (working over the bottom 3 dc).
- Switch to purple yarn for the last dc.
- 2 dc in the next stitch (working over the bottom 2 dc in purple).
- 2 dc, 2 ch, 2 dc in the next ch-2 space.
- 2 dc in the next stitch (working over the bottom 2 dc in purple).
- Switch to white yarn for the last dc.
- 3 dc in the next stitch (working over the bottom 3 dc).
- Switch to purple yarn for the last dc.
- Repeat steps 9-14 three more times, working the corner dc in each ch-2 space.
- Sl st in the top of the first ch, joining the round.
Fourth Row
- Ch 3 (counts as a dc)
- 1 dc in the same space
- Ch 2
- 2 dc in the same space with white yarn
- Dc in the next stitch with white yarn
- Repeat the last 2 stitches across the row until the next ch 2 space.
- 2 dc, Ch 2, 2 dc in the ch 2 space
- Repeat the last 2 stitches across the row until the next ch 2 space.
- 2 dc, Ch 2, 2 dc in the ch 2 space
- Repeat the last 2 stitches across the row until the next ch 2 space.
- 2 dc, Ch 2, 2 dc in the ch 2 space
- Repeat the last 2 stitches across the row until the last stitch
- Dc in the last stitch
- Sl st in the top of the first ch.
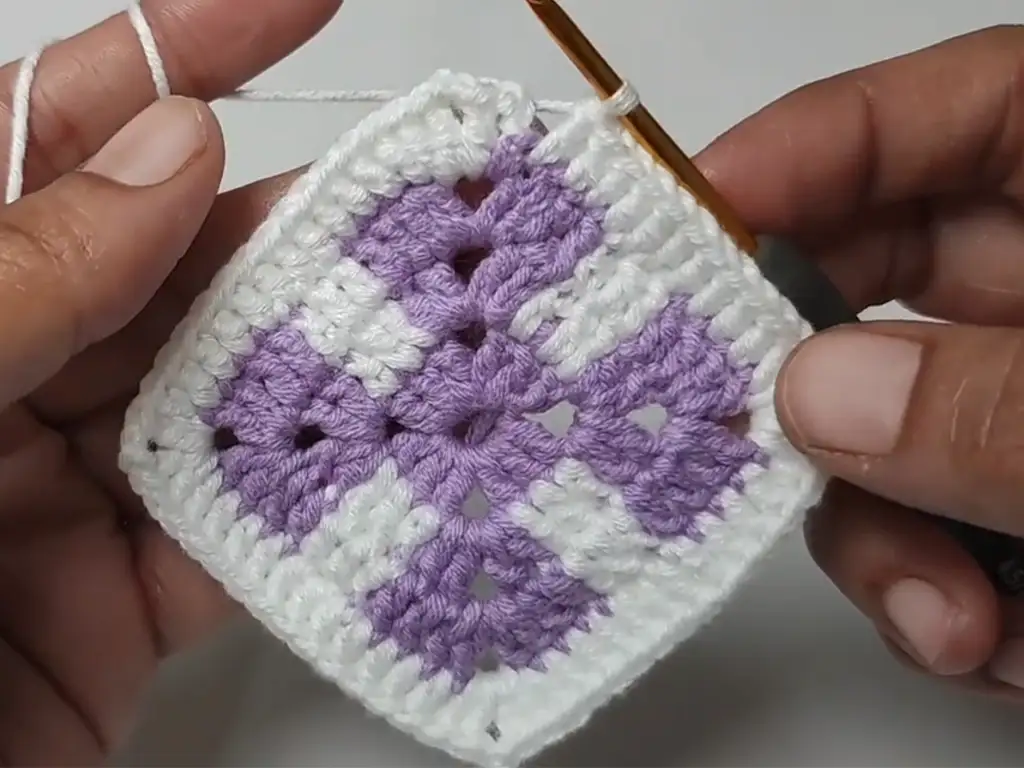
Fifth Row
- Ch 3 (counts as a dc)
- Dc in the same space
- 2 dc, Ch 2, 2 dc in the next ch 2 space
- Dc in the next stitch
- Repeat the last 2 stitches across the row until the next ch 2 space.
- 2 dc, Ch 2, 2 dc in the ch 2 space
- Repeat the last 2 stitches across the row until the next ch 2 space.
- 2 dc, Ch 2, 2 dc in the ch 2 space
- Repeat the last 2 stitches across the row until the next ch 2 space.
- 2 dc, Ch 2, 2 dc in the ch 2 space
- Repeat the last 2 stitches across the row until the last stitch
- Dc in the last stitch
- Sl st in the top of the first ch.

Ascending and Descending Rows:
To create a larger square, you can add rows to your granny square crochet pattern.
Increase the size of the square, follow these steps:
- Chain 3 at the beginning of the next row.
- Work your first stitch in the first stitch of the previous row.
- Continue working the rest of the stitches according to the pattern instructions.
To decrease the size of the square, follow these steps:
- Work two double crochets together in the first stitch of the previous row.
- Continue working the rest of the stitches according to the pattern instructions.
Creative Uses for Your Finished Granny Square Crochet Pattern
The possibilities for using your finished crochet square motifs are endless! Here are a few ideas:
- Crochet Blanket: Make a beautiful crochet baby blanket by joining multiple granny squares together.
- Crochet Afghan: Create a cozy crochet afghan by joining granny squares with different color combinations.
- Crochet Home Decor: Add a touch of handmade charm to your home with crochet square motifs used for pillows, coasters, or even placemats!
Troubleshooting Common Issues in Your Granny Square Crochet Pattern
- Incorrect Stitch Count: If you notice your stitch count is off, go back and check your work carefully. Double-check your stitches and make sure you’re not missing any or adding extra stitches.
- Loose or Tight Tension: Consistency in your tension is crucial for a neat and even granny square. If your stitches are too loose, your square will be stretched and might have holes. Conversely, if your stitches are too tight, the square will be smaller than intended.
- Color Changes: It’s easy to get confused when changing colors. Remember to secure the new color yarn before working the next stitch to prevent gaps.
Advanced Tips and Tricks for Perfecting Your Granny Square Crochet Pattern
- Use a stitch marker: A stitch marker can be very helpful in keeping track of the beginning of each round.
- Practice your stitches: Crocheting consistently takes practice. The more you practice, the easier it will become to maintain an even tension and stitch count.
- Experiment with different yarns: Explore different yarn textures, weights, and colors to see how they affect your finished project.
- Join a crochet community: There are many online crochet communities where you can connect with other crocheters, share your projects, and get help with any challenges you might face.
Other Crochet Projects You’ll Love
If you’re looking for more easy crochet tutorials or DIY crochet projects to try, check out these amazing resources:
- Easy Crochet Blanket Patterns
- Beginner Crochet Projects for Beginners
- Free Crochet Patterns for Home Decor
- Crochet Square Motif variations
- Simple crochet scarf patterns
- Beginner-friendly crochet hat tutorials
Conclusion
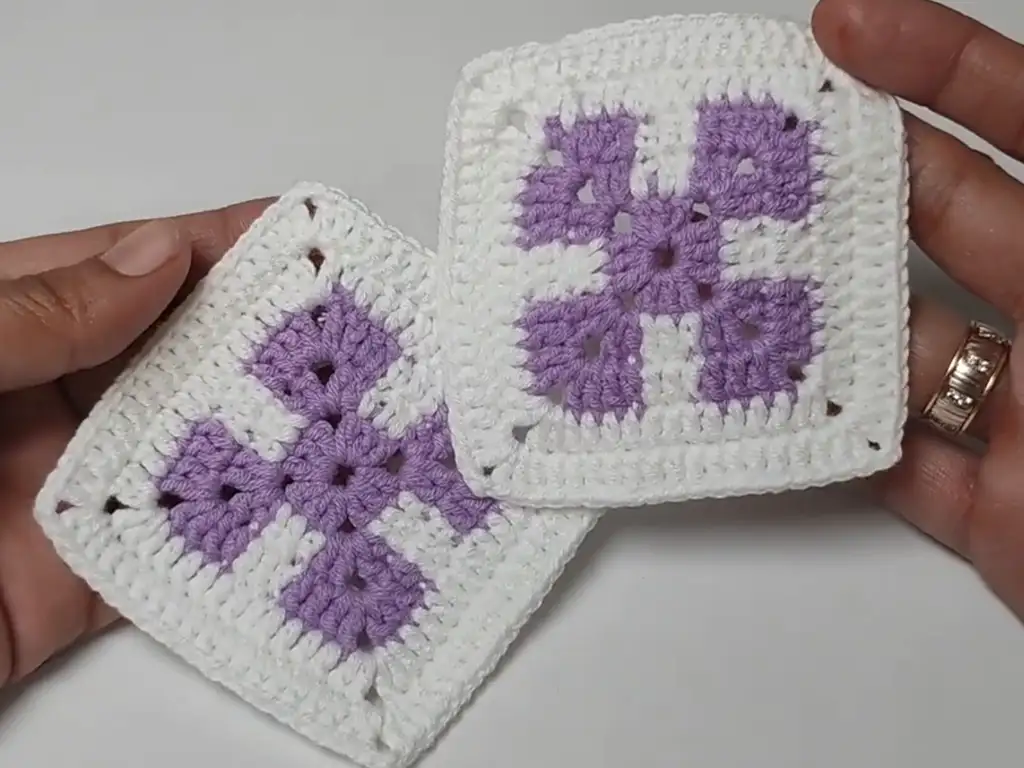
Congratulations! You’ve successfully learned how to create a beautiful crochet granny square! We hope this free crochet square pattern tutorial has inspired you to try new projects and explore the endless possibilities of crochet. If you found this helpful, be sure to check out TubaCrochet’s Youtube video: https://www.youtube.com/watch?v=0BNQuunyBww.
We’d love to see your creations! Share your finished granny squares on Instagram using the hashtag #tubacrochet_ or on TikTok @tubacrochet. And remember, crochet is a journey, not a race. Embrace the process, experiment with different techniques, and most importantly, have fun!
Please leave a comment below and share your thoughts on this crochet pattern!
If you like this post, please share it with your friends! Happy Crocheting!


