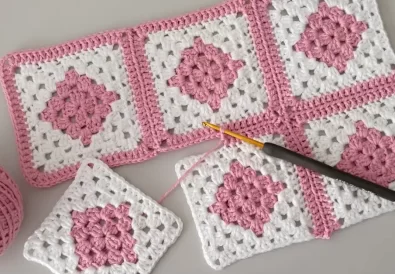
Discover the art of crochet joining methods with our guide on how to attach crochet granny squares. Ideal for beginners, learn step-by-step how to join crochet granny squares together, making your joining crochet squares for beginners journey easy and enjoyable.
Crocheting is an art that turns simple yarn into beautiful, functional pieces. Today, we’re focusing on a crochet how to join method, particularly joining crochet granny squares. This process is ideal for beginners, and we’ll use a step-by-step approach to ensure clarity and ease.
Required Materials
- Yarn (preferably in multiple colors for visual appeal)
- Crochet hook (2.5 mm recommended)
- Scissors
- Darning needle
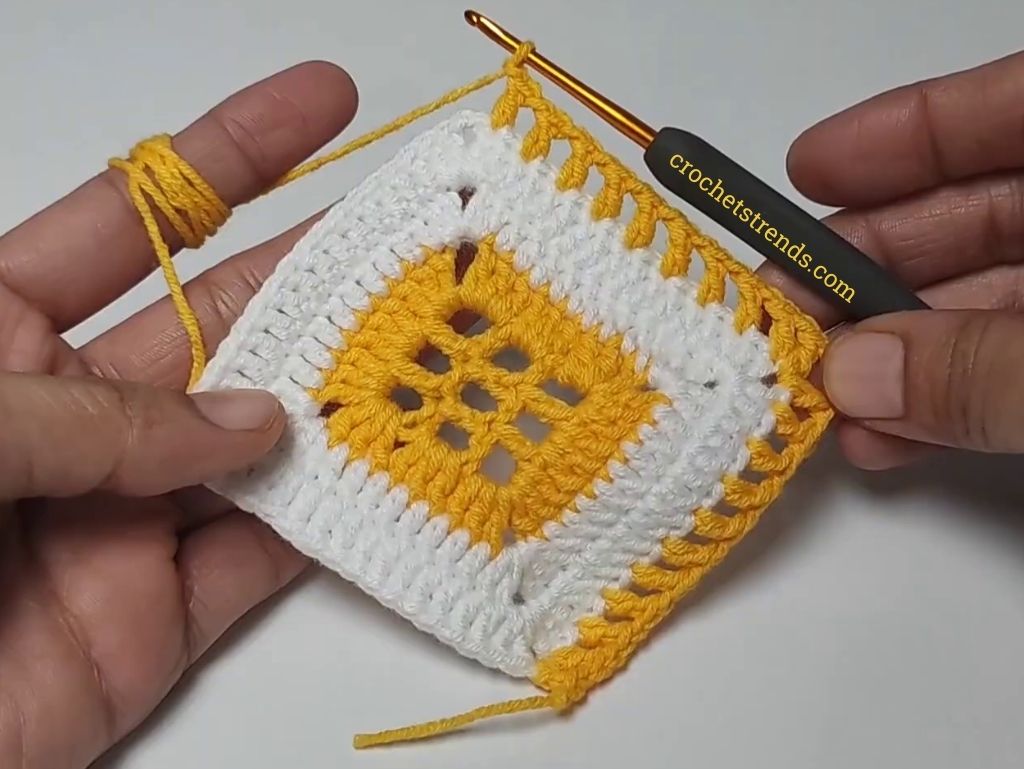
The Basic Technique
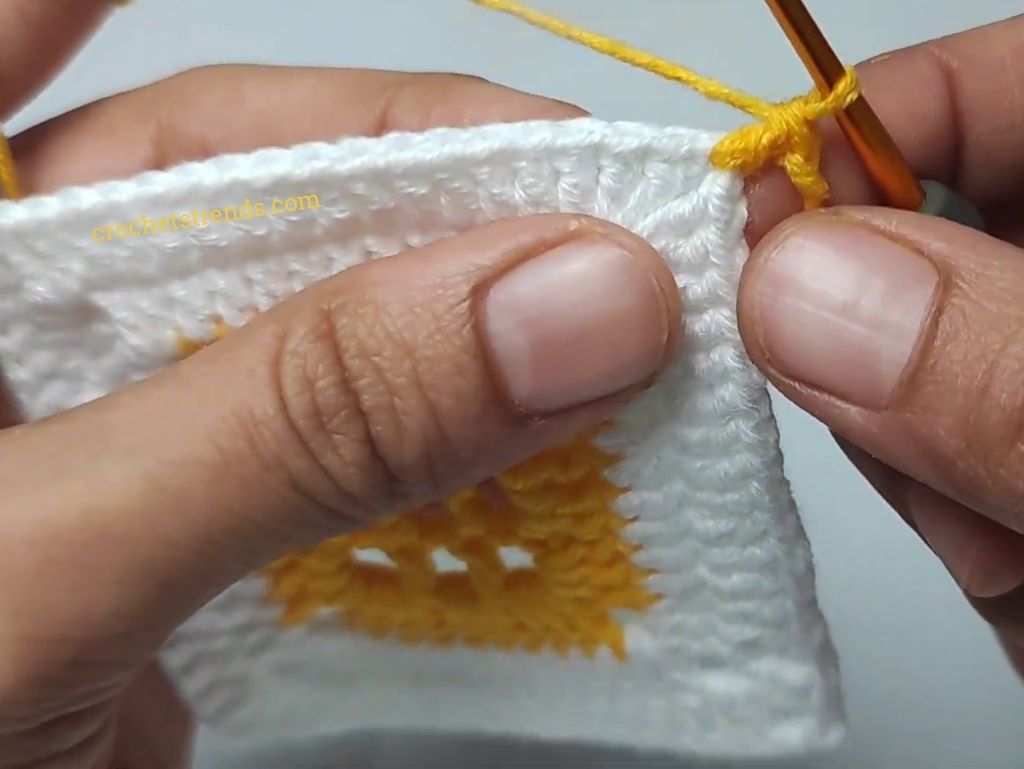
To begin, choose a corner of your granny square and start with double crochets. Remember, the key is consistency in your stitching. Here’s a brief overview:
- Make a double crochet at the top of the first stitch.
- Chain one, skip a space, then double crochet.
- Repeat until you reach the corner.
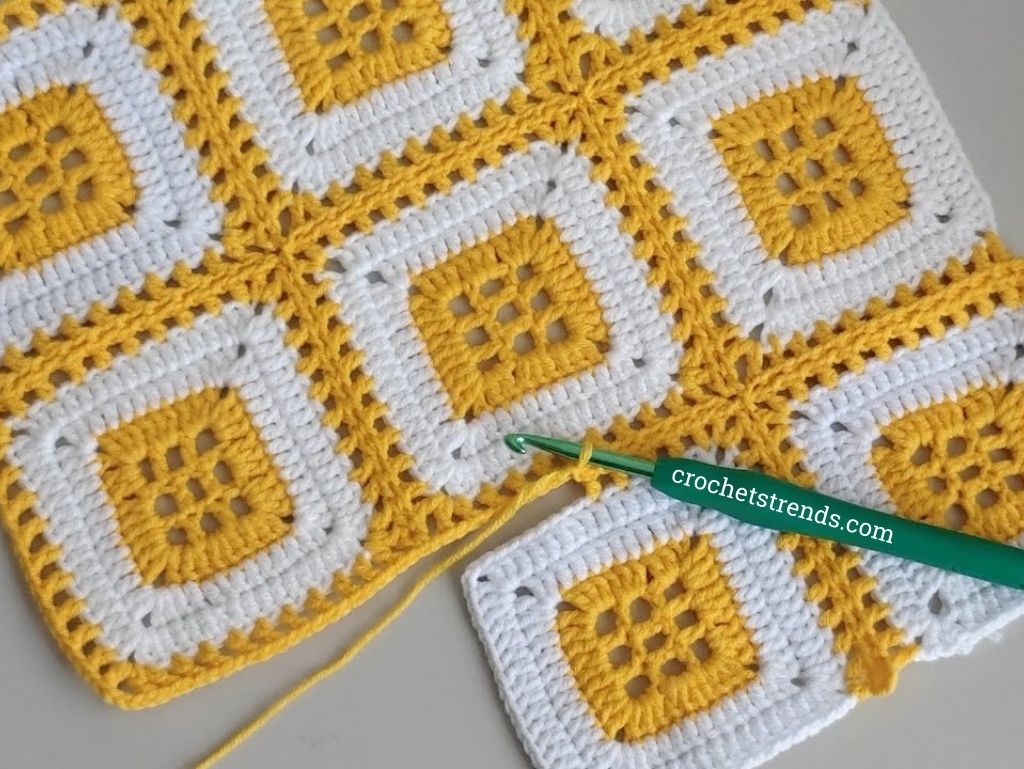
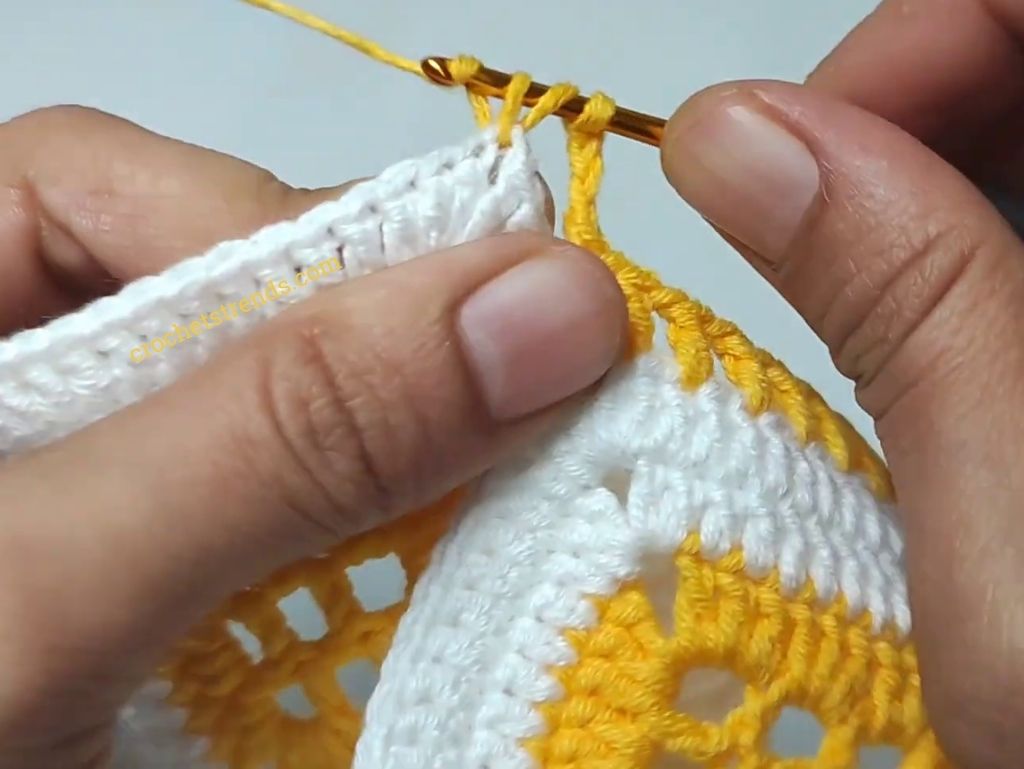
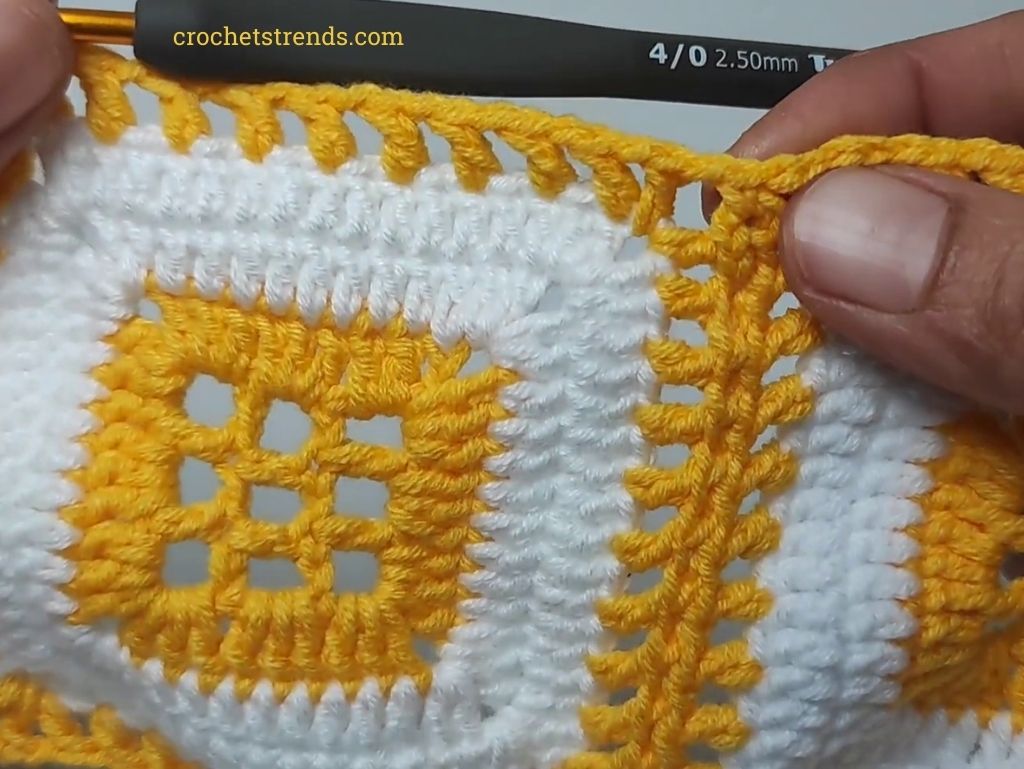
Joining the Squares
Now, the exciting part – joining! Start by laying two squares side by side.
- In the corner space of the first square, double crochet, chain three, then double crochet again.
- For the second square, replicate the double crochet in the corner.
- Use a slip stitch from the back of the first square to join them.
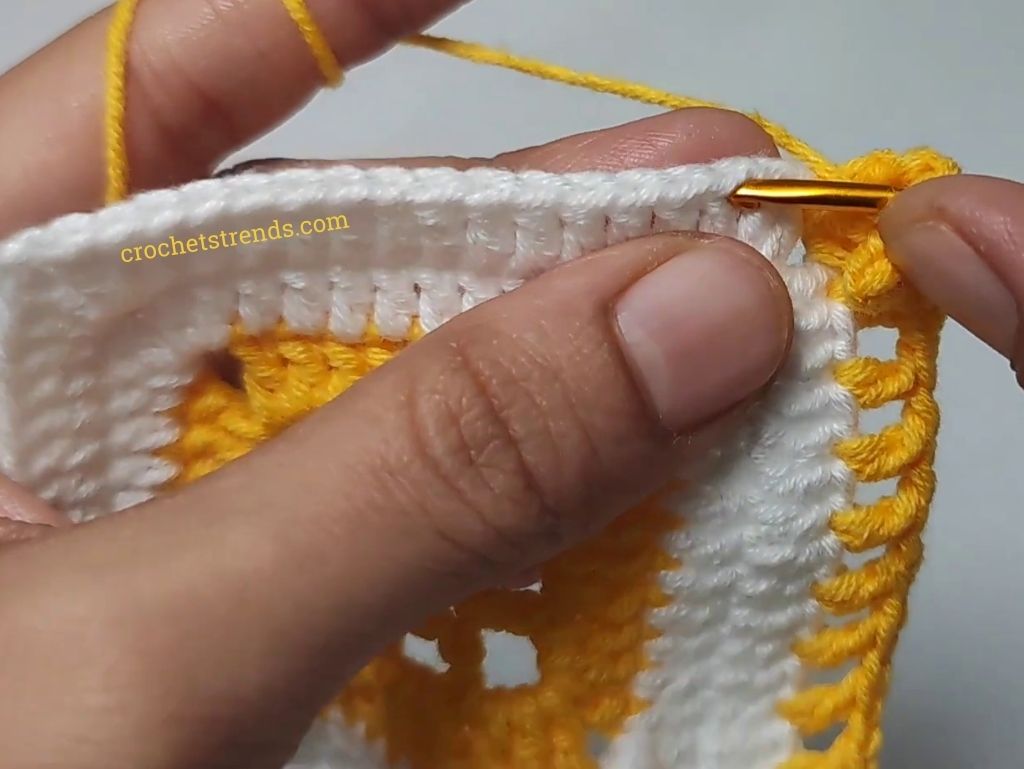
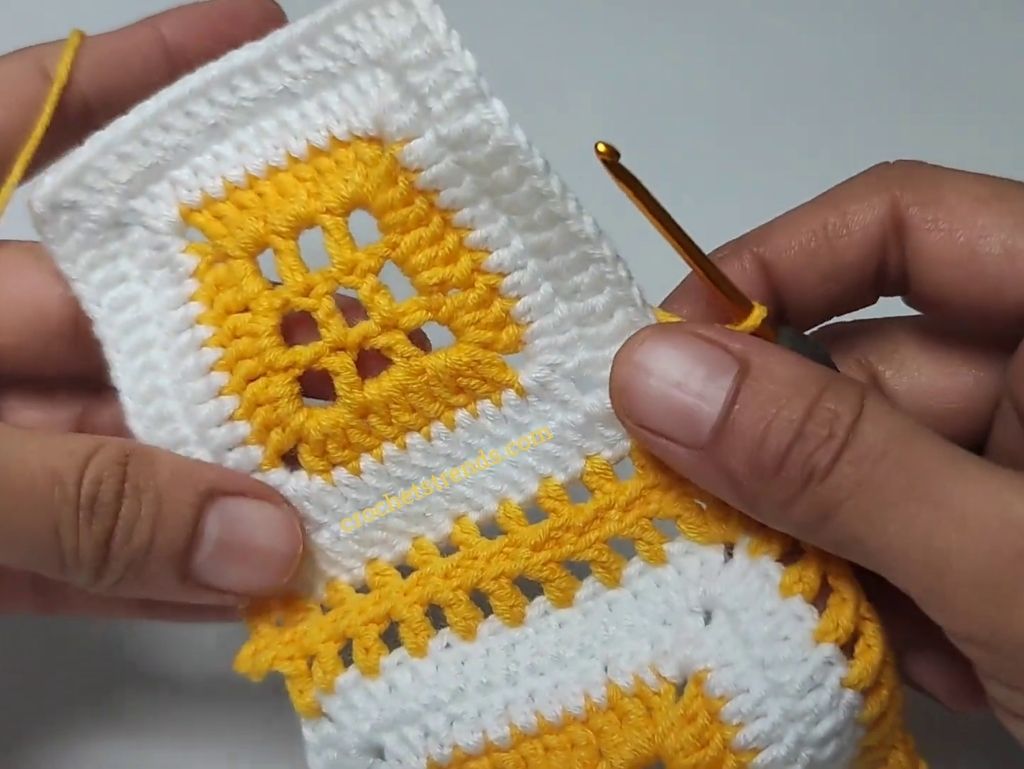
Making It Neat and Tidy
As you approach the end of a row, pay special attention. The aim is to maintain a uniform look. Depending on your square’s size, adjust your final double crochet accordingly. This attention to detail will make your project look professional and polished.
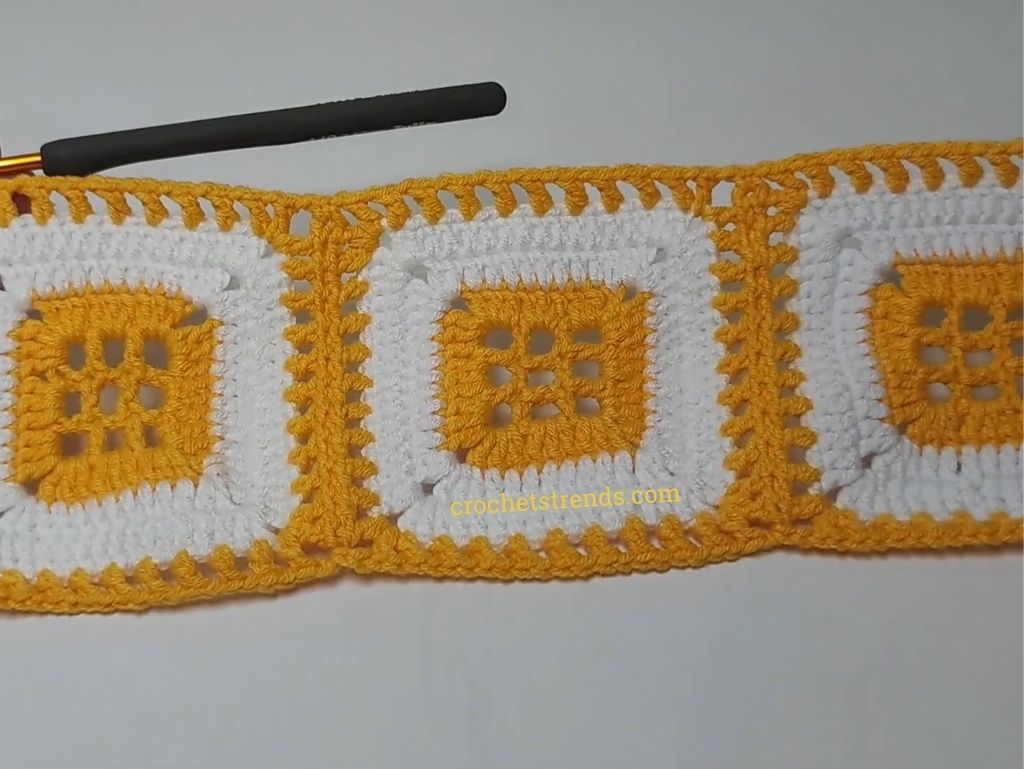
Continuing the Process
Repeat the process for each square, ensuring that the corners and sides align neatly. This uniformity is crucial for a cohesive look in your final product.
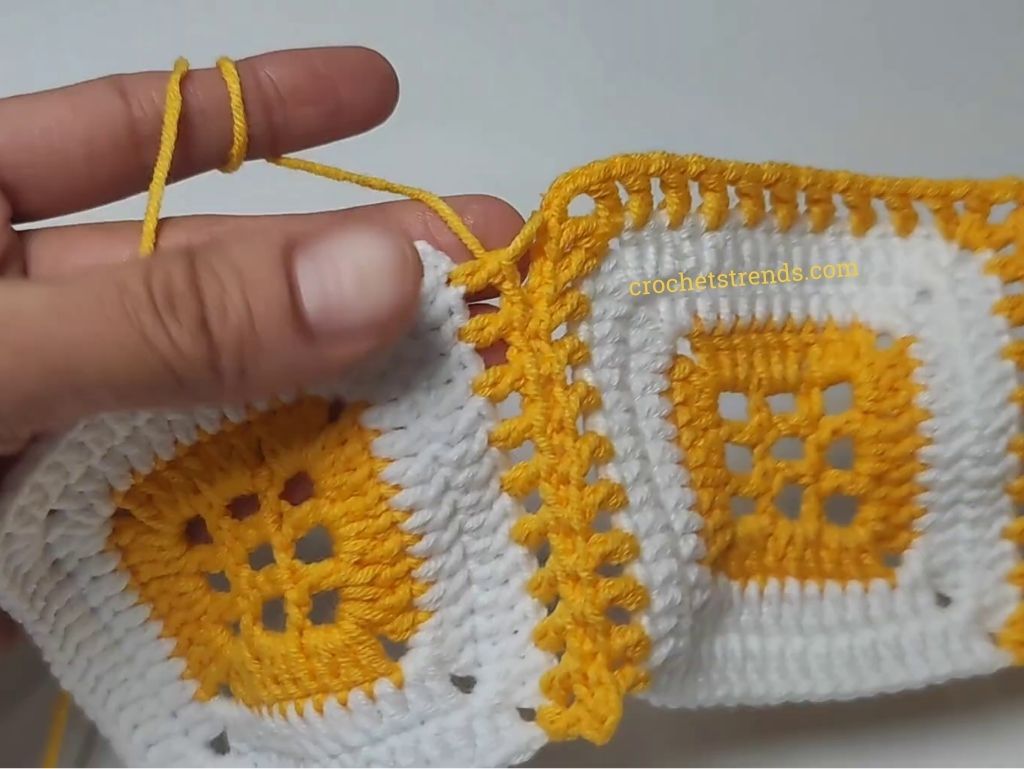
Final Touches
After joining all the squares, continue with the box stitch on the exposed edges. This provides a finished look to your project.
Explore More with TubaCrochet
For a more in-depth guide and visual aids, check out TubaCrochet’s YouTube channel. Their video tutorial is a fantastic resource for visual learners.
Conclusion
Crocheting granny squares together is a rewarding project that offers endless possibilities in terms of design and function. Remember, practice makes perfect. Feel free to share your projects, thoughts, and engage with our community in the comments below. Happy crocheting!