Looking for a cute and festive project? This amigurumi pumpkin keychain crochet pattern is the perfect blend of fun and practical. It’s beginner-friendly, works up quickly, and can be used as a keychain, bag charm, or handmade fall gift.
In this tutorial, I’ll guide you through every step in detail—from the foundation chain to finishing the stem—so even if you’re new to crochet, you’ll feel confident. We’ll also cover how to adjust the size, how to keep your stitches neat, and how to shape your pumpkin beautifully.
Download the free PDF pattern here: Amigurumi Pumpkin Keychain PDF
Watch the full video tutorial here: Amigurumi Pumpkin Keychain Video
Materials for the Amigurumi Pumpkin Keychain
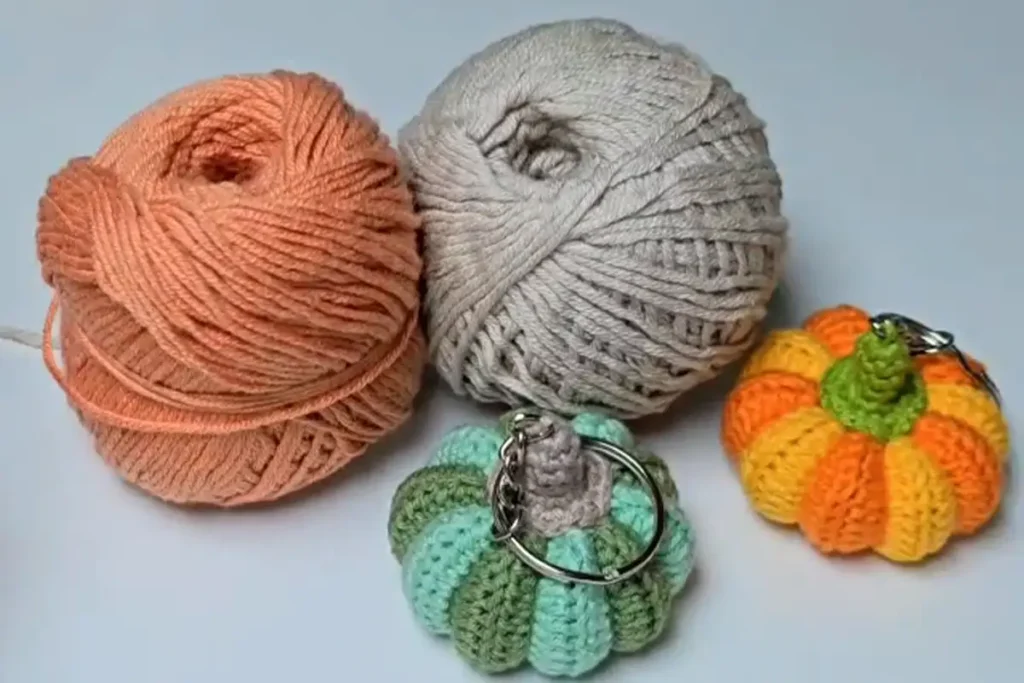
- Medium weight yarn (50% cotton, 50% acrylic) in two colors (pumpkin + stripe)
- A small amount of green yarn (for the stem)
- 2.5 mm crochet hook (adjust hook size if your stitches are too tight or too loose)
- Fiberfill stuffing (not too much—just enough to make it plump)
- Tapestry needle (for sewing & ridges)
- Keychain ring/clip
- Scissors
Pro Tip: Cotton blends give structure, while pure cotton makes it sturdier and heat-resistant if you plan to use it as decor.
Abbreviations (US Crochet Terms)
- ch = chain
- sc = single crochet
- hdc = half double crochet (YO, insert hook, YO, pull up a loop, YO, pull through all loops)
- sl st = slip stitch
- MR = magic ring
- st(s) = stitch(es)
- BLO = back loop only
Step-by-Step Amigurumi Pumpkin Keychain Pattern
How to Crochet the Pumpkin Body
- Foundation Chain: Ch 20 (≈ 8 cm / 3 in). Keep chains loose.
- Taller pumpkin → add chains in multiples of 2.
- Smaller pumpkin → reduce chains by an even number.
This chain length defines the pumpkin’s height.
- Row 1: Starting in 3rd ch from hook, make 18 hdc. Ch 2, turn.
- Row 2: Work 18 hdc in BLO. This creates the ribbed pumpkin texture. Ch 2, turn.
- Row 3–20: Repeat Row 2, changing colors every 2 rows.
- Example: Rows 1–2 cream, Rows 3–4 orange.
- Always keep row count = chain count.
Your rectangle should measure about 6 cm (2.3 in) wide × 13 cm (5 in) long.
Check: If the piece curls inwards → tension too tight. If it waves/ruffles → tension too loose or too many stitches. Adjust hook size if needed.

Assembly Instructions for the Crochet Pumpkin
- Fold the rectangle in half, short edges together.
- Join edges with sl st through BLO only.
- Ch 1, cut yarn, leave a long tail. Turn inside out.
- With tapestry needle, weave tail across one open edge like a drawstring. Pull tight to close.
- Stuff lightly with fiberfill—don’t overfill or pumpkin won’t shape well.
- Close the other edge with the same drawstring method.
- To form pumpkin ridges: thread darker yarn, run from top to bottom 6–8 times evenly spaced, pulling gently each time. Tie securely at the bottom.
Pro Tip: Create ridges evenly spaced around to mimic a natural pumpkin shape.
Crochet Stem & Keychain Loop
- With green yarn, make a MR.
- Rnd 1: Ch 1, 6 sc into MR. Join with sl st. (6 sts)
- Rnd 2–5: Ch 1, sc in each st around. Join with sl st. (6 sts each round)
- Stop here for a short stem.
- Rnd 6: Ch 1, 2 sc in each st. Join. (12 sts)
- Rnd 7: 2 sc in next st, 1 sc in next st → repeat around. Join. (18 sts)
- Fasten off, leave long tail.
- Sew stem to pumpkin top.
- Use yarn tail from MR to attach keychain ring/clip securely.
Finishing Touches for the Pumpkin Keychain
- Weave in all ends carefully on the inside.
- Shape your pumpkin by adjusting the stuffing and tightening ridges.
- Add a curly vine: Ch 20 with green yarn, sc twice in each chain to curl. Sew beside the stem.
- Finished size: about 5 cm (2 in) tall (without stem).
Tips & Variations – Crochet Pumpkin Keychain Ideas
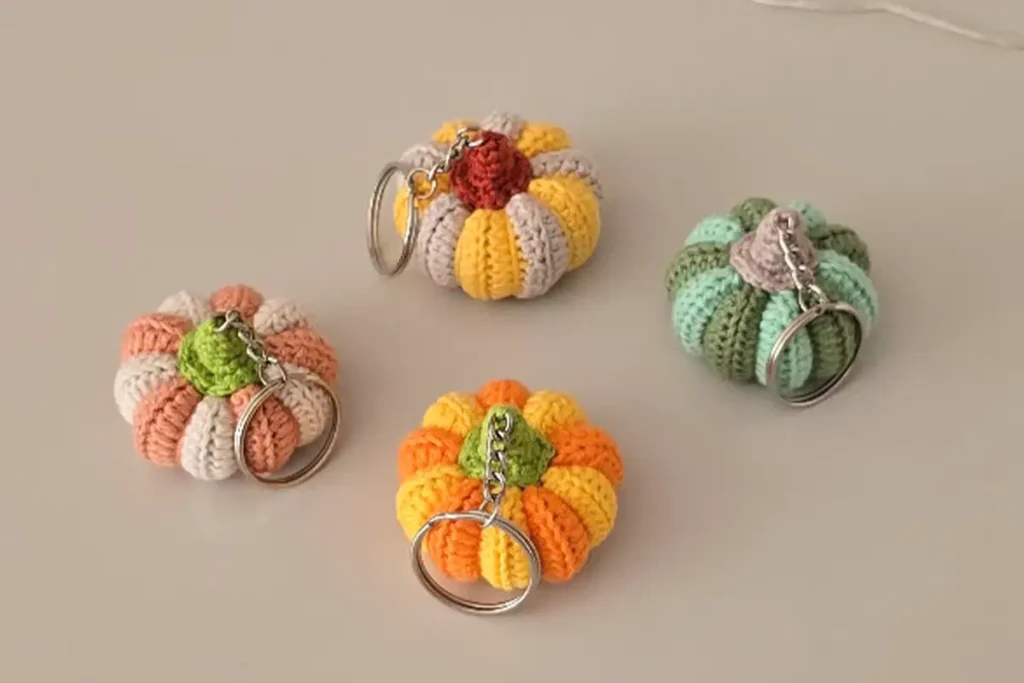
- Use traditional orange & green for fall.
- Try pastel colors for a cute accessory.
- Make a set for craft fairs, market stalls, or Etsy shops.
- Use metallic thread in the stem for a sparkly autumn look.

Download the Free Amigurumi Pumpkin Keychain PDF Pattern
Watch the Amigurumi Pumpkin Keychain Video Tutorial
Related Crochet Projects You May Like
- Easy Crochet Mandala
- Easy Crochet Carnation Bouquet Tutorial
- Free Crochet Heart Pattern with Puff Flower
Amigurumi Pumpkin Keychain FAQ
How long does it take to crochet this pumpkin keychain?
Usually 1–2 hours. Beginners may take a bit longer.
What yarn works best for this crochet pumpkin?
Cotton or cotton blends are best—they hold shape and look neat.
Can beginners follow this pumpkin keychain pattern?
Yes! It only uses ch, sc, hdc, sl st, and basic increases.
Can I sell the pumpkin keychains I make?
Yes, you can sell finished pumpkins. Please credit the pattern source.
How do I make my pumpkin look rounder?
Stuff lightly and tighten the ridges evenly—it creates the plump pumpkin shape.
Final Thoughts & Call to Action
This amigurumi pumpkin keychain crochet pattern combines a simple base with fun details, making it perfect for beginners and experienced crocheters alike. Whether you use it as a gift, market item, or just a seasonal accessory, each pumpkin will be unique and handmade with love.
Don’t forget to:
- Download the free PDF pattern
- Watch the step-by-step video tutorial
- Subscribe on YouTube: @TubaCrochet
- Follow on Instagram: @tubacrochet_
Happy crocheting, and see you in the next pattern!