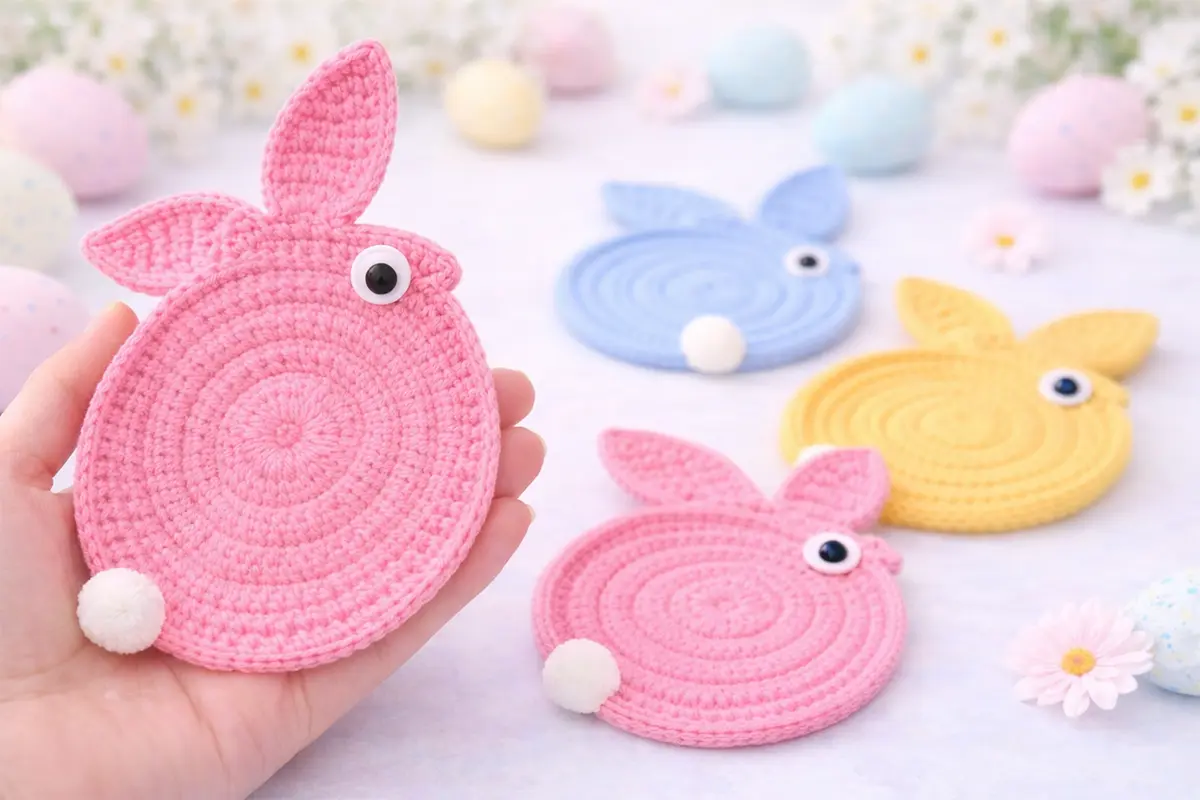
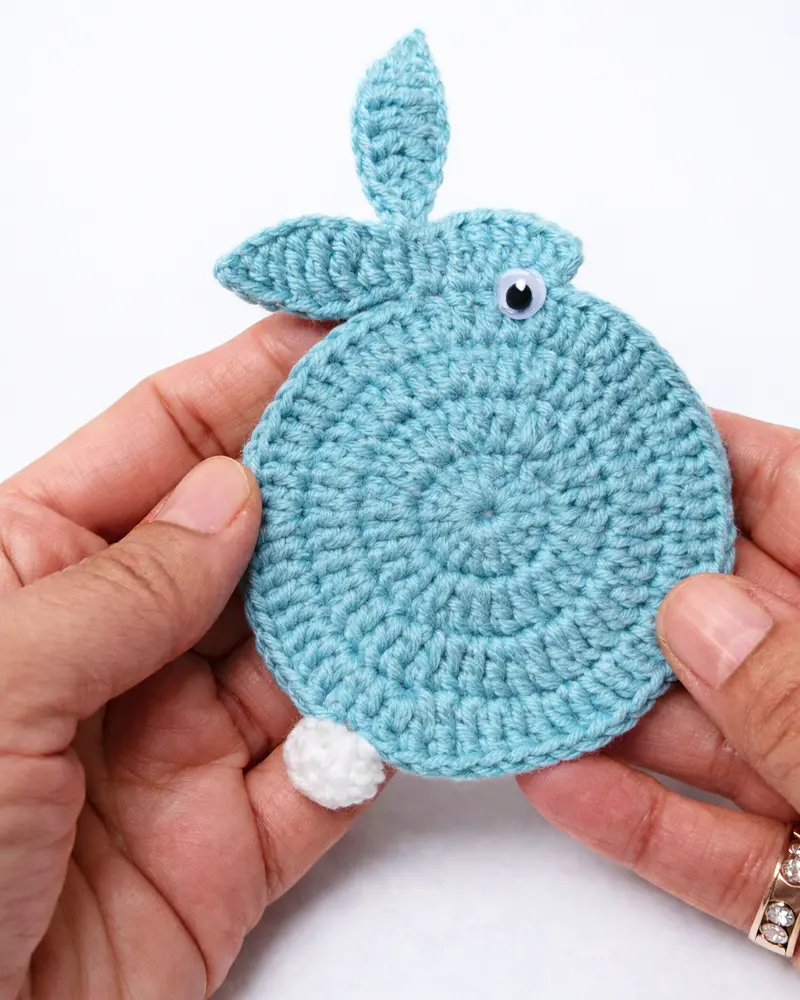
If you’re looking for a quick crochet project that is cute, useful, and easy to follow, this easy crochet bunny coaster free pattern is a great place to start. This project is designed with beginners in mind and uses simple stitches, soft cotton yarn, and easy shaping to create an adorable bunny coaster. It’s perfect for spring decor, Easter table styling, and handmade gift ideas.
In this beginner-friendly crochet tutorial, you’ll learn how to make the round coaster base, shape the bunny head, crochet the ears, add the fluffy tail, and place the eye detail. If you want a free crochet pattern that feels fun, quick, and achievable, this bunny coaster is a lovely project to try.
Watch the Video Tutorial
If you’d like to follow the steps visually, you can watch the full video tutorial here:
Video Tutorial:
https://youtu.be/PSPUrtERCIY
Download the Free PDF Pattern
You can also use the written version while crocheting:
Free PDF Pattern:
https://crochetstrends.com/wp-content/uploads/2026/03/easy-crochet-bunny-coaster-pattern-pdf.pdf
Why This Crochet Bunny Coaster Is Perfect for Beginners
This crochet bunny coaster is ideal for beginners because:
- it uses simple stitches
- the shape builds step by step
- it works up quickly
- it helps you practice working in the round
- the finished result looks polished and giftable
If you enjoy quick crochet projects for beginners, this is the kind of pattern that helps you build confidence while making something cute and useful.
Materials for Crochet Bunny Coaster
To make this crochet bunny coaster, you’ll need:
- Himalaya Himagurumi cotton yarn
- 2.20 mm crochet hook
- Yarn needle
- Scissors
- Stitch marker (optional)
- Safety eye or small black bead
Crochet Abbreviations for Bunny Coaster Pattern
- ch = chain
- sl st = slip stitch
- sc = single crochet
- hdc = half double crochet
- dc = double crochet
- tr = treble crochet
Crochet Bunny Coaster Free Pattern Step-by-Step
How to Crochet Bunny Coaster Base
Round 1
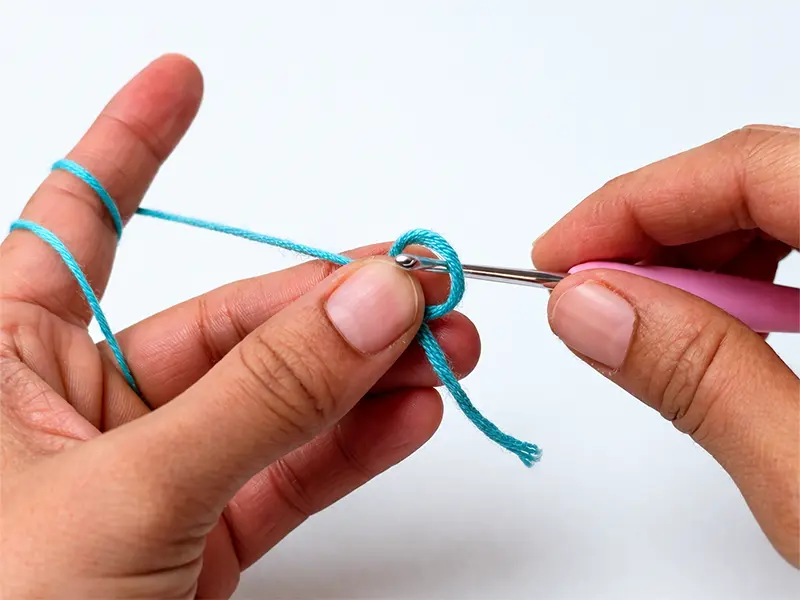
Start with a magic ring.
- Ch 3
- Work 14 dc into the ring
You should now have 15 stitches total, counting the starting chain.
Pull the ring closed and join with a slip stitch.
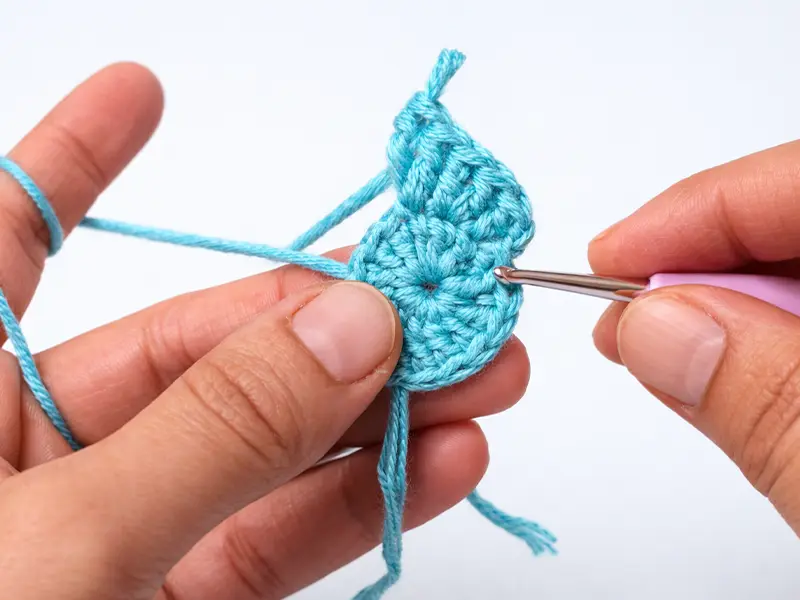
Round 2
- Ch 2
- Make 1 dc in the same stitch
- Work 2 dc in each stitch around
Join with a slip stitch.
Stitch count: 30
Round 3
- Ch 2
- Make 1 dc in the same stitch
Repeat around:
- 1 dc in next stitch
- 2 dc in next stitch
Join with a slip stitch.
Stitch count: 45
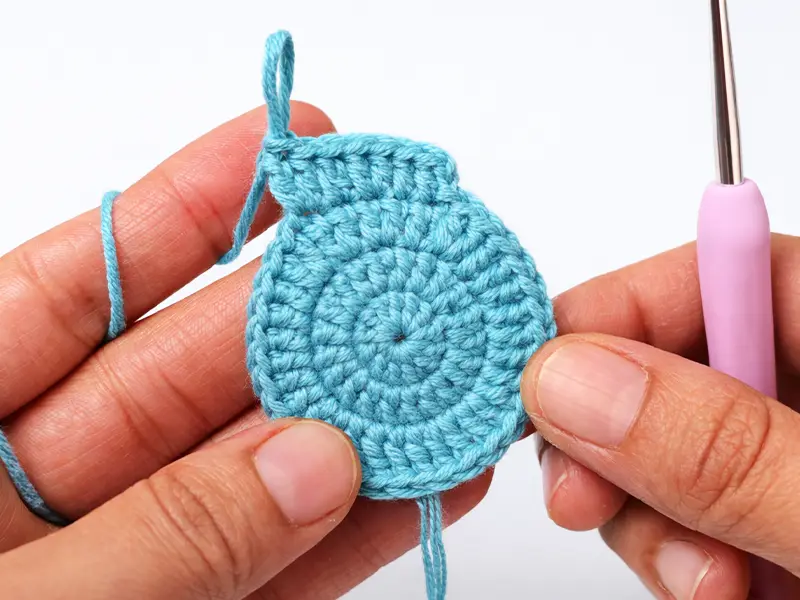
Round 4
- Ch 2
- Make 1 dc in the same stitch
Repeat around:
- 1 dc in each of the next 2 stitches
- 2 dc in next stitch
Join with a slip stitch.
Stitch count: 60
At this point, your coaster should be flat and round.
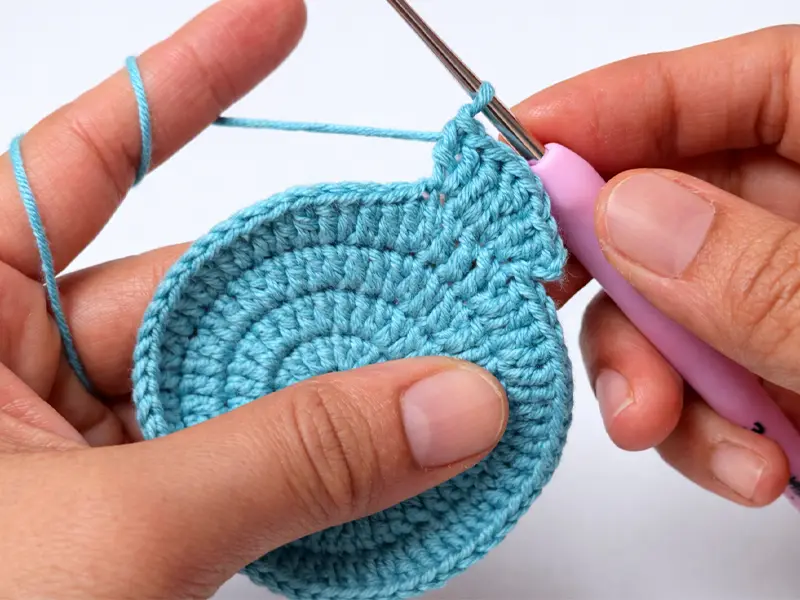
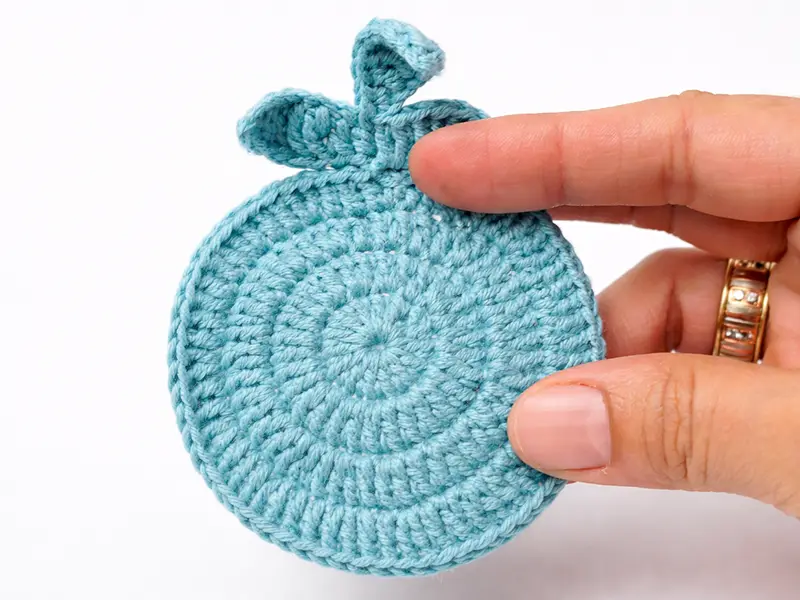
How to Shape the Bunny Coaster Head
To shape the bunny head:
- Ch 3
- In the same space, make 2 dc
- In the next stitch, make 2 tr
- In the next stitch, make 2 tr
- In the next stitch, make 2 dc
This creates the rounded bunny head.
How to Crochet Bunny Coaster Ears
First Ear
- Ch 9
Work back into the chain:
- Slip stitch in 2nd chain from hook
- Hdc in next chain
- Dc in next chain
- Tr in each of the next 3 chains
- Dc in next chain
- Hdc in last chain
Attach the ear with a slip stitch into the head section.
Second Ear
- Ch 9
Repeat the same stitch order:
- Slip stitch in 2nd chain
- Hdc in next chain
- Dc in next chain
- Tr in each of the next 3 chains
- Dc in next chain
- Hdc in last chain
Attach back into the head section, then:
- Ch 1
- Cut yarn
- Weave in the end
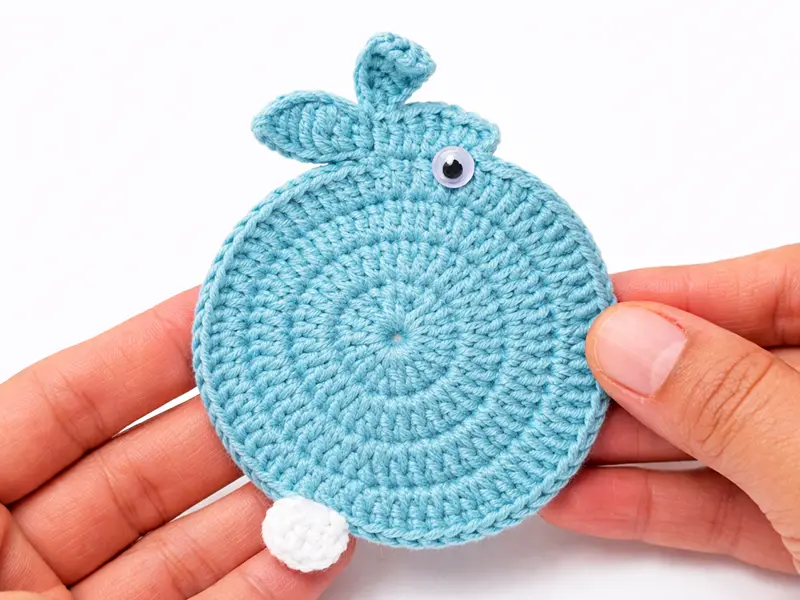
Bunny Coaster Tail and Assembly
Using white yarn:
- Attach the yarn at the 22nd stitch from the head section
- Ch 2
- Make 4 dc in the same space
- Ch 2
- Slip stitch in the same space
- Ch 1
- Cut yarn and weave in the end
This forms the fluffy bunny tail.
For the eye:
- Use a safety eye or a small black bead
- Attach it near the first double crochet space on the head
Beginner Tips for Crochet Bunny Coaster
Take your time with the magic ring
A neat center makes the rest of the project much easier. Since this is the base of the coaster, it’s worth slowing down here.
Check your stitch count after every round
Your counts should be:
- 15
- 30
- 45
- 60
This is one of the most important beginner habits in crochet.
If your coaster curls up, your tension is too tight
A flat coaster is the goal. If the edges curl upward, try crocheting more loosely.
The ears get their shape from changing stitch heights
The progression from slip stitch to treble crochet — and back down again — is what gives the ears their soft, curved shape.
Use a stitch marker for the tail spot
If counting stitches feels tricky, mark the 22nd stitch first so placement is easier.
Fluff the tail for a cuter look
Because all tail stitches are worked into one spot, the tail will look fuller. You can gently fluff it with your fingers at the end.
Crochet Bunny Coaster FAQ
1. What do I need to get started?
You’ll need cotton yarn, a 2.20 mm hook, scissors, a yarn needle, and an eye detail like a safety eye or black bead.
2. Is this actually beginner-friendly?
Yes. This is a beginner crochet project made with simple stitches and easy shaping.
3. Help! Why is my coaster curling up?
That usually means your tension is too tight or your stitch count is off. Try loosening your stitches and recounting each round.
4. Do I have to start with a magic ring?
It’s the best choice for a neat center, but you can practice it a few times first if it feels new.
5. Stitch count check: How many should I have?
You should have:
- 15 after Round 1
- 30 after Round 2
- 45 after Round 3
- 60 after Round 4
6. How do I get the ears to look right?
Follow the stitch order carefully and keep both ears as similar as possible in tension and size.
7. Where exactly does the tail go?
Attach it at the 22nd stitch from the head section.
8. Where’s the best spot for the eye?
Near the first double crochet space on the head, slightly off-center for a sweeter look.
More Easy Crochet Patterns and Bunny Coaster Ideas
If you enjoyed this free crochet bunny coaster pattern, you may also like:
- beginner crochet coaster patterns
- quick crochet gift ideas
- Easter crochet projects
- spring crochet decor ideas
- cute crochet keychains and small accessories
Looking for more easy crochet ideas? Browse more step-by-step tutorials and free patterns on CrochetStrends.
Easy Crochet Bunny Coaster Final Thoughts
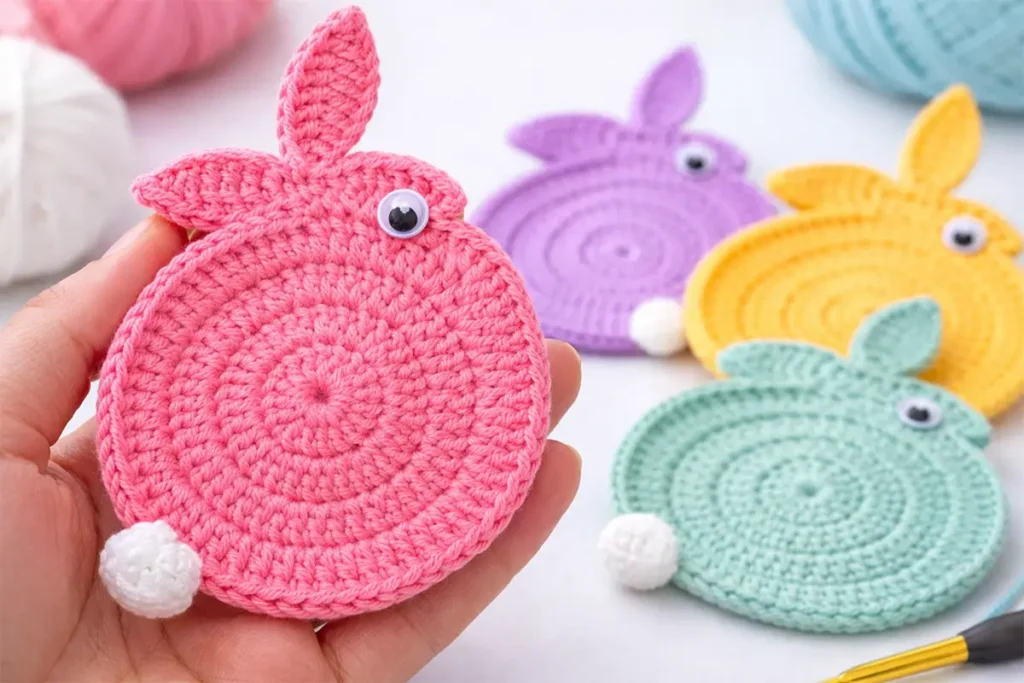
This easy crochet bunny coaster free pattern for beginners is a fun way to practice shaping while making something cute, useful, and seasonal. It’s quick enough for a relaxing afternoon project, simple enough for beginners, and sweet enough to use as decor or a handmade gift.
If you make one, try experimenting with different pastel colors for a soft spring look.
What colors would you choose for your bunny coaster?
Tell me in the comments — I’d love to hear your color ideas.
Helpful Links
- Free PDF Pattern: https://crochetstrends.com/wp-content/uploads/2026/03/easy-crochet-bunny-coaster-pattern-pdf.pdf
- Video Tutorial: https://youtu.be/PSPUrtERCIY
- Youtube channel: https://www.youtube.com/@UCAyHNF4mAhLF3ttT_6nSv8Q
- Instagram: https://www.instagram.com/Craftsman_Crochet
- Facebook: https://www.facebook.com/crochetcraftsmann/
- Pinterest: https://tr.pinterest.com/tubacrochet/