
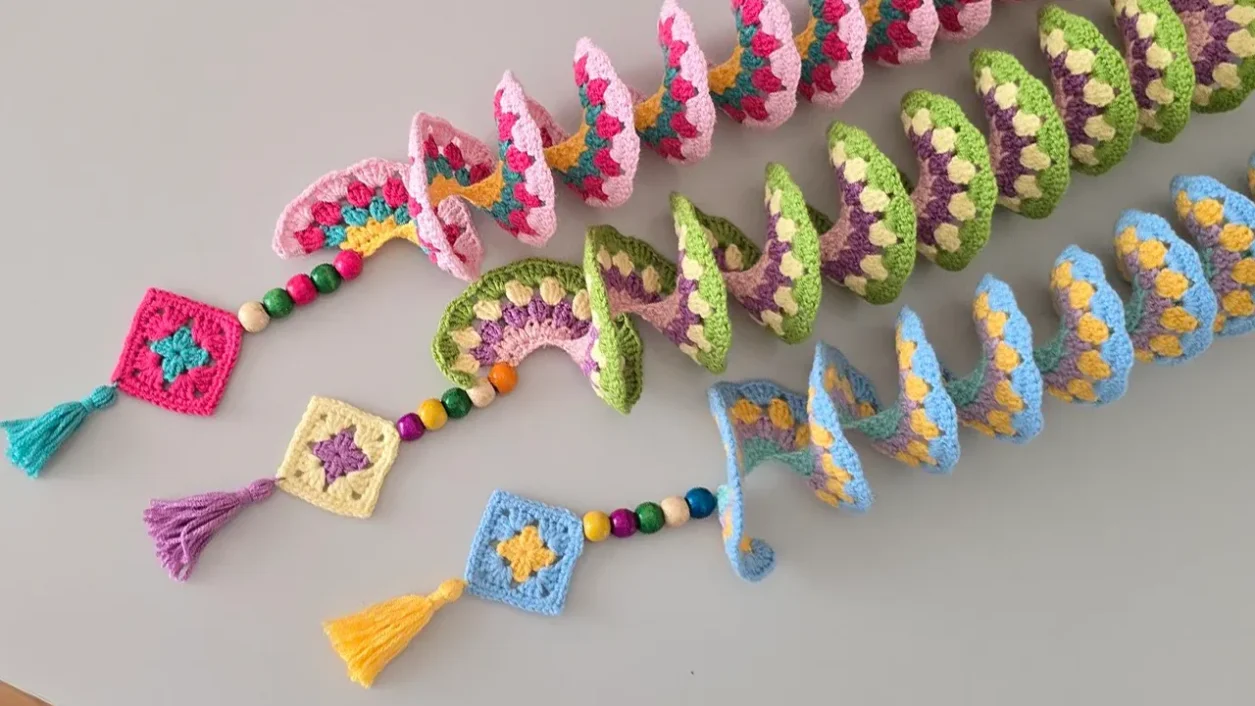
Looking for an easy crochet project that brings color, motion, and handmade charm to your outdoor space? This easy crochet wind spinner pattern uses simple stitches, cheerful color changes, and a decorative spiral design that’s ideal for beginners and experienced crafters alike. Whether you hang it on your porch, balcony, or garden tree, it’s sure to brighten up any corner!
Why Make an Easy Crochet Wind Spinner?
Easy, quick, and perfect for summer vibes
Looking for a fun and easy crochet project that also makes a great outdoor decoration? This easy crochet wind spinner is a perfect pick! With simple stitches and vibrant yarn, you’ll create a twirling, eye-catching piece in no time.
Decorate your garden, balcony, or indoor spaces
This spinner can brighten up any space – hang it on your balcony, garden, porch, or even in a child’s room. It’s versatile, lightweight, and moves beautifully with the wind.
Materials for the Easy Crochet Wind Spinner
Yarn, crochet hook, optional beads, and accessories
To make your crochet wind spinner, gather these supplies:
- Yarn: 5-ply yarn, 50% acrylic + 50% cotton, medium weight (Category 3 or DK)
- Hook Size: 2.50 mm (US size B/1 or C/2)
- Accessories: Fiberfill (optional), scissors, yarn needle, wooden beads, and a keyring (for hanging).
Suggested color palette for a vibrant spinner
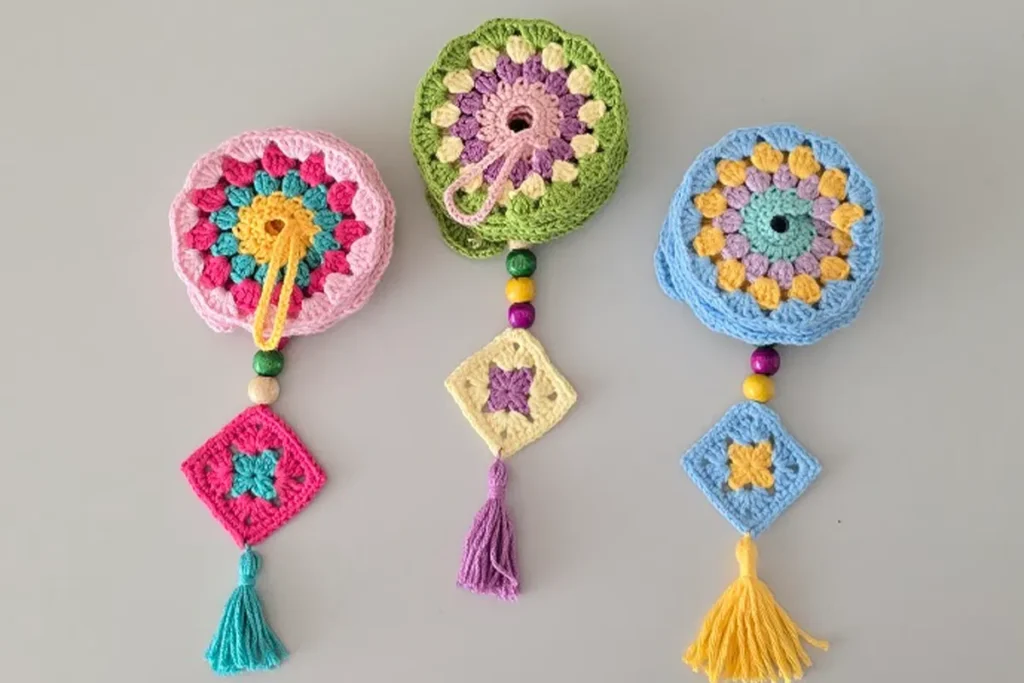
Use 4 different colors for the spiral and 2 additional contrasting shades for the granny square center. Bright summer tones work best!
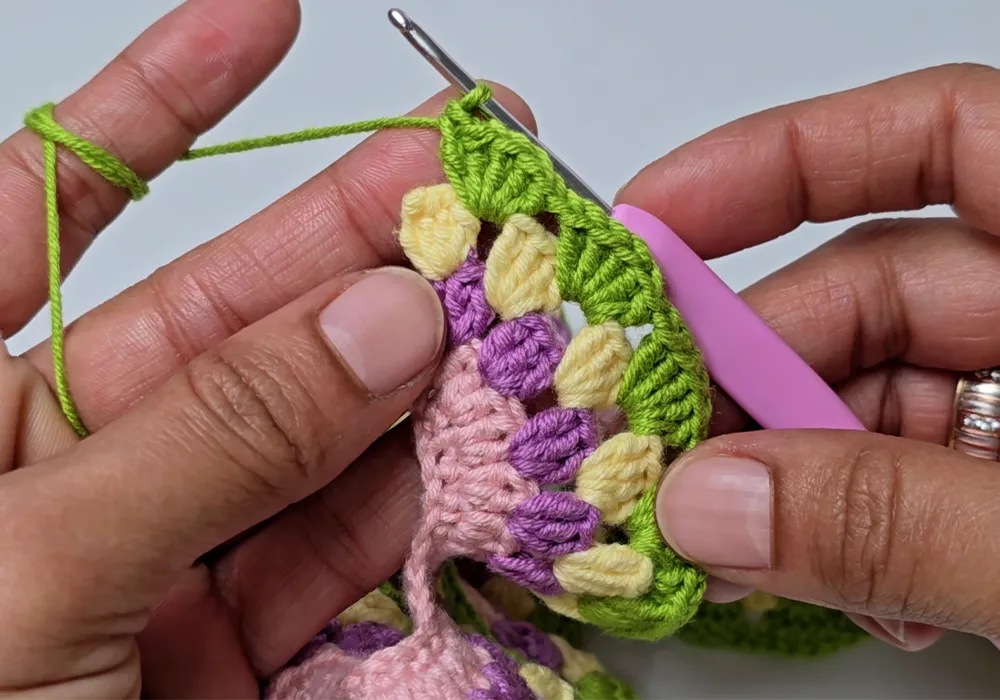
Basic Crochet Stitches in This Spinner Pattern
Chain stitch (ch): The foundation of most patterns. Yarn over and pull through the loop on the hook.
Single crochet (sc): Insert hook, yarn over, pull through, yarn over again, pull through both loops.
Half double crochet (hdc): Yarn over, insert hook, yarn over, pull through, then yarn over and pull through all 3 loops.
Double crochet (dc): Yarn over, insert hook, yarn over, pull through, yarn over, pull through 2 loops, yarn over, pull through last 2 loops.
Slip stitch (sl st): Insert hook, yarn over, pull directly through both the stitch and the loop on the hook.
Tip: If you’re new to any of these stitches, be sure to pause the video tutorial and practice each one slowly. They’re all beginner-friendly once you get the hang of them!
How to Crochet a Wind Spinner – Step-by-Step Guide
Step 1: Foundation chain and single crochet row
Start with 100 chains using your first color (approx. 35 cm long). In Row 1, work single crochets (sc) starting from the 2nd chain to the end.
2: Build volume with hdc and dc stitches
Row 2: Make 2 half double crochets (hdc) into each stitch.
Row 3: Make 3 double crochets (dc), 1 chain, skip one stitch — repeat this sequence.
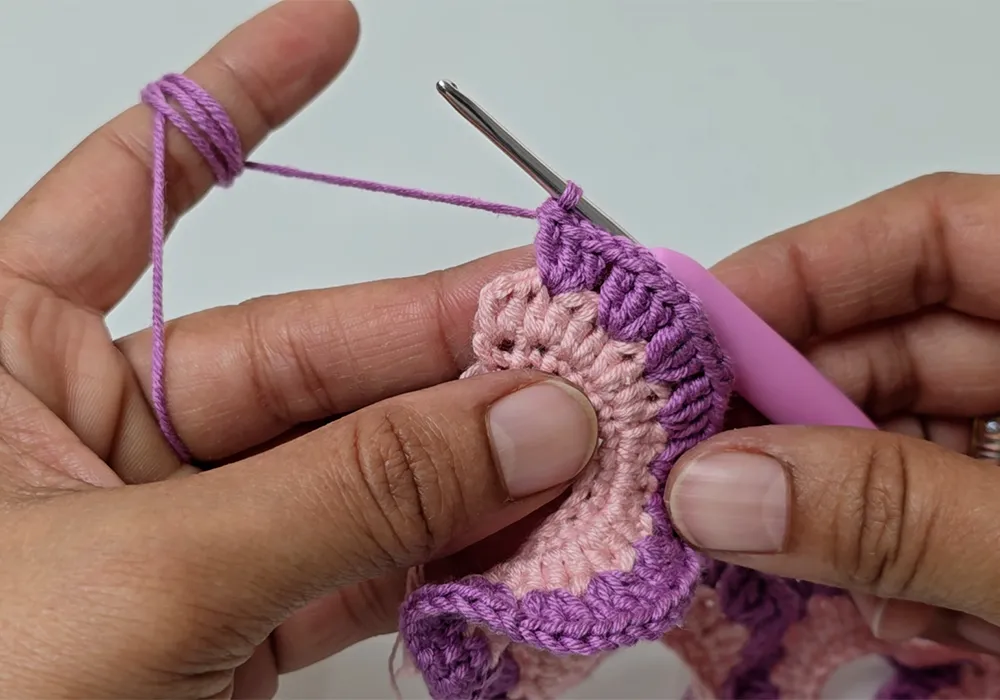
Step 3: Create the spiral with color changes
Rows 4–5: Change colors, increase to 4 and then 5 double crochets (dc) in each group, separated by 1 chain. Each row builds height and the twirling shape.
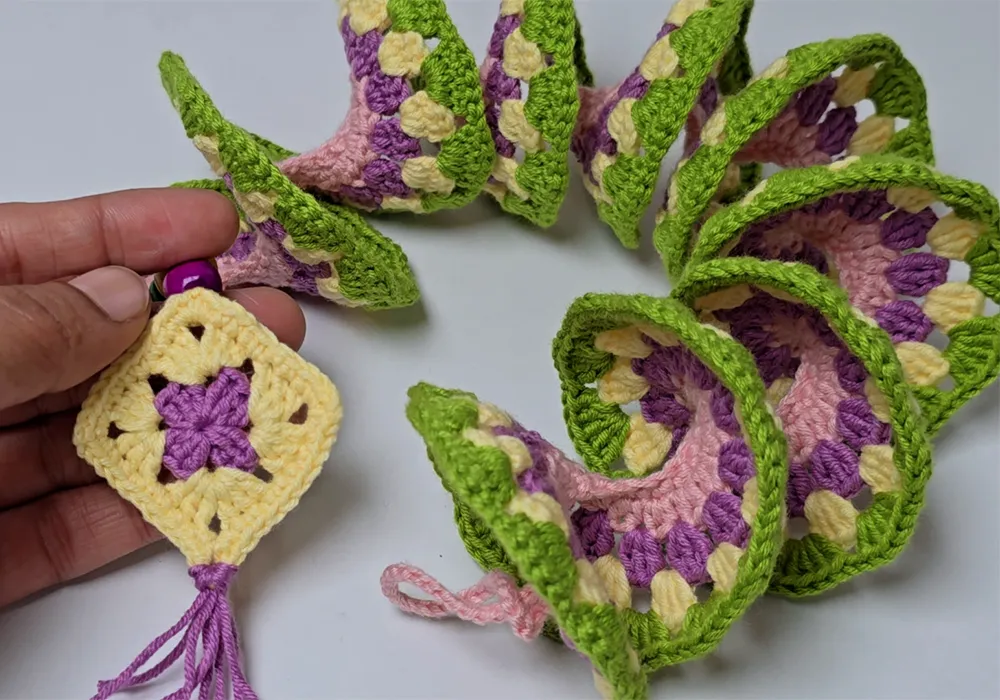
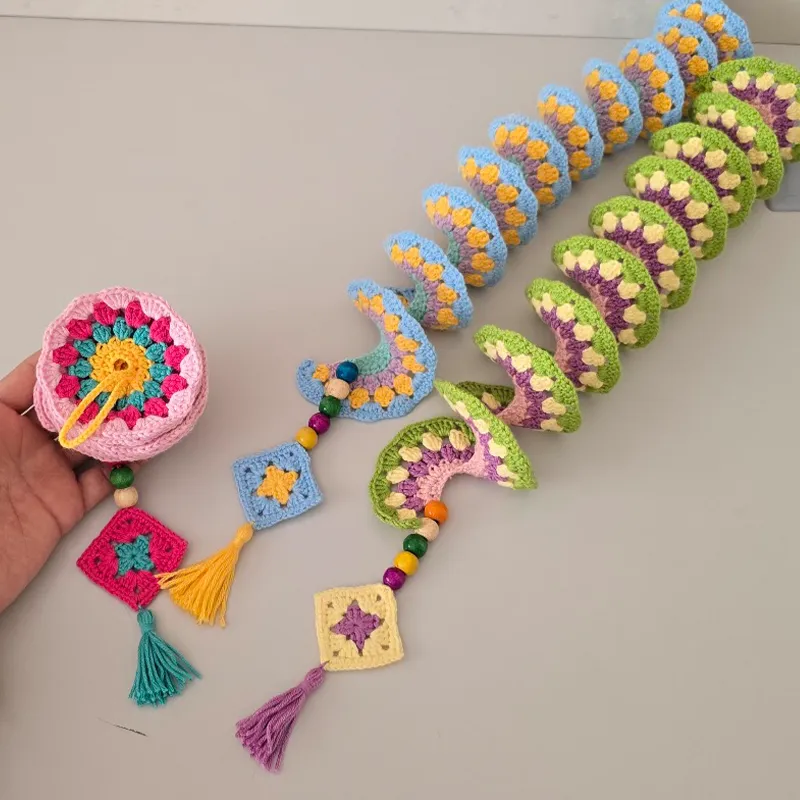
4: Finish with granny square and tassel
Use any two colors to crochet a classic granny square for the base. Then add a border using single crochets (sc) and chain spaces. Finally, add tassels or a puff flower and a hanging chain with beads.
Customize Your Easy Crochet Wind Spinner
Try different color combos for unique looks
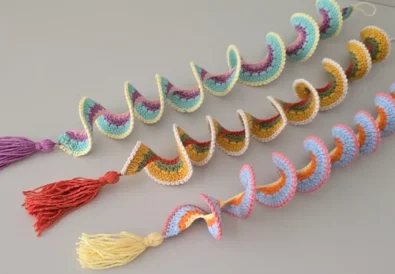
Mix pastels, brights, or ombre yarns for different effects. Try blues and whites for a breezy feel or sunset tones for warmth.
Add your own embellishments
Sew on beads, add tassels, or attach a puff flower to give your spinner character. This is a fun way to make it uniquely yours!
Easy Crochet Wind Spinner – FAQs
How do I make the spinner bigger or smaller?
Adjust the number of chains in your foundation chain. More chains = longer spinner.
Which yarns are best for this project?
Cotton blends or acrylics work great for outdoor use. Choose medium-weight yarn for the best results.
Is this project good for beginners?
Absolutely! The pattern uses simple stitches and is explained clearly step by step.
Watch the Wind Spinner Tutorial & Download the Pattern
Full video tutorial
Download the free PDF pattern
Easy Crochet Wind Spinner (PDF)
Share your creations and tag us!
We’d love to see what you made:
Let’s bring some color and motion to the outdoors!
Discover More Free Crochet Projects
Looking for your next project? Try one of our other beginner-friendly tutorials:
- Crochet Sunflower Keychain Tutorial
- Crochet Heart Amigurumi Keychain
- Crochet Tulip Flower – DIY Bouquet
Stay inspired and keep creating!


The finished product does not match the very vague pattern, luckily I know how to crochet!
Thank you so much for your feedback I understand what you mean! The written pattern was designed to complement the step-by-step video, but I’ll make sure to clarify the missing or confusing parts in the next update. If you’d like, you can also follow along with the full video tutorial here — it shows every stitch in detail:
https://www.youtube.com/watch?v=cOLnWvbOwp4
Your comment truly helps me improve the patterns for everyone