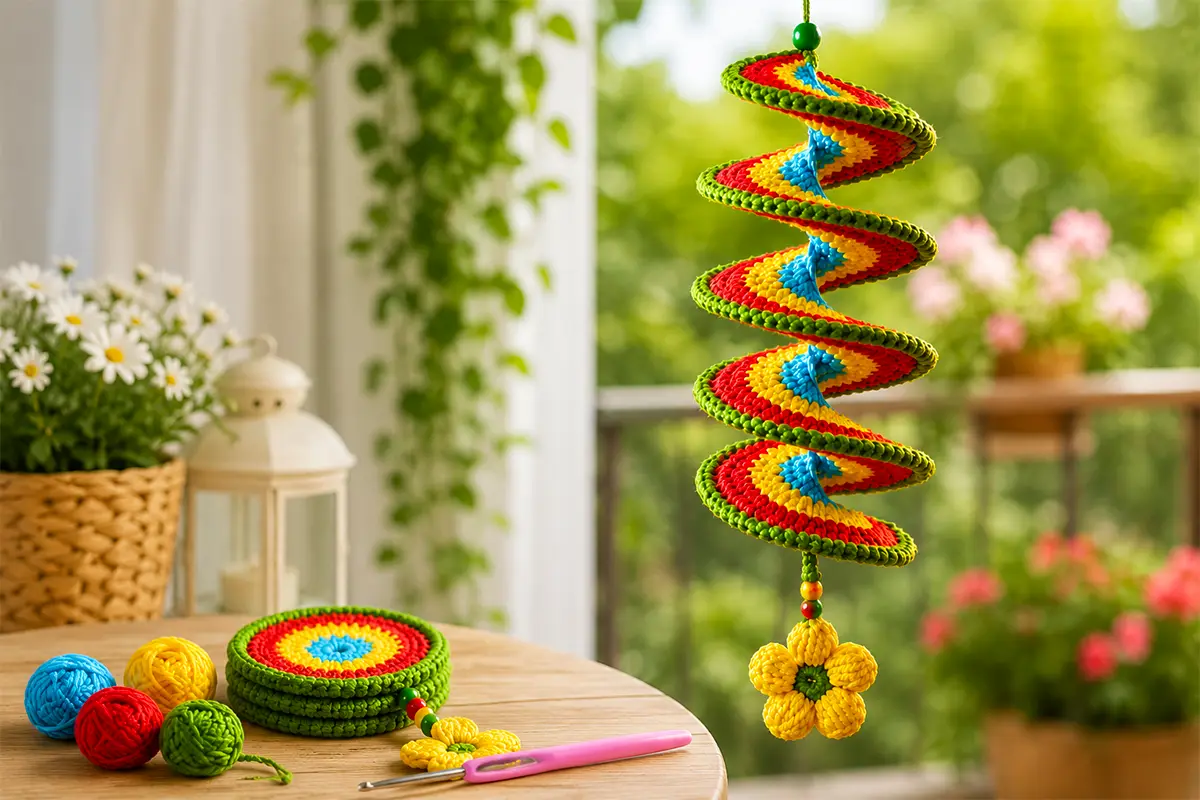
If you love colorful handmade decor, this crochet wind spinner is a beautiful and beginner-friendly project to try. It turns small leftover yarn balls into a bright spiral decoration you can hang on your balcony, porch, garden, craft room, or near a sunny window. The best part is that the spiral shape forms naturally as you crochet, so you do not need any special tools or complicated shaping.
This project is especially useful if you enjoy scrap yarn crochet projects for beginners. Instead of letting small yarn leftovers sit unused in your basket, you can turn them into something cheerful, decorative, and giftable. With a simple chain foundation, basic increases, colorful rows, beads, and a small crochet flower, this easy wind spinner becomes a fun handmade decor piece.
You can watch the full step-by-step video tutorial here:
Watch the crochet wind spinner video tutorial
You can also download the written pattern here:
Download the written PDF pattern

Why This Easy Crochet Wind Spinner Is Perfect for Beginners
This project looks more detailed than it really is. The structure is based on one simple idea: you keep increasing by making two stitches into each chain or stitch. As the stitch count grows, the crochet piece naturally starts to curl. That curl is what creates the beautiful spiral shape.
If you are new to crochet, this is a great project because it uses familiar stitches such as half double crochet, double crochet, and single crochet. You will also learn how color changes can make a simple project look more dimensional.
The standard version starts with 90 chains, which makes a wind spinner about 34 cm / 13.4 inches long before shaping. But you can easily customize the length. Start with fewer chains for a shorter spinner, or add more chains if you want a longer hanging decoration.
For more beginner-friendly projects, you may also enjoy this related guide:
Easy Crochet Projects for Beginners
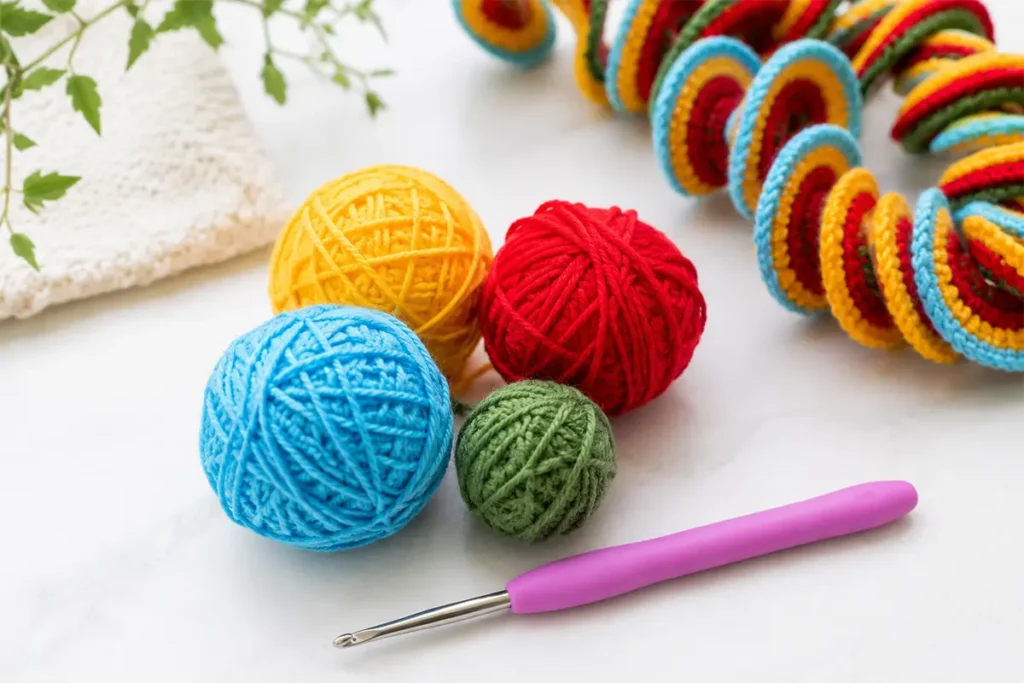
Materials for This Crochet Wind Spinner Pattern
For this crochet wind spinner pattern, you only need a few basic supplies.
You will need cotton yarn in several colors, a 2.5 mm crochet hook, scissors, a yarn needle, decorative beads, and a small crochet flower motif for the bottom. Cotton yarn is a good choice because it gives the spiral nice stitch definition and helps the finished piece hold its shape.
Try to use the same yarn weight for all colors. This keeps the spiral balanced and prevents one section from becoming heavier or looser than the others. High-contrast colors also work beautifully because they make each spiral layer easier to see.
This is also a great stash buster crochet idea. You do not need full skeins for every row. Small leftover balls of blue, yellow, red, green, pink, or white yarn can all work well.
If you like home decor crochet ideas, you can also visit:
Crochet Home Decor Ideas
How the Crochet Spiral Forms Naturally
The “magic” of this project comes from the increases. In the first row, you work two half double crochets into each chain. In the next rows, you continue increasing with double crochets. Because the stitch count grows so quickly, the crochet strip cannot stay flat. It begins to twist and curl into a spiral.
This makes the project fun to watch as you work. At first, it may look like a regular crochet strip, but after a few rows, the shape starts to appear. By the time you add the final color, the spiral becomes much more visible.
If your piece starts curling, that is not a mistake. It means the pattern is working correctly.
Step-by-Step Crochet Wind Spinner Pattern Overview
The project begins with a foundation chain of 90 chains. After that, you work one half double crochet into the third chain from the hook. Then you continue across the row by working two half double crochets into each chain.
For the next color, you attach your yarn to the top of the first stitch, chain three, and work one double crochet into the same stitch. The chain three counts as your first double crochet, so this creates two double crochets in the first stitch. Then you continue working two double crochets into each stitch across the row.
The third color follows the same increasing idea. You attach the new yarn, chain three, and continue working two double crochets into the stitches below. This is where the spiral really starts to pop.
For the final color, you create a decorative edge using a simple hook twist technique.
Crochet Hook Twist Technique for a Decorative Edge
The crochet hook twist technique is the small detail that makes the edge look cleaner and more polished. It is still beginner-friendly, but it gives the wind spinner a more finished look.
To make this edge, pull up a loop from the top of the next stitch. You will have two loops on your hook. Then gently twist your hook around the first loop. After that, yarn over and pull through both loops to complete the single crochet.
Repeat this step across the row. Keep your tension relaxed. If you pull too tightly, the edge can become stiff or uneven. A softer tension helps the spiral hang naturally and keeps the decorative edge neat.
This little finishing trick is one of the reasons the finished spinner looks more detailed than the basic stitch pattern suggests.
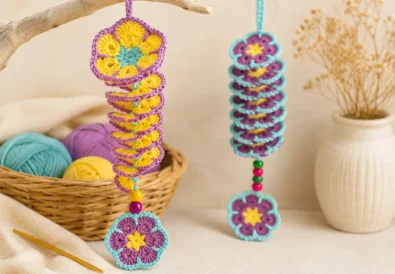
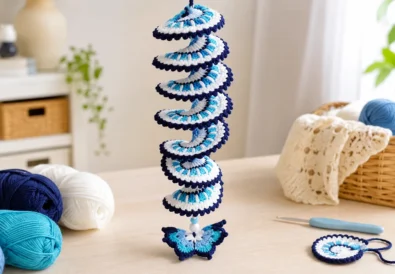
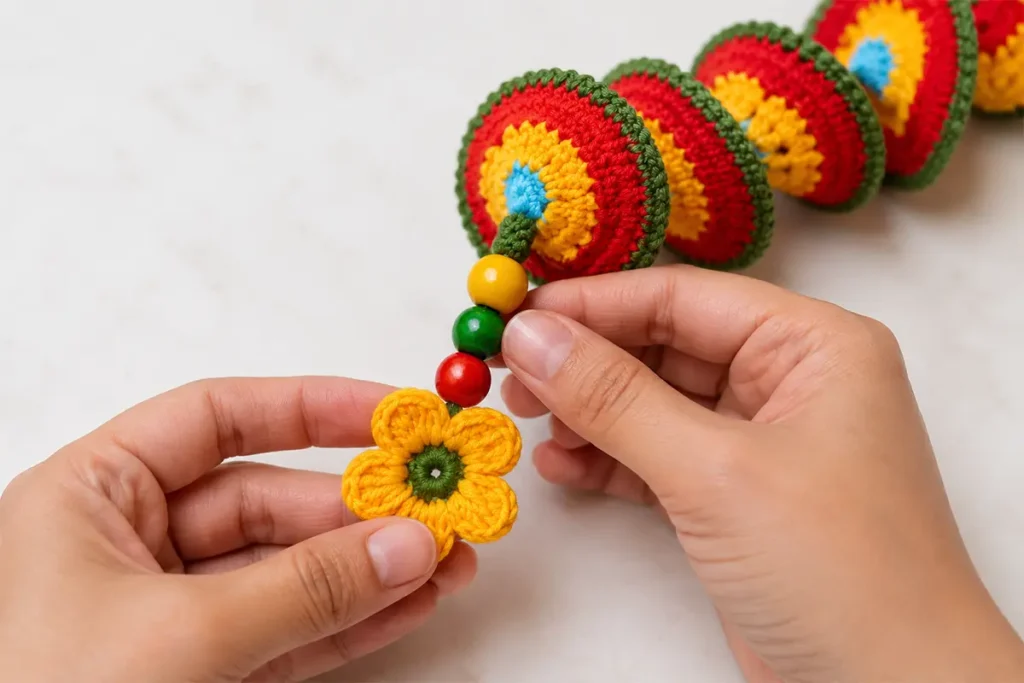
Add Beads and a Crochet Flower to Your Wind Spinner
After the crochet rows are finished, leave a long yarn tail. Carry that tail down toward the center row at the bottom. In the sample project, this section is the blue row.
Then add beads to the bottom. You can use just a few beads for a simple look, or add more for extra movement and detail. Choose bead colors that match your yarn so the whole piece looks coordinated.
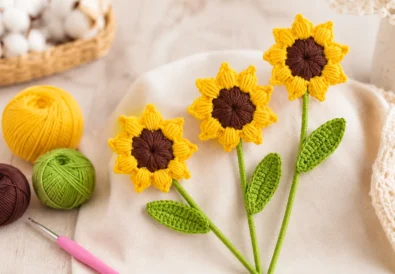
After the beads, attach a small crochet flower motif to the end. This flower gives the wind spinner a cute, handmade, giftable finish. You can use any small flower motif you like. If you enjoy crochet flower projects, you may want to explore:
Easy Crochet Flower Patterns
How to Hang Your Crochet Wind Spinner
There are two easy ways to hang your finished wind spinner. You can crochet a chain loop at the top, or you can simply tie a piece of yarn through the top section.
A chain loop looks neat and handmade, while a yarn tie is quick and simple. Both options work well for hanging the spinner on a balcony, porch, garden hook, window, or craft room wall.
Once it is hanging, gently twist the wind spinner around the center and let it open. The spiral shape will come to life beautifully.
DIY Garden Decor Ideas with a Crochet Wind Spinner
This DIY garden decor project is colorful, lightweight, and easy to customize. You can make it in bright rainbow colors for summer, soft pastels for spring, warm orange and brown shades for fall, or red, green, and white for Christmas decor.
It also makes a cute handmade gift. You can pair it with a small gift tag, wrap it in kraft paper, or add it to a handmade gift basket.
This wind spinner works well as:
- Balcony decor
- Garden decor
- Window decor
- Porch decoration
- Craft room decor
- Handmade gift idea
- Scrap yarn project
- Craft fair item
For more gift-friendly ideas, visit:
Crochet Gift Ideas
Frequently Asked Questions About Crochet Wind Spinners
What yarn and hook size work best for a crochet wind spinner?
Cotton yarn is recommended because it gives the spiral nice stitch definition and helps the wind spinner hold its shape. A 2.5 mm crochet hook works well for this standard version.
Can I make this crochet wind spinner longer or shorter?
Yes. The standard pattern starts with 90 chains, which creates a spinner about 34 cm / 13.4 inches long. Use fewer chains for a shorter spinner or add more chains for a longer one.
Why is my crochet spiral starting to curl?
Yes, absolutely. The curling is the secret of the project. Because you work two stitches into each chain or stitch, the piece naturally twists into a spiral.
What is the hook twist technique in this crochet wind spinner pattern?
It is a decorative finishing move used in the final row. You pull up a loop, gently twist your hook around the first loop, then yarn over and pull through both loops to complete the single crochet. This creates a neat textured edge.
How do I keep the crochet wind spinner spiral neat and even?
Keep your tension relaxed, especially on the decorative edge. Tight stitches can make the spiral stiff. Softer tension helps the curves hang naturally.
Is this a good scrap yarn crochet project?
Yes. This is a great scrap yarn crochet project. You can switch colors in each row and use small amounts of leftover yarn from your stash.
How do I finish and hang the crochet wind spinner?
Carry the yarn tail down to the bottom, add beads, and attach a small crochet flower. For hanging, make a chain loop at the top or tie it with a piece of yarn.
Final Thoughts
This easy crochet wind spinner is a fun way to turn leftover yarn into bright handmade decor. The natural spiral effect makes it exciting to crochet, and the beads plus flower detail give it a finished look. Whether you hang it in your garden, balcony, porch, or craft room, it adds a cheerful handmade touch.
For more tutorials and project ideas, follow Crochet Craftsman here:
YouTube: https://www.youtube.com/@CrochetCraftsmann
Instagram: https://www.instagram.com/Craftsman_Crochet
Facebook: https://www.facebook.com/crochetcraftsmann/
Pinterest: https://tr.pinterest.com/tubacrochet/