Welcome to the world of granny square crochet! If you’re a beginner looking for a simple yet beautiful project, you’ve come to the right place. This tutorial will guide you through the process of creating an easy granny square patterns that is both fun and rewarding. Granny squares are versatile and can be used in various projects, from cozy blankets to stylish bags. Whether you’re crafting a pillow cover, a blanket, or just experimenting, this beginner crochet project is perfect for you. The best part? This free crochet square pattern is easy to follow, making it ideal for those new to the craft.
Easy Granny Square Patterns: A Beginner’s Guide
The granny square is a timeless classic in the world of crochet. Its simple construction and repetitive nature make it an ideal project for beginners. In this tutorial, we’ll break down the process into manageable steps, ensuring even those new to crochet can create beautiful squares with confidence. To begin with, let’s talk about the appeal of the granny square. It’s incredibly versatile, lending itself to a wide array of projects, from blankets and afghans to bags, scarves, and even clothing! The possibilities are endless!
Firstly, let’s gather our materials. Secondly, we’ll learn the basic stitches. Then, we’ll move on to creating the foundation chain and working the first round. After that, we’ll explore how to build the square, adding rounds to increase its size. Finally, we’ll share some tips and tricks for achieving perfect granny squares every time. Specifically, we’ll discuss how to maintain consistent tension and achieve neat corners. Let’s get started!
Learn How to Crochet Easy Granny Square Patterns
This easy crochet granny square directions tutorial offers a fantastic opportunity to learn a new skill and create something beautiful with your own hands. Most importantly, it’s a relaxing and enjoyable craft that can be therapeutic and rewarding. The granny square is a fantastic beginner crochet project because it uses only a few basic stitches. We’ll cover these stitches in detail, providing clear explanations and helpful visuals. In fact, you’ll be surprised how quickly you can master them!
To illustrate, we’ll use images and videos to demonstrate each step of the process. Indeed, visual aids can be incredibly helpful for understanding new techniques. Introducing the magic ring, a technique used to start many crochet projects worked in the round. This creates a neat and tight center for your granny square. In addition to the magic ring, we’ll cover the chain stitch (ch), double crochet (dc), and slip stitch (sl st). These are the foundational stitches you’ll need for this project.
Simple & Easy Granny Square Patterns for Beginners: Step-by-Step Tutorial
Now, let’s delve into the heart of this granny square tutorial. We’ll provide a step-by-step guide, walking you through each stage of creating your crochet square. First of all, let’s talk about the materials you’ll need.
Getting Started: Materials You’ll Need
- Yarn: We recommend a worsted weight cotton yarn. This type of yarn is readily available, affordable, and comes in a wide array of colors. For this tutorial, we’ll be using Alize Cotton Gold, but feel free to use any similar yarn you prefer.
- Crochet Hook: You’ll need a 2.75 mm crochet hook. This size works well with worsted weight yarn.
- Scissors: A sharp pair of scissors is essential for cutting the yarn.
- Yarn Needle: This is helpful for weaving in ends.
Now that you know what materials you need, let’s move on to the basic stitches!
Understanding the Basic Stitches
- Chain Stitch (ch): This is the most fundamental stitch in crochet. It forms the base for many other stitches and is used to create rows and spaces.
- Double Crochet (dc): This is a taller stitch than the single crochet, creating a denser fabric. It’s the primary stitch used in this granny square pattern.
- Slip Stitch (sl st): This stitch is used for joining rounds, finishing rows, and creating invisible joins.
Step 1: Creating the Foundation Chain
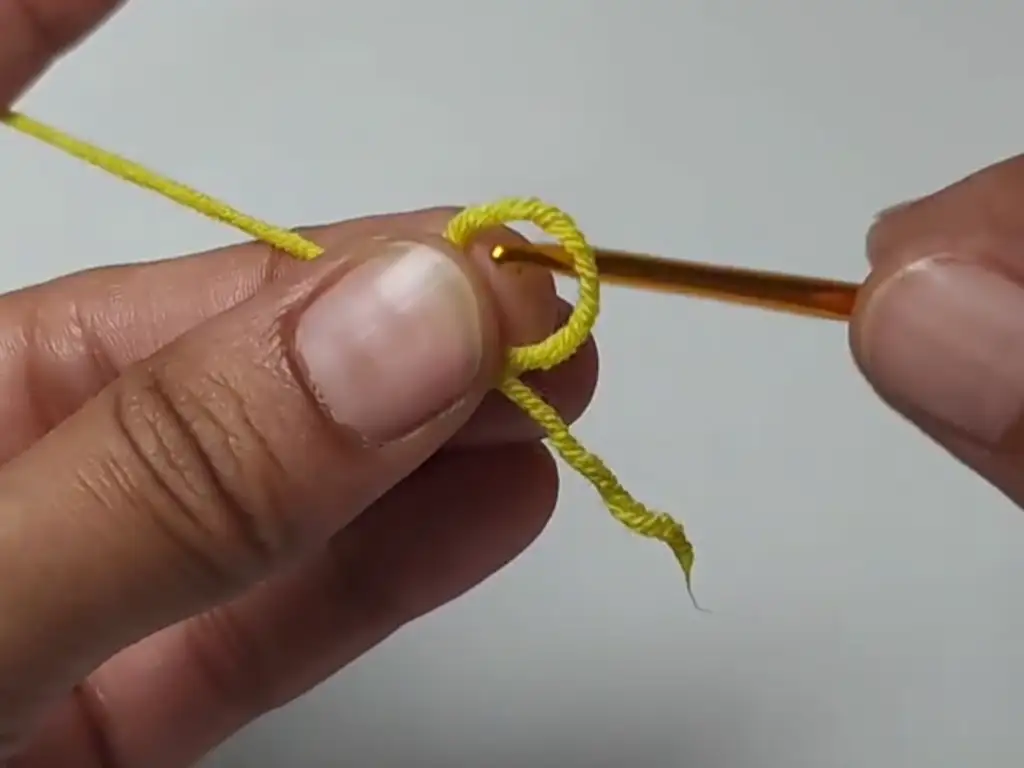
To begin, make a magic ring. This is the starting point for our crochet square. The magic ring provides a neat and tight center, preventing any holes from forming. Next, chain 3. This chain 3 counts as your first double crochet.


Step 2: Working the First Round
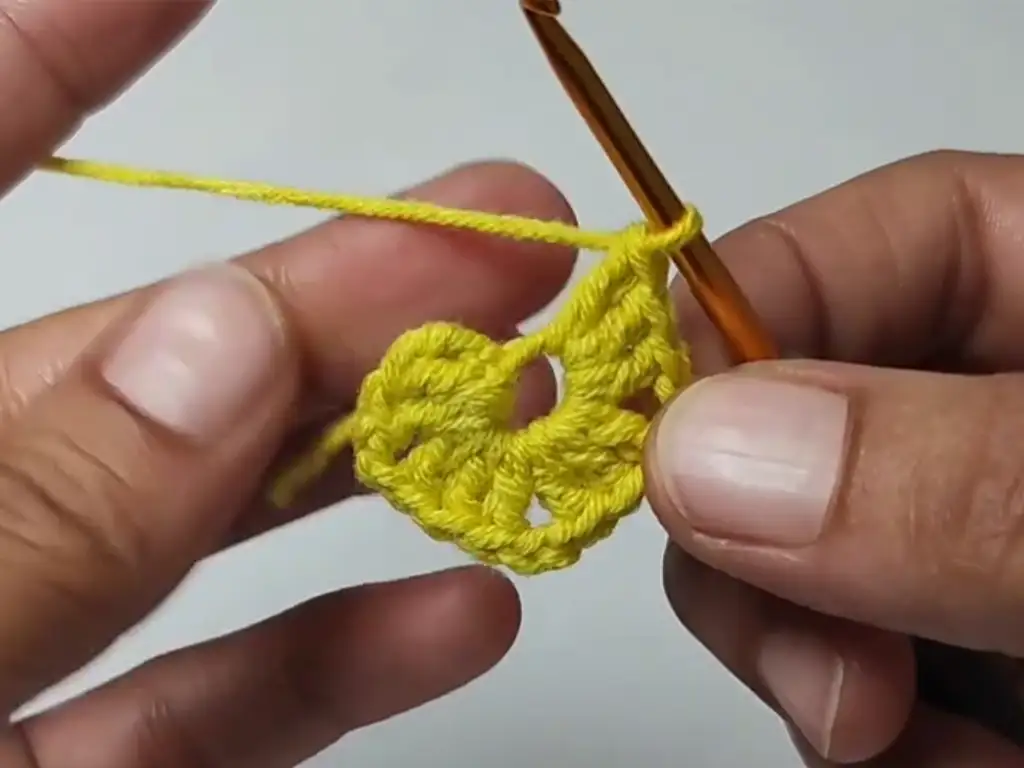
Now, work 2 double crochets into the magic ring. Afterward, chain 2. This creates the first corner space of your granny square. Then, work 3 double crochets into the magic ring. Repeat this sequence (chain 2, 3 double crochets) three more times. Finally, chain 2 and slip stitch into the top of the beginning chain 3 to close the round.
Step 3: Building the Square – Subsequent Rounds
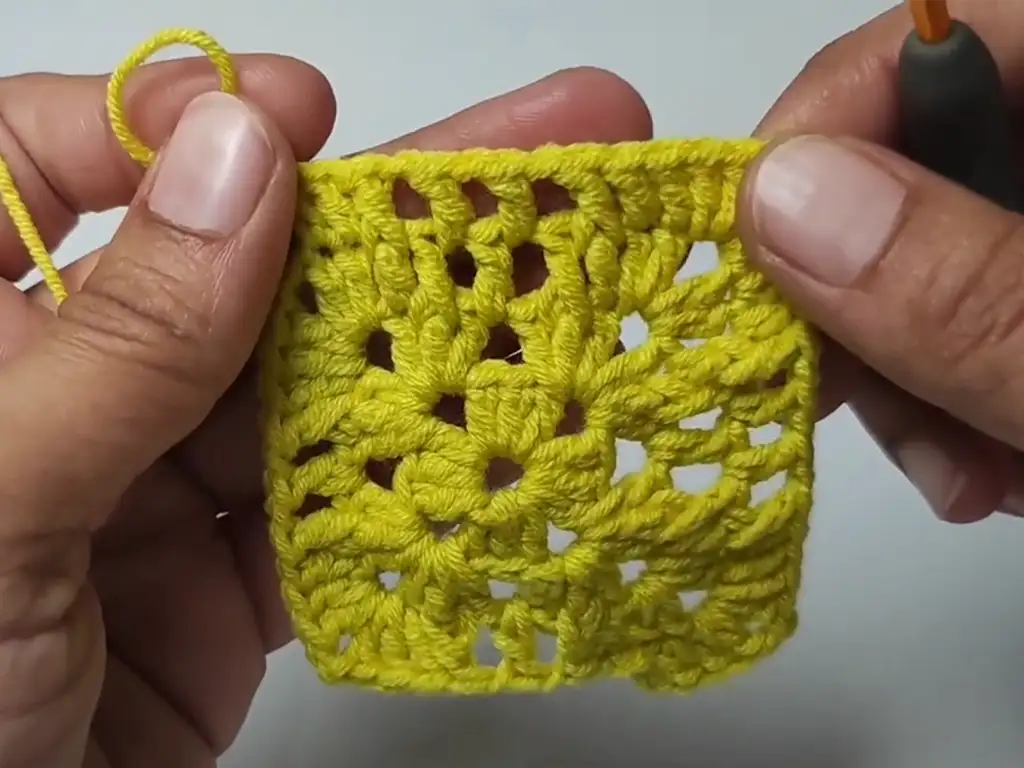
Subsequently, we’ll continue building the square by adding more rounds. Each round will increase the size of the square. The pattern is repetitive, making it easy to memorize and follow. We’ll provide detailed instructions for each round, ensuring you can create a beautiful and symmetrical granny square.


Free Easy Granny Square Patterns for Beautiful Handmade Designs
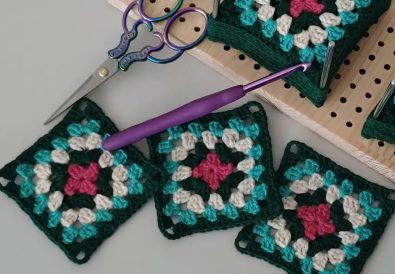
The beauty of the granny square lies in its versatility. Since it’s a relatively small motif, you can create a wide variety of projects by joining multiple squares together. For example, you can create blankets, afghans, scarves, bags, and even clothing! Besides, you can customize your projects by using different colors and yarn weights.
In addition, the granny square is a fantastic way to use up leftover yarn. Because of this, it’s a sustainable and eco-friendly craft. Specifically, you can create beautiful and unique projects without having to buy new yarn.
Unlock Your Creativity with These Easy Granny Square Patterns
Ultimately, the granny square is a blank canvas for your creativity. As you can see, you can experiment with different colors, textures, and even stitch variations. Undoubtedly, the possibilities are endless!
Tips and Tricks for Perfect Granny Square Patterns
- Consistent Tension: Maintaining consistent tension is key to achieving neat and even squares. Practice makes perfect!
- Neat Corners: Pay close attention to the corner spaces. Make sure you’re working the correct number of stitches into each space.
- Counting Stitches: Count your stitches regularly to ensure you’re staying on track.
Creative Variations: Adding Color and Texture
- Color Changes: Change colors at the end of each round to create stripes or other patterns.
- Different Yarns: Experiment with different yarn weights and textures to add visual interest.
From Squares to Projects: What to Make with Granny Squares
- Blankets and Afghans: Join multiple squares together to create cozy blankets and afghans.
- Scarves and Shawls: Create long strips of squares for scarves and shawls.
- Bags and Purses: Use squares to create unique and stylish bags and purses.
In short, the possibilities are endless!


Knitting Pattern:
Row 1:
- Make a magic ring.
- Ch 3 (counts as a dc).
- 2 dc in the ring.
- Ch 2.
- 3 dc in the ring.
- Repeat steps 4-5 three more times.
- Ch 2.
- Sl st in the top of the beginning ch-3.
Row 2:
- Ch 3 (counts as a dc).
- 2 dc in the same sp.
- Ch 2.
- 3 dc in the next ch-2 sp.
- Ch 1.
- 3 dc in the next ch-2 sp.
- Ch 2.
- 3 dc in the next ch-2 sp.
- Repeat steps 5-8 around.
- Ch 1.
- Sl st in the top of the beginning ch-3.
Rw 3:
- Sl st in the next dc.
- Ch 3 (counts as a dc).
- 2 dc in the same sp.
- Ch 2.
- 2 dc in the next ch-2 sp.
- 1 dc in the top of the next dc from the previous row.
- 1 dc in the middle of the next dc from the previous row.
- Ch 1.
- 1 dc in the next ch-1 sp.
- Ch 1.
- 1 dc in the middle of the next dc from the previous row.
- 1 dc in the top of the next dc from the previous row.
- 2 dc in the next ch-2 sp.
- Ch 2.
- 2 dc in the next ch-2 sp.
- Repeat steps 6-15 around.
- Ch 1.
- 1 dc in the middle of the next dc from the previous row.
- Sl st in the top of the beginning ch-3.
Rows 4 and beyond:
Continue following the established pattern, increasing the number of boxes on each edge by one with each row. Remember to always skip the last two dc on the edge before starting a new box, and skip the first dc when finishing a box. In the corners, continue the pattern of 2 dc, ch 2, 2 dc.
Increasing and Decreasing Rows:
- Increasing: To put it another way, you can make a larger square by simply continuing adding rows, following the established pattern.
- Decreasing: Conversely, you can make a smaller square by stopping adding rows when you reach your desired size.
Tricks of the Model:
- Consistent tension is key: Practice maintaining even tension throughout your work to achieve uniform squares.
- Count your stitches: Regularly counting your stitches will help you stay on track and avoid mistakes.
- Pay attention to the corners: The corners are crucial for shaping the square, so make sure you’re working the correct number of stitches into each corner space.
A Big Thank You to @TubaCrochet
This tutorial is based on the wonderful video by @TubaCrochet (https://www.youtube.com/@TubaCrochet). We highly recommend checking out her channel for more amazing crochet tutorials! You can find the specific video for this granny square pattern here: https://www.youtube.com/watch?v=4XVHePPHp-k
We’d love to see your finished projects! Share them with us on Instagram (https://www.instagram.com/tubacrochet_/), TikTok (tiktok.com/@tubacrochet), and Facebook (https://www.facebook.com/tubacrochet/).
Don’t forget to leave a comment below and share your thoughts and questions! We love hearing from our readers and fostering a vibrant crochet community.
Other Crochet Projects You’ll Love
- Crochet a Cozy Blanket: Explore different stitch patterns and color combinations to create a unique and comforting blanket.
- Crochet Stylish Coasters: Add a touch of handmade charm to your home décor with these easy-to-make coasters.
- Crochet a Trendy Scarf: Create a fashionable scarf with a variety of stitch patterns and yarn choices.
- Crochet Flower Patterns: Learn how to crochet beautiful flowers for embellishing your projects or creating stunning bouquets.
- Crochet Amigurumi Patterns: Explore the world of amigurumi, the art of crocheting adorable stuffed animals and characters.
Conclusion
In conclusion, granny squares are a fantastic way to start your crochet journey. They’re easy, versatile, and offer endless opportunities for creativity. Whether you’re making a blanket, pillow, or bag, the skills you’ve learned in this tutorial will serve you well in many future projects.
Remember: The journey of learning to crochet is filled with joy and discovery. Take your time, enjoy the process, and most importantly, have fun with it!
Watch the video tutorial by @TubaCrochet for a visual guide and be sure to check out more granny square tutorials on her channel. Don’t forget to share your projects with the community! Now that you’ve mastered the easy granny square patterns, it’s time to explore new horizons. Keep crocheting, keep creating, and most of all, keep enjoying every stitch you make. Happy crocheting!


