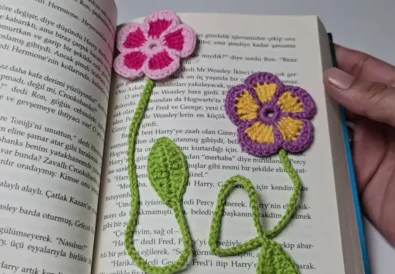
Hey there, fellow crochet lovers! Ready for a fun project? This time we’re diving into creating a sweet heart crochet bookmark! This pattern is just right, whether you’re new or a seasoned pro. A cute bookmark makes reading that much better. You can also use it for gifts! This blog post will guide you. I’ll explain every step, plus some helpful tricks. You will also find a free pattern for download! Let’s make something pretty!
1. Introduction to the Crochet Bookmark Pattern
- What Makes This Crochet Bookmark Special? This crochet bookmark pattern is a true gem. It’s a simple design using basic stitches. The heart design adds a touch of charm. This DIY crochet bookmark is not just beautiful; it is useful. It is a great project for anyone. It is a perfect, quick project. You can create handmade gifts quickly.
- Why Crochet Bookmarks Make Great Gifts Looking for a thoughtful present? Handmade crochet bookmarks are a great idea. They show care and effort. These are practical for book lovers. Plus, they add a personal touch to any book. They are great for any occasion. You can make them in different colors. Try matching the book lover’s style!
2. Materials Needed for Your DIY Crochet Bookmark
- Best Yarn for Crochet Bookmarks For this project, use 100% cotton yarn. It’s durable and feels nice. Cotton yarn also holds its shape well. It’s available in many colors. You can select your favorite one. You can use a worsted-weight yarn. Choose a color that matches the recipient.
- Choosing the Right Crochet Hook A 2.5 mm crochet hook is what we’ll use. This size works well with the chosen yarn. A smaller hook makes a tighter stitch. A larger one will make it looser. You might need to adjust the hook size for a good gauge. Always select a hook that fits your yarn.
Other auxiliary materials you need are:
Scissors.
Yarn needle for weaving in ends.
Felt-tip pen to mark your rows, if you need it.
3. Step-by-Step Crochet Bookmark Tutorial
- Starting Your Crochet Bookmark: Foundation Chain You start by making a slip knot. Then you create a chain of 41 stitches. This chain forms the base. Your whole bookmark will be made on it. This chain will set the length of your bookmark. Remember this chain must be a multiple of 8, plus 1. The length can be adjusted easily.
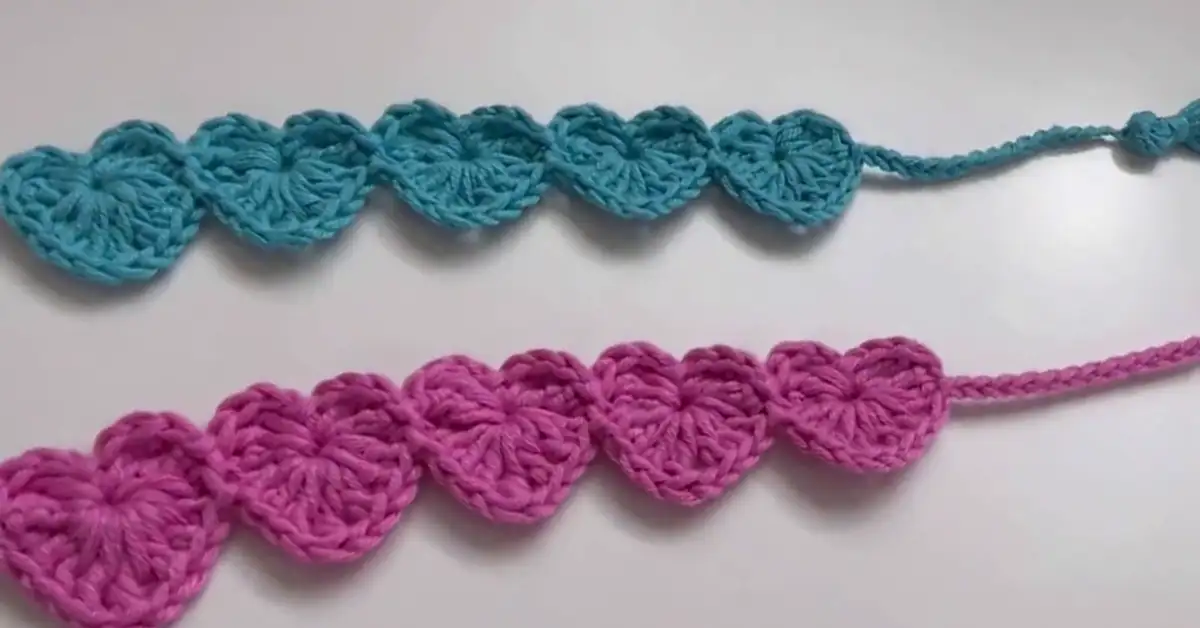
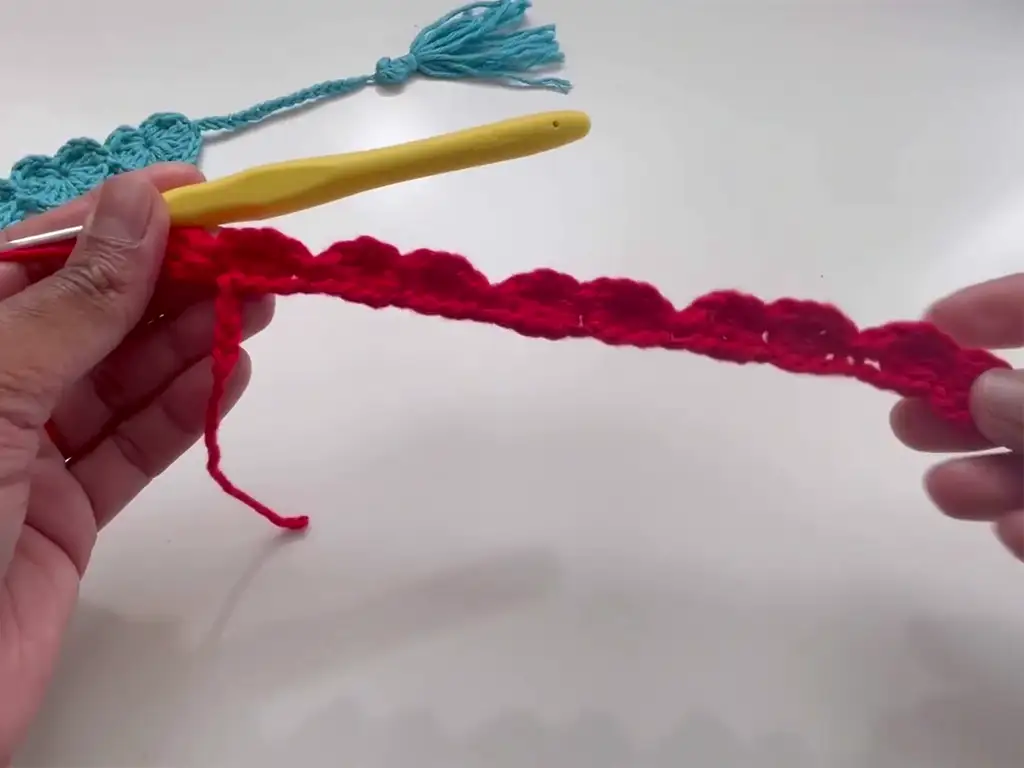
- Creating the Heart Pattern: Row-by-Row Instructions This is where the fun starts! The heart pattern uses basic stitches. These are treble crochets and slip stitches. We will create these special heart motifs. The pattern repeats across the row. Follow the instructions exactly. Be sure to use a stitch marker, if needed.
- Finishing Your Bookmark: Securing the Ends After the hearts are done, it’s time to finish. We’ll create an edge using double crochets. This border makes it look neat. Secure the ends well. Weave the ends to hide them. This will prevent unraveling. Weaving hides the loose yarn.
4. How to Crochet the Heart Design
- Understanding the Heart Stitch Pattern The heart is created by specific stitches. We use two treble crochets. Then you make a chain of two. You will work a slip stitch. Next chain two. Add two treble crochets into the same chain. It sounds complex at first, it is easy with practice! This sequence will make your heart shape.
- Tips for Perfecting Your Heart Crochet Bookmark Keep your tension consistent. This will make your work even. Don’t make stitches too tight. Work each step carefully. Practice makes perfect! Repeat the pattern until you’re happy with the hearts. If you make a mistake, don’t worry, you can fix it!
5. Adding the Perfect Tassel to Your Handmade Bookmark
- Step-by-Step Tassel Tutorial A tassel adds a lovely final touch. Wrap yarn around your fingers ten times. Then tie it off at one end. Insert the thread in the end of your bookmark. Attach the tassel to the loop of the bookmark. Wrap yarn around the base of the tassel. Now the tassel is secure.
- How to Attach the Tassel Securely Use your yarn needle to weave in the end securely. Ensure it won’t come undone. Trim the tassel’s ends for a neat look. You can make your tassel as long as you want! You can also use different colors.
6. Tips for Customizing Your Easy Crochet Bookmark
- Color Variations for Your Crochet Bookmark
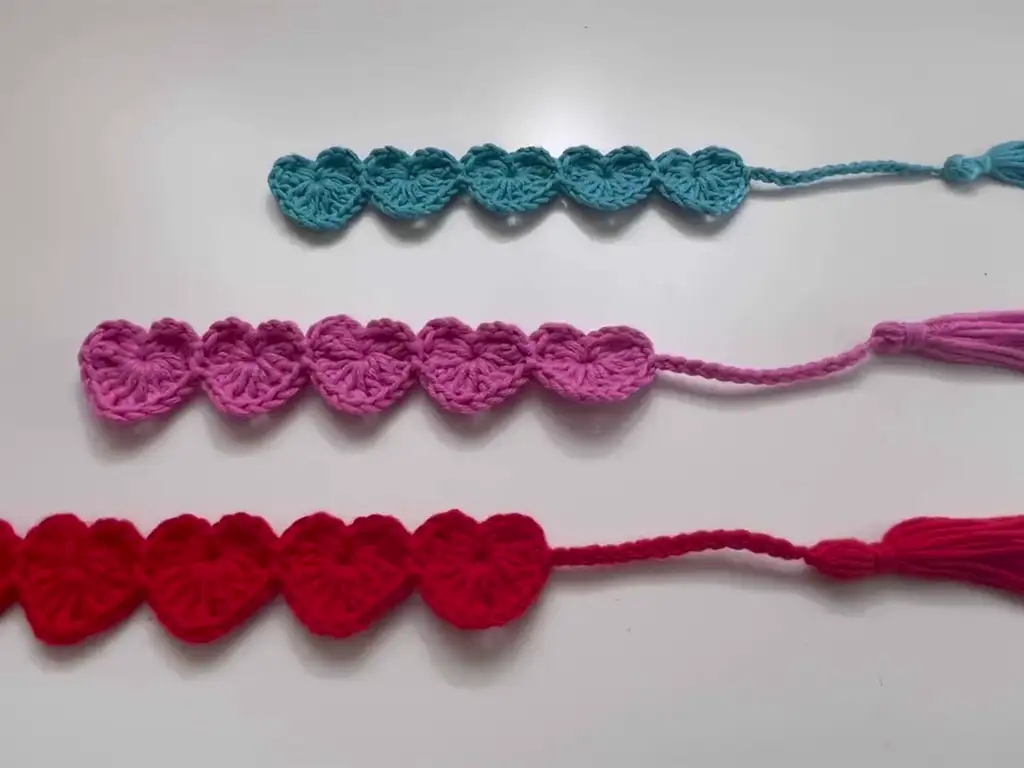
Try different colors for your hearts. You can even use variegated yarn. Change colors between rows if you want. You can use different colors for the tassel. This gives you endless options. Be creative and have fun with colors!
- Adjusting the Size: Longer or Shorter Bookmarks You can adjust the length of your bookmark. Remember the multiple of eight chains. Use more or fewer chains to change the bookmark length. Be sure to add one more chain in the end. Then, add the hearts, accordingly. You can make a long or short bookmark. It is perfect for any size book.
7. Why Choose This Heart Crochet Bookmark Pattern?
- Perfect for Beginners: Simple and Quick This easy crochet bookmark is great for beginners. The instructions are clear, and easy to follow. It’s a quick project to complete. This helps build confidence in crochet. You can learn new skills easily!
- A Unique Handmade Gift for Book Lovers This heart crochet bookmark is a perfect gift. It is thoughtful and personal. It’s great for any occasion. It shows you put time and effort into it. The book lover in your life will appreciate it!
8. FAQs About Crochet Bookmarks
- How Long Does It Take to Make a Crochet Bookmark? A beginner can finish in one to two hours. An experienced crocheter can do it faster. It’s a great project for a relaxing evening. The pattern is quick and satisfying. It does not take long to finish.
- Can I Use Thicker Yarn for This Pattern? Yes, you can. You may need a larger hook size. Adjust the hook to match the yarn. The bookmark will be a bit bigger. The stitch count will be the same. Using a different yarn will change the look.
- What Other Crochet Projects Can Beginners Try? Beginners can try simple scarves or dishcloths. These are great for building confidence. Small projects like coasters are also great. Once you know the basic stitches, try making a simple hat. You can also try making granny squares for a blanket.
9. Share Your Handmade Crochet Bookmark Creations!
- Tag Us on Social Media
We love seeing your work! Share your handmade crochet bookmark with us. Tag us on Instagram using the handle: “https://www.instagram.com/tubacrochet_ ”. Share on TikTok using the handle: “tiktok.com/@tubacrochet”. Use Facebook, too: “https://www.facebook.com/tubacrochet/ ”. Show everyone your beautiful designs!
- Join Our Crochet Community for More Ideas Connect with other crafters! Get inspired by new designs. Ask questions and share tips. Our community is here for you. This is a perfect way to make friends. Share ideas and grow together.
How to Crochet Your Heart Bookmark: A Step-by-Step Pattern
This pattern gives you all the instructions. Follow this tutorial for best results. Let’s make a beautiful crochet heart bookmark!
Materials:
- Worsted weight 100% cotton yarn.
- 2.5 mm crochet hook.
- Yarn needle.
- Scissors.
Gauge:
Gauge isn’t vital for this project. Focus on consistent tension. If your bookmark seems different than pictured, adjust the hook as you need. The finished product is about 1.5 inches wide by 7 inches long (not counting the tassel).
Stitch Abbreviations:
- ch = chain
- sl st = slip stitch
- tr = treble crochet
- dc = double crochet
Notes:
- We are using US crochet terms.
- Chain stitches don’t count as stitches at the beginning of rows, unless noted otherwise.
- Hearts are made along the base chain.
- Double crochet edges are worked on each side of the chain.
- Tassel is optional.
Pattern Instructions:
Row 1: Base Chain
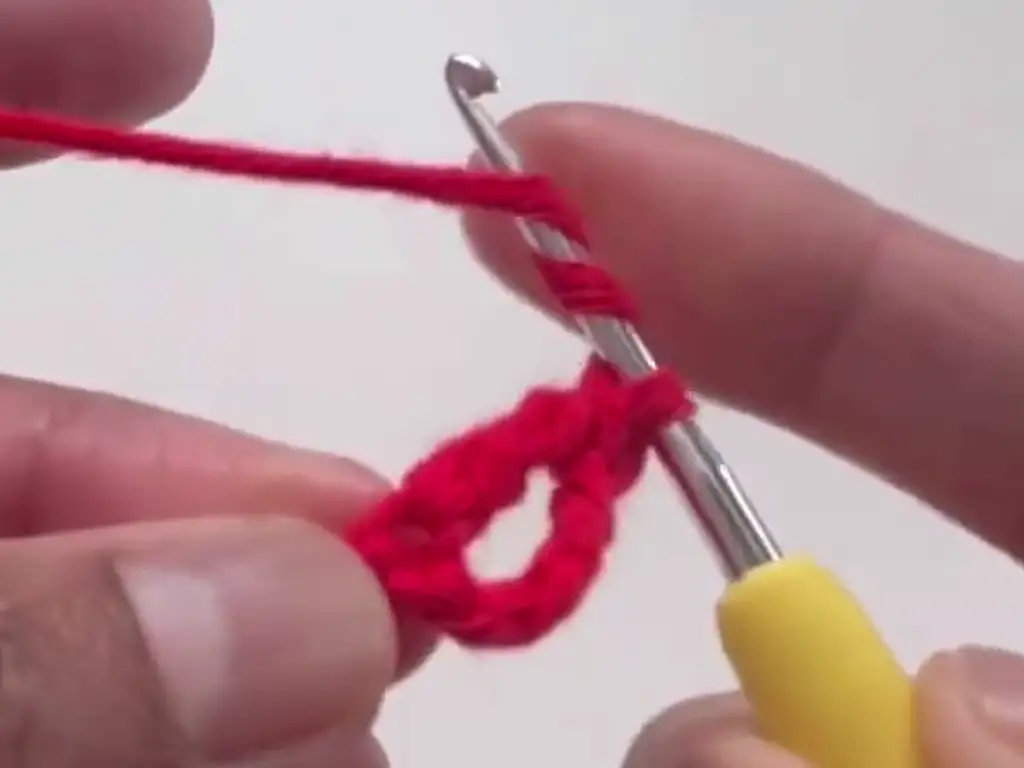
- Make a slip knot. This makes your first loop on the hook.
- Chain 41. This will form the base of your bookmark. The pattern uses a multiple of 8 chains, plus one more. Use this to adjust the length of the chain. 41 chains creates 5 hearts.
- Explanation: Hold yarn and make a loop. The tail goes over the yarn and towards you. Insert your hook into the loop and pull the working yarn through. This makes the slip knot. It attaches to the hook.
Row 2: First Heart Row
- Turn your work. Rotate your project so you’re working back along the chain.
- Skip the first 4 chains. These do not count as stitches.
- Yarn over twice (yo twice). This prepares your hook for a treble crochet.
- Insert hook into the fifth chain from the hook. Pull up a loop.
- Yo, pull through two loops. This reduces loops on the hook. Now there are three loops.
- Yo, pull through two loops again. Two loops remain on the hook.
- Yo, pull through two loops. This completes the first treble crochet.
- Yo twice. Insert hook in the same stitch as the first treble crochet. Make a second treble crochet. You have completed 2 treble crochets. They are both in the same chain.
- Chain 2.
- Insert hook into same chain. Work a slip stitch. This forms the bottom point of the heart.
- Explanation: A slip stitch is a short stitch.
- Chain 2.
- Yo twice. Insert hook in same chain and make one treble crochet.
- Yo twice. Insert hook in the same chain, and make the second treble crochet. You created the first heart.
- Skip the next 3 chains.
- Insert hook into the fourth chain. Work a slip stitch. This connects the heart shapes to the base chain.
- Repeat steps 3-15 across the chain. Repeat this until the last three chains.
- Skip last three chains.
- Insert hook in the last stitch and work slip stitch. This secures the final stitch.
- Explanation: This finishes your row of hearts.
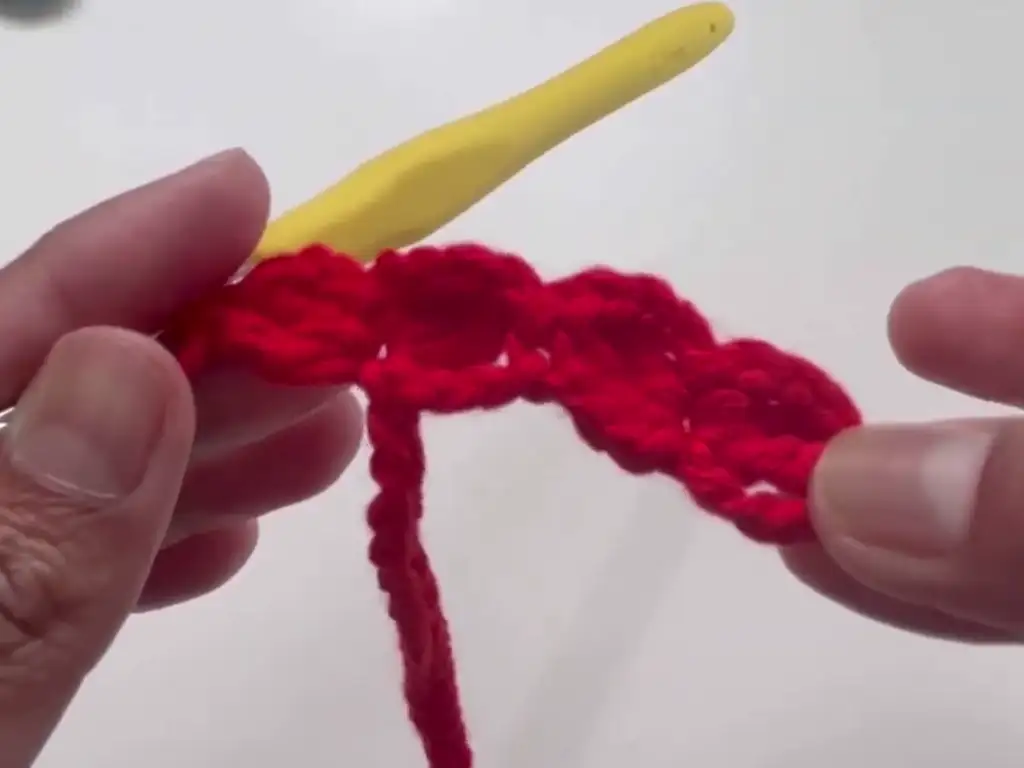
Rw 3: Double Crochet Border
- Don’t turn your work. Continue around the first chain.
- Yarn over.
- Insert hook in same chain as the last slip stitch from the previous row. Work three double crochets. This rounds the edge above the heart.
- Explanation: A double crochet is a short stitch.
- Chain 1.
- Yo twice. Insert hook in the same stitch. Make one treble crochet.
- Chain 1.
- Insert hook in same stitch. Make three double crochets.
- Skip the next 3 stitches on the base chain. This is where you connected hearts with a slip stitch.
- Insert hook in slip stitch from the previous row, make a slip stitch.
- Repeat steps 2-9 across the bottom of the chain.
- Yo, work three double crochets in the last stitch.
- Chain 1. Make one treble crochet. Chain 1. Work three double crochets into the same stitch.
- Insert hook in your first stitch. Work slip stitch.
- Explanation: This secures your final stitch and completes the border.

Finishing:
- Chain 15. This forms the tassel loop.
- Cut yarn, leave a long tail.
- Pull the yarn through the last loop and tighten.
- Thread tail onto yarn needle.
- Tassel: Wrap yarn around fingers ten times.
- Cut yarn.
- Thread needle through loop, insert in the bookmark loop.
- Secure yarn, pull through loop. Make a knot.
- Wrap yarn around tassel base for a secure knot.
- Secure with weaving and knotting.
- Trim the tassel.
- Weave in all loose ends.
Increasing and Decreasing Rows:
- Increasing: To make your bookmark wider you will add chains to the start chain. Use a multiple of eight (8, 16, 24 etc.). Remember to add one chain in the end.
- Decreasing: To make bookmark more narrow subtract chains from the start chain. Subtract multiples of eight (8, 16, 24 etc.). Remember to add one chain in the end.
Tips for Beginners:
- Take your time with the treble and slip stitches.
- Don’t worry if your first tries are not perfect.
- Use stitch markers if needed.
- Watch videos to help learn the stitches.
Tricks from the Video:
- The presenter @anutha-thecrochetworld (https://www.youtube.com/@anutha-thecrochetworld) uses the back loop when inserting the hook in Row 2.
- The presenter clearly shows how to slip stitch between hearts in Row 2.
- In Row 3, she shows how to work around the heart shape.
Download the Free PDF Pattern:
You can get the complete written pattern here: “ https://crochetstrends.com/wp-content/uploads/2025/02/Crochet-Bookmark-Pattern.pdf “ . Download it now. You can crochet offline or print it.
Do not miss out to watch the video on YouTube: “ https://www.youtube.com/watch?v=F5pu9CXW4fw “.
Be sure to share your projects on social media, like Instagram: “https://www.instagram.com/tubacrochet_ ”, on TikTok: “tiktok.com/@tubacrochet ” and on Facebook “https://www.facebook.com/tubacrochet/ ”.
Share your comments and projects below. We’d love to see what you create.
Other Crochet Projects You’ll Love
If you enjoyed this easy crochet bookmark, here are other projects you can try. Start with basic crochet squares. Crochet a simple scarf or hat. Try making dishcloths or coasters. These projects are all great for practice. These will help you explore your creativity.
Keep crocheting and enjoy the process! It’s a journey of creativity! Keep sharing your wonderful ideas.