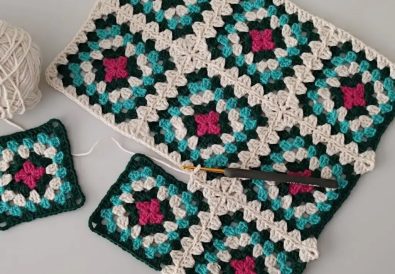
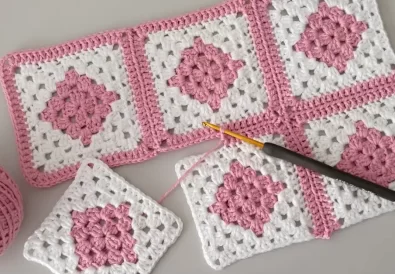
Learn how to easily join granny squares with crochet in this free, step-by-step tutorial – perfect for beginner projects!
Granny squares are those delightful, colorful motifs that are a cornerstone of crochet. They offer endless possibilities for creative blankets, bags, garments, and more. But once you’ve crocheted a beautiful collection of squares, how do you transform them into a cohesive project? The answer: joining granny squares!
This tutorial is perfect for crocheters of all levels, especially beginners. We’ll explore a simple slip stitch method for joining granny squares that creates a neat and seamless look.
Materials
Before we dive in, here’s what you’ll need:
- Granny squares: Crocheted in your desired colors and yarn type.
- Yarn: Ideally, use the same yarn as your squares for a consistent look.
- Crochet hook: A 3mm hook (or the size used to crochet your squares).
- Scissors
- Yarn needle (optional, for weaving in ends)
Understanding the Basics
Let’s quickly cover two important crochet terms used in this tutorial:
- Slip Stitch: A foundational stitch that creates a subtle connection between stitches.
- Chain Stitch: Used to create small spaces for flexibility when joining.
Step by Step Guide to Joining Granny Squares


Arrange Your Squares
Lay out your granny squares in the desired pattern. Consider color combinations and the overall design you want to achieve.
Find the Back Loops
Each crochet stitch has two loops: a front loop and a back loop. We’ll be working with the back loops for a cleaner seam.
Start Joining
- Attach your yarn to the corner of one square with a slip knot.
- Insert your hook through the back loop of the second chain from the corner in your first square.
- Insert your hook through the back loop of the second chain from the corner of your next square.
- Make a slip stitch to join them.
Continue Joining Along the Edge
- Continue making slip stitches through the opposite back loops of the second chain from the corner on each square you join.
- At the corners, work a slip stitch through both corner chains (the second and third chain from the corner) to create a secure connection.


Joining Multiple Rows
Once you complete a row of squares, start joining the next row horizontally in the same way. At the point where four squares meet, make slip stitches into the corner chains as described above.
Tips for Success
- Practice makes perfect! The joining technique will become easier and faster the more you practice.
- Maintain consistent tension. This keeps your seams even and your final project looking its best.
- Experiment with different colors! Joining with a contrasting color yarn adds a fun visual element to your project.
Ascending and Descending Rows (Optional):
This technique allows you to create a scalloped or wavy border for a decorative touch.
- Ascending Row:
- After joining the squares in a row, chain 2 (or more for a deeper scallop).
- Continue joining squares in the next row, inserting your hook under both loops of the starting chain-2 (or the top loop of additional chains) instead of the back loop.
- Descending Row:
- After joining the squares in a row, skip the first chain space in the corner.
- Insert your hook through the back loop of the second chain from the corner.
- Continue joining squares, working slip stitches through back loops as usual.
Take Your Granny Square Projects Further
The possibilities are endless with granny squares! Here are a few ideas to inspire you:
- Cozy Blankets: Perfect for snuggling on the couch.
- Vibrant Bags: Stylish and unique accessories.
- Playful Home Decor: Create cushions, throws, and more.
Watch and Learn
For a detailed visual demonstration of this joining technique, be sure to check out Tuba Crochet on YouTube at https://www.youtube.com/@TubaCrochet. Don’t miss this video specifically: https://www.youtube.com/watch?v=jOg-ATluFik It’s an excellent resource for beginners and experienced crocheters alike!
Get Social!
We love seeing your creations! Share pictures of your joined granny square projects on Instagram (https://www.instagram.com/tubacrochets?igsh=MW0wNjA2ZTcwbjUyMw==) and TikTok (tiktok.com/@tubacrochet). Use the hashtags #grannysquares #crochetlove
Conclusion
Now that you’ve mastered joining granny squares, the world of crochet is truly your oyster! Don’t be afraid to let your creativity shine. If you have questions or want to share your progress, feel free to leave a comment below. Happy crocheting!


