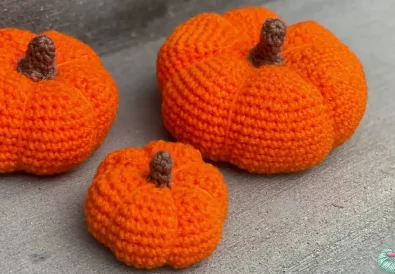
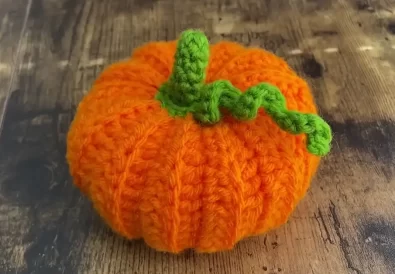
Nothing says “fall” quite like a plump, cheerful pumpkin. Why not bring that festive charm into your home with a handmade touch? In this tutorial, we’ll explore a simple and delightful crochet basket project: a lidded pumpkin basket that’s as practical as it is adorable. Whether you’re a seasoned crocheter or a complete beginner, this crochet basket pattern is easy to follow and promises a satisfying result. Get ready to add a touch of handmade warmth to your autumn decor with this delightful DIY crochet basket.
Introducing the Crochet Pumpkin Basket with Lid
Are you ready for fall? It’s time to decorate your home with cozy, handmade accents! And what better way to do that than with a crochet pumpkin basket? This delightful crochet basket design is perfect for storing yarn, trinkets, or even as a charming centerpiece on your coffee table.
This crochet basket is beginner-friendly, which means even if you’re new to crocheting, you can easily follow along and create a beautiful and functional basket. You can use it to store all kinds of goodies, from yarn and craft supplies to snacks and toys.
A Simple Crochet Basket Design for Beginners
This crochet pumpkin basket is designed to be easy to follow, even if you’ve never crocheted before. I’ll be using simple stitches and clear instructions that are easy to understand.
We’ll be creating a basket with a lid, so you can keep your belongings safe and tidy. But you can easily modify the pattern to create a basket without a lid, if you prefer.
Essential Materials and Supplies for Your Crochet Basket
Choosing the Right Yarn for Your Crochet Basket
The key to a sturdy and attractive crochet basket is choosing the right yarn. While the video tutorial utilizes Himalaya Himagurumi cotton yarn, you can use any similar weight yarn. For a softer feel, cotton blends or acrylic yarns are great options. If you want a more rustic look, consider using jute or twine.
- Color: Choose a vibrant orange for a classic pumpkin look, or experiment with different autumnal hues like cream, brown, or even a deep green.
- Thickness: Worsted weight yarn is a good choice for beginners. It’s easy to work with and creates a basket that holds its shape well.
- Material: Cotton yarn is a popular choice for baskets because it’s durable and washable. However, acrylic or cotton blend yarns are also suitable and often more affordable.
You’ll need a few basic supplies to get started on your crochet basket project:
- Yarn: Himalaya Himagurumi cotton yarn (or a similar cotton yarn) in your favorite fall colors! I used a dark brown for the stem and leaf, and a lighter brown for the basket and lid. I’ll also need a green yarn for the leaf.
- Hook: 2.75 mm crochet hook
- Scissors: For cutting the yarn
- Sewing needle: For attaching the stem and leaf


Step-by-Step Crochet Basket Tutorial
Creating the Basket Body
First, let’s create the basket body, which we’ll build with two strands of yarn together:
- Make a slip knot on your hook.
- Chain (ch) 20. (This is the height of your pumpkin—more chains mean a taller pumpkin.)
- Skip the first 3 chains.
- Work 10 double crochets (dc) in the next 10 chains (you should have 11 total dc with the starting chain).
- Work 3 half double crochets (hdc) in the next 3 chains.
- Work 2 single crochets (sc) in the next 2 chains.
- Work 2 slip stitches (sl st) in the next 2 chains.
- Chain 1, turn your work.
Secondly, let’s work Row 2:
- Work 2 sl st in the back loops of the 2 sl st from the previous row.
- Work 2 sc in the back loops of the 2 sc from the previous row.
- Work 3 hdc in the back loops of the 3 hdc from the previous row.
- Work 11 dc in the back loops of the 11 dc from the previous row.
- Work the final dc in the top loop of the last chain.
- Chain 3, turn your work.
Now that you know how to work the first two rows, we’ll repeat the pattern for a total of 26 rows. Here’s how:
- Work 11 dc in the back loops of the 11 dc from the previous row.
- Work 3 hdc in the back loops of the 3 hdc from the previous row.
- Work 2 sc in the back loops of the 2 sc from the previous row.
- Work 2 sl st in the back loops of the 2 sl st from the previous row.
- Chain 3, turn your work.
After working 26 rows, we’ll finish the basket body. Cut your yarn, leaving a long tail. Fold the piece of crochet in half, with the starting chain on one side and the last row on the other.
Work a sl st along the starting chain side and into the loops on the last row, until you reach the end of the row. This joins the sides together to create a round base.
Next, let’s work on the puckering: Cut one of the two strands of yarn. With the remaining strand, work a single crochet (sc) through the back loops along the base of the basket. This creates the puckering effect and gives the basket a nice rounded shape. Pull gently on the loop to tighten the crochet.


Making the Basket Lid
Now, let’s create the lid using two strands of yarn together:
- Make a slip knot on your hook.
- Chain (ch) 14.
- Skip the first 3 chains.
- Work 5 dc in the next 5 chains (you should have 6 total dc with the starting chain).
- Work 2 hdc in the next 2 chains.
- Work 2 sc in the next 2 chains.
- Work 2 sl st in the next 2 chains.
- Chain 1, turn your work.
Next, work Row 2:
- Work 2 sl st in the back loops of the 2 sl st from the previous row.
- Work 2 sc in the back loops of the 2 sc from the previous row.
- Work 2 hdc in the back loops of the 2 hdc from the previous row.
- Work 6 dc in the back loops of the 6 dc from the previous row.
- Work the final dc in the top loop of the last chain.
- Chain 3, turn your work.
Next, repeat the following steps for 30 rows:
- Work 6 dc in the back loops of the 6 dc from the previous row.
- Work 2 hdc in the back loops of the 2 hdc from the previous row.
- Work 2 sc in the back loops of the 2 sc from the previous row.
- Work 2 sl st in the back loops of the 2 sl st from the previous row.
- Chain 3, turn your work.
After working 30 rows, we’ll finish the lid:
- Cut your yarn, leaving a long tail.
- Fold the piece of crochet in half, with the starting chain on one side and the last row on the other side.
- Work a sl st along the starting chain side and into the loops on the last row, until you reach the end of the row. This joins the sides together to create a round lid.
- Repeat the puckering technique from the basket body at the point where you’ll attach the handle.
Adding a Charming Handle to Your Crochet Basket
Firstly, we’ll create a handle for the lid:
- Make a magic ring.
- Chain (ch) 1.
- Work 8 single crochet (sc) in the ring.
- Work a sl st into the top of the first chain.
Next, repeat the following for rows 2-7:
- Chain (ch) 1.
- Work 8 sc in the back loops of the 8 sc from the previous row.
- Work a sl st into the top of the first chain.
After working row 7, cut your yarn, leaving a long tail.
Adding the Stem and Leaf
First, use dark brown yarn to sew a small circle of stitches to the top of the lid, creating a stem shape.
Then, switch to green yarn and create the leaf:
- Make a slip knot and chain (ch) 25 (for the long leaf) or 20 (for the short leaf).
- Work 2 hdc into the third chain from the hook.
- Work 1 hdc into the next chain.
- Work 2 hdc into the next chain.
- Work 1 hdc into the next chain.
- Continue working 1 hdc and 2 hdc until you reach the end of the chain.
- Work a sl st into the top of the handle.
After making the short leaf, work a sl st into the next crochet loop on the handle. Cut the yarn.
Finally, sew the leaf and stem to the lid of the basket.


Tips for Crocheting Your Pumpkin Basket
- Yarn Selection: Choose a cotton yarn for a sturdier basket.
- Stitch Tension: Keep your stitches consistent throughout.
- Practice Makes Perfect: If you’re a beginner, practice the stitches on a scrap of yarn before starting your basket.
- Size Variations: To make a smaller basket, decrease the number of chains in the first row. To make a larger basket, increase the number of chains.
Decorating Your Finished Crochet Basket
You can personalize your crochet basket with a variety of embellishments:
- Embroidery: Add a cute face to your pumpkin using embroidery floss!
- Buttons: Sew on a few buttons for extra texture.
- Felt: Create a fun pattern using felt squares and glue.
- Ribbon: Tie a ribbon around the handle for a pop of color.
More Crochet Basket Ideas to Explore
Besides this crochet pumpkin basket, you can try other fun crochet basket designs! Consider making a:
- Crochet storage basket: Great for organizing yarn, craft supplies, or household items.
- Crochet yarn basket: A must-have for any crocheter.
- Crochet gift basket: A thoughtful and handmade gift for any occasion.
Showcasing Your Crochet Basket Design
If you’re on Instagram, TikTok, or Facebook, be sure to share photos of your crochet pumpkin basket!
Here are some ways to share your creations:
- Instagram: Tag @TubaCrochet in your posts.
- TikTok: Post a video of you creating your basket and tag tiktok.com/@tubacrochet.
- Facebook: Share your photos in the TubaCrochet Facebook group!
Don’t forget to share your crochet basket ideas and creations in the comments below! We’d love to see what you come up with!
Download the free crochet pumpkin basket pattern:
If you’d like to download a printable version of this crochet pumpkin basket pattern, you can get it for free here.
And don’t forget to check out the full video tutorial on YouTube here. Follow @TubaCrochet for more amazing crochet projects!
Get inspired by TubaCrochet’s video tutorial!
For those eager to start crocheting, here’s the complete crochet pumpkin basket pattern with lid, adapted from the video tutorial: https://www.youtube.com/watch?v=Hpnb-Ex9on0&t=466s.
Connect with TubaCrochet!
- Instagram: https://www.instagram.com/tubacrochet_
- TikTok: tiktok.com/@tubacrochet
- Facebook: https://www.facebook.com/tubacrochet/
Other Crochet Projects You’ll Love
If you enjoyed making this crochet pumpkin basket, you’ll likely love other crochet projects as well. Explore different patterns and techniques to expand your crochet repertoire.
Happy crocheting! I can’t wait to see your beautiful creations!


