
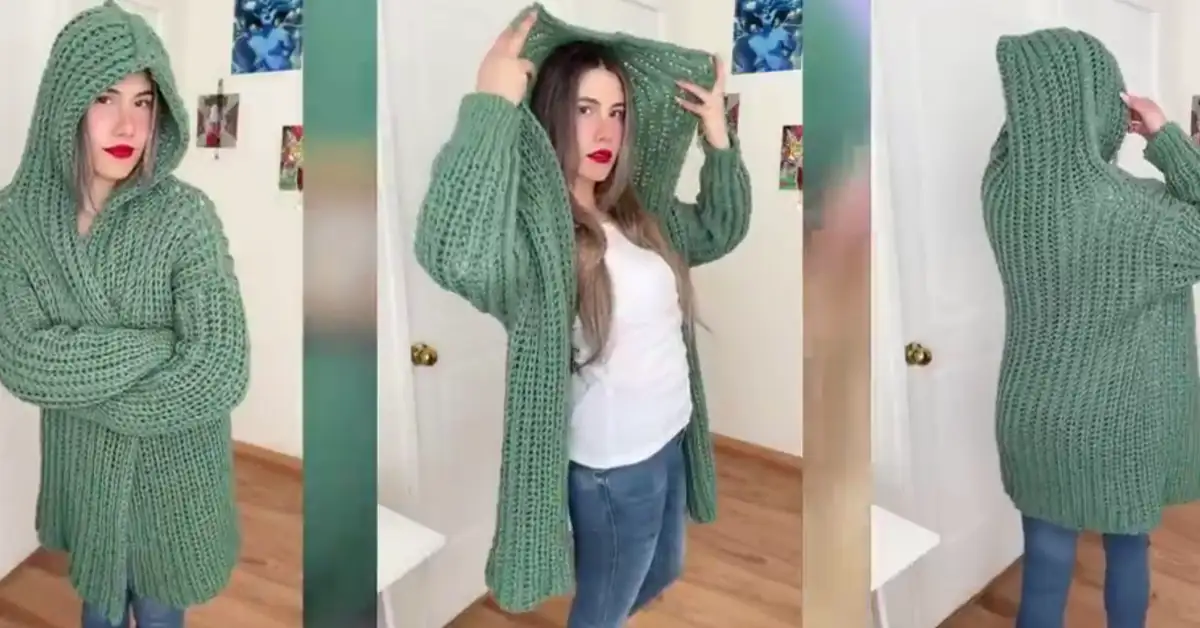
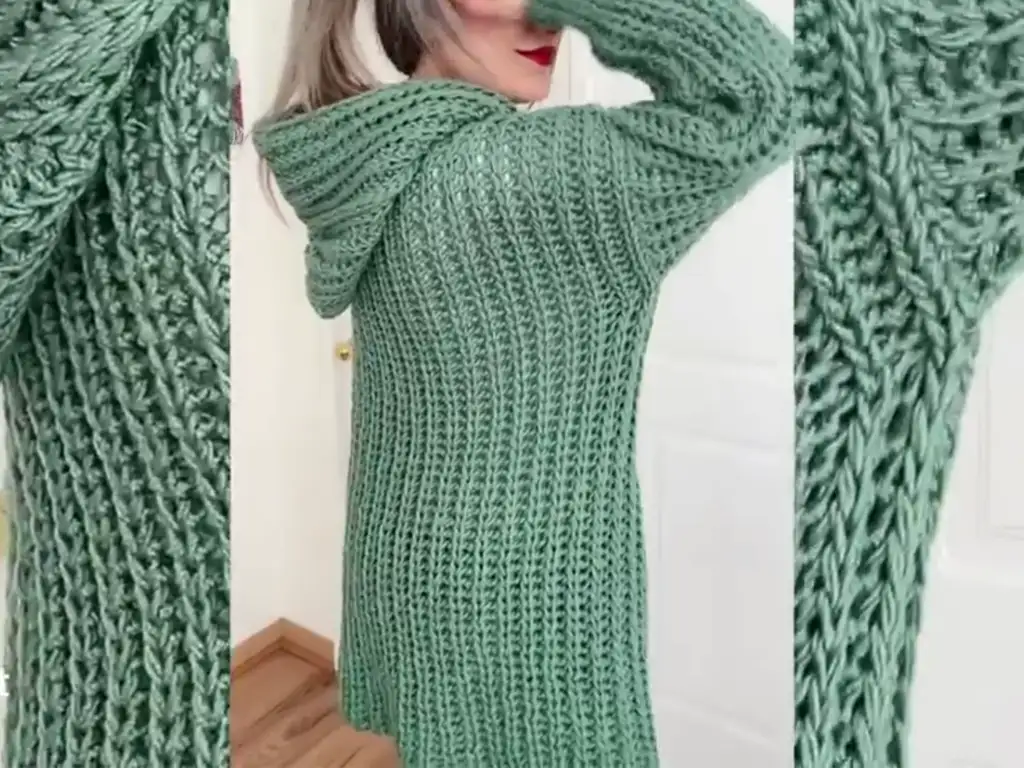
Introducing the Crochet Hooded Cardigan Pattern
Initially, let’s dive into the delightful world of crochet hooded cardigans! These versatile garments offer a unique blend of style and comfort, making them a favorite among crochet enthusiasts. Undoubtedly, a crochet hooded cardigan is a must-have addition your wardrobe.
What Makes this Crochet Hooded Cardigan Special?
This particular crochet hooded cardigan pattern stands out for its simplicity and beginner-friendly approach. Indeed, it utilizes a single stitch throughout, the half double crochet slip stitch (hdc sl st), which creates a beautifully textured fabric that resembles knitting. Overall, it’s an easy-to-follow pattern that yields impressive results, even for those new crochet.
Why Choose a Crochet Hooded Cardigan?
Crochet hooded cardigans are incredibly versatile. They can be dressed up or down, making them perfect for a variety of occasions. Besides, they provide an extra layer of warmth on chilly days while still looking chic and stylish. Most importantly, they offer that handmade touch that adds a personal and unique element your wardrobe.
Getting Started: Gathering Your Supplies
To begin with, before we embark on our crochet journey, let’s gather the necessary materials.
Essential Materials for your Crochet Hooded Cardigan
- Yarn: You’ll need approximately 1100 grams of worsted weight yarn. The sample crochet hooded cardigan used Merino Gold 200 (a blend of 51% acrylic and 49% merino wool), a delightfully soft and durable choice.
- Color: The beauty of crochet is that you can personalize your cardigan with any color you desire! Opt for a classic neutral like cream or gray, or embrace a bold hue that reflects your personality.
- Thickness: Worsted weight yarn (medium weight) is ideal for this project, as it creates a cardigan that is both warm and comfortable without being overly bulky.
- Crochet Hook: A 12mm crochet hook is recommended for a chunky, oversized look. However, if you prefer a finer gauge, you can use an 8mm hook. Specifically, adjust the hook size achieve your desired drape and gauge.
- Scissors: A sharp pair of scissors is essential for snipping yarn and weaving in ends.
- Measuring Tape: You’ll need a measuring tape ensure accurate sizing throughout the project. Specifically, you’ll be using it measure your starting chain, gauge, and various sections of the cardigan.
- Stitch Markers: Stitch markers are your best friends in crochet! Essentially, they help you keep track of your progress and mark important points in the pattern, such as the beginning of rows or specific stitch counts.
- Yarn Needle: A yarn needle is used for weaving in ends neatly and securely.
Yarn Recommendations for a Cozy Crochet Hooded Cardigan
Besides Merino Gold 200, here are some other yarn options that would work beautifully for this crochet hooded cardigan:
- Lion Brand Wool-Ease Thick & Quick: A popular and affordable choice, this yarn is soft, easy work with, and comes in a wide variety of colors.
- Bernat Softee Chunky: Another great option for a cozy cardigan, this yarn is super soft and creates a lovely drape.
- Paintbox Yarns Simply Chunky: This yarn offers a wide range of vibrant colors and a great price point.
Choosing the Right Crochet Hook for Your Project
Actually, the crochet hook size you choose will affect the overall look and feel of your cardigan. As a result, a larger hook (like the recommended 12mm) will create a looser fabric with a chunky texture, while a smaller hook (like 8mm) will result in a denser, finer gauge fabric. To illustrate, experiment with different hook sizes until you achieve the drape and stitch definition you desire.

Building Your Crochet Hooded Cardigan: A Step-by-Step Guide
Now that you know the materials you’ll need, let’s get started with the crochet hooded cardigan pattern!
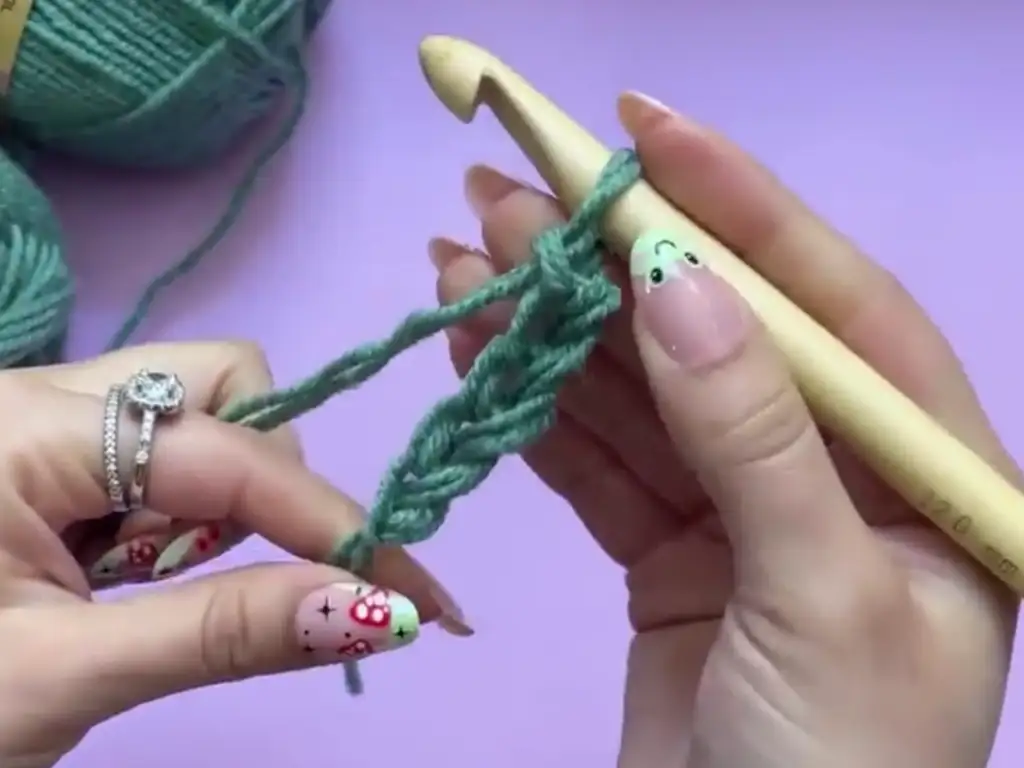
Crafting the Foundation Chain for your Crochet Hooded Cardigan
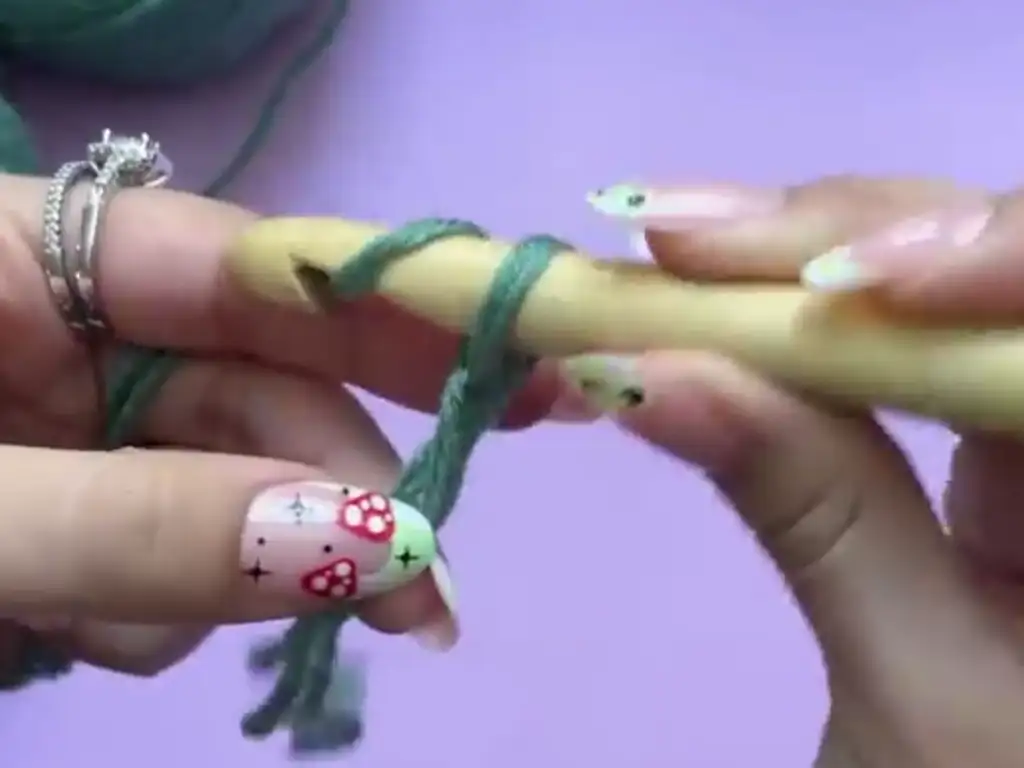
- First of all, begin by making a slip knot and placing it on your crochet hook.
- Afterward, chain 105 (or your desired length from the top of your head down your intended cardigan length).
- Important Tip: Do not stretch the chain when measuring, as this can affect the final length of your cardigan. Instead of stretching, let the chain lie naturally.
Working the Half Double Crochet (HDC) Stitch
The half double crochet (hdc) stitch is a basic crochet stitch that creates a lovely texture. It’s worked as follows:
- Yarn over (yo).
- Insert your hook into the designated stitch.
- Yo and pull up a loop (you now have three loops on your hook).
- Yo and pull through all three loops on your hook.
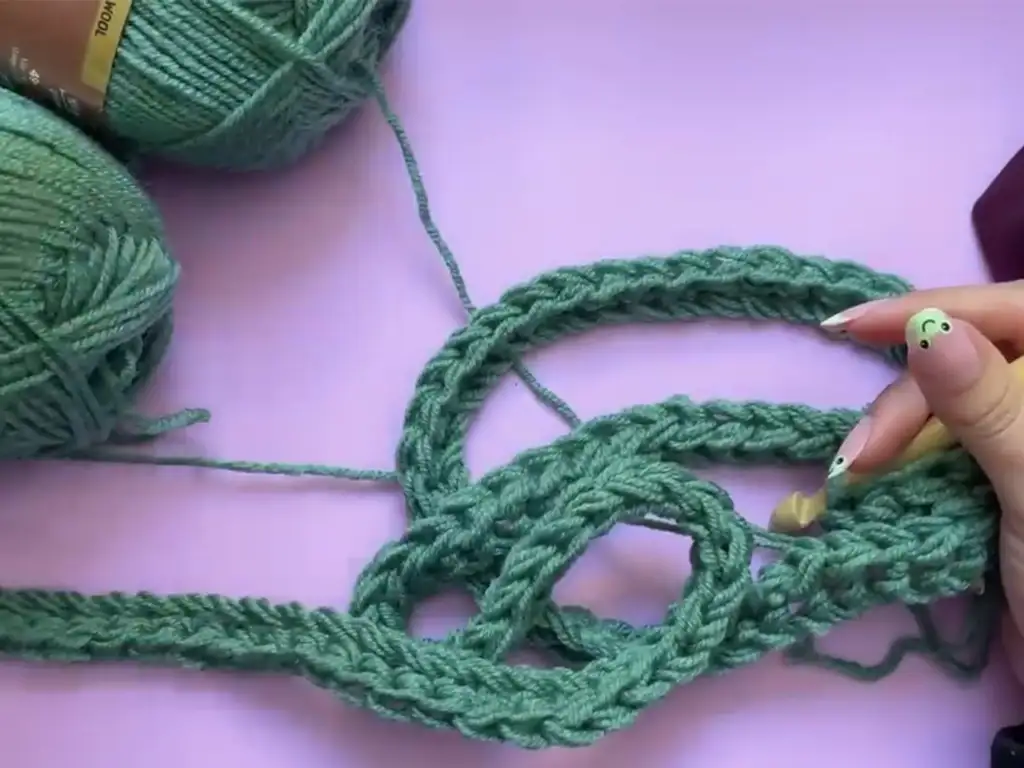
In this tutorial, we’ll be using a variation of the hdc stitch called the half double crochet slip stitch (hdc sl st). This stitch creates a denser fabric that resembles knitting. To put it another way, it adds a unique touch the cardigan.
The Half Double Crochet Slip Stitch (hdc sl st)
- Yo.
- Insert your hook into the designated stitch.
- Yo and pull up a loop (three loops on hook).
- Instead of yarning over and pulling through all three loops, you’ll yarn over and pull through only the first two loops on your hook (two loops remaining).
- Yarn over and pull through the remaining two loops on your hook.

Shaping the Hood of Your Crochet Hooded Cardigan
After that, you’ll begin shaping the hood of your cardigan. This involves strategically placing stitch markers and working only a portion of each row. Consequently, this creates the opening for the hood.
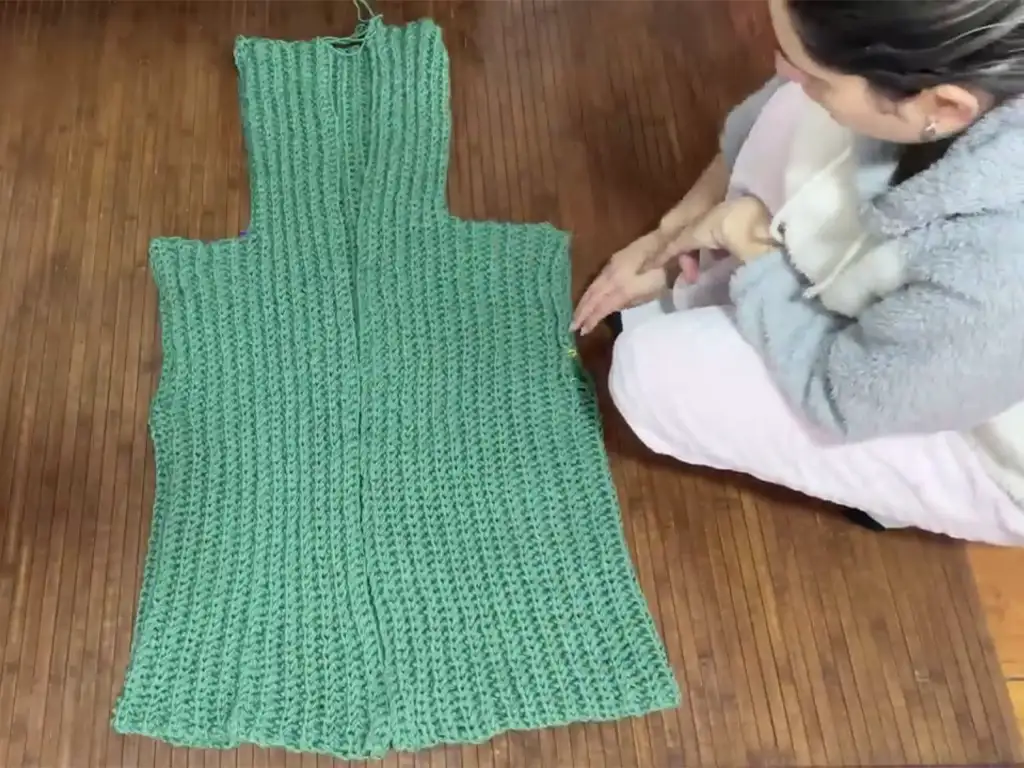
Creating the Front and Back Panels of Your Crochet Hooded Cardigan
Subsequently, you’ll continue working in rows create the front and back panels of the cardigan. In addition to working in rows, you’ll be following specific measurements ensure the cardigan fits properly.
Shaping the Shoulders and Armholes
Likewise, shaping the shoulders and armholes involves creating strategic openings for the sleeves. You’ll achieve this by chaining a specific number of stitches skip a section of the row before continuing with the hdc sl st.
Completing the Back Panel
To begin, the back panel is the largest section of the crochet hooded cardigan. You’ll continue working in rows until it reaches the desired length.
Forming the Second Shoulder and Armhole
Moving on, you’ll repeat the shoulder and armhole shaping on the other side of the back panel ensure symmetry.
Finalizing the Front Panel
To wrap up the body of the cardigan, you’ll mirror the steps you took for the first front panel create the second front panel.
Seaming the Crochet Hooded Cardigan Together
Lastly, it’s time bring all the pieces together! You’ll fold the cardigan in half and seam the shoulders and hood edges using slip stitches or a yarn needle.
Crafting the Crochet Cardigan Sleeves
Now, let’s move on making the sleeves for your crochet hooded cardigan.
Getting Started with the Crochet Sleeve
To start, you’ll begin each sleeve with a foundation chain and then work a few rows of slip stitches create the cuff.
Completing the Crochet Sleeve
Afterward, you’ll transition hdc sl st and continue working in rows until the sleeve reaches the desired length and width.
Attaching the Sleeves Your Crochet Cardigan
Finally, you’ll carefully attach the sleeves the armholes of the cardigan, ensuring a snug and comfortable fit.
Finishing Touches for Your Crochet Hooded Cardigan
To sum up, a few finishing touches will give your crochet hooded cardigan a polished and professional look.
Weaving in the Ends
In short, weaving in the ends is an important step that ensures your cardigan looks neat and tidy. To illustrate, use a yarn needle thread the ends through the fabric, securing them discreetly.
Adding a Finishing Touch Your Crochet Hooded Cardigan
Certainly, you can add a personal touch your crochet hooded cardigan with optional embellishments. For instance, consider adding buttons, a decorative edging, or even pockets!
Creative Ideas for Your Crochet Hooded Cardigan
Let’s get started with some creative ideas personalize your crochet hooded cardigan.
Exploring Different Yarn Colors and Textures
To begin with, don’t be afraid experiment with different yarn colors and textures. In fact, a variegated yarn can add a beautiful depth and dimension your cardigan, while a textured yarn can create a unique tactile experience.
Designing Your Own Unique Crochet Hooded Cardigan Styles
In addition to exploring yarns, you can also customize the cardigan‘s design. For example, you could make it longer or shorter, add a collar, or experiment with different sleeve styles.
Incorporating Interesting Stitch Patterns into your Crochet Hooded Cardigan
As well as exploring yarns, you can also add visual interest your cardigan by incorporating different stitch patterns. To illustrate, consider adding a cable panel, a lace border, or even a textured stitch throughout the body.
Crochet Hooded Cardigan FAQs
Introducing some frequently asked questions about crochet hooded cardigans.
What’s the Best Yarn Weight for a Crochet Hooded Cardigan?
Worsted weight yarn (medium weight) is generally the best choice for a crochet hooded cardigan. It provides a good balance of warmth and drape. Nonetheless, you can experiment with other yarn weights achieve different effects. For instance, a bulky weight yarn will create a chunky and cozy cardigan, while a sport weight yarn will result in a lighter and more delicate garment.
How Do I Adjust the Size of My Crochet Hooded Cardigan?
You can adjust the size of your crochet hooded cardigan by changing the number of chains in your foundation chain and the number of rows you work. Moreover, you can also adjust the width of the cardigan by increasing or decreasing the number of stitches in each row. To sum it up, refer the pattern instructions for specific guidance on sizing adjustments.
What are Some Tips for Beginners Crocheting a Hooded Cardigan?
If you’re a beginner, crocheting a crochet hooded cardigan can seem like a daunting task. However, it’s actually a lot easier than it looks.
Here are a few tips to help you get started:
- Start with a simple pattern. The crochet hooded cardigan pattern used in this tutorial is a great choice for beginners.
- Practice the hdc stitch. This stitch is the foundation of this cardigan, so make sure you’re comfortable with it before you start.
- Follow the pattern carefully. It’s easy to make mistakes if you’re not paying attention to the pattern. Take your time and double-check your work frequently.
- Don’t be afraid to ask for help. There are many resources available online and in craft stores that can help you with your crocheting.
- Have fun! Crocheting should be enjoyable. Don’t get discouraged if you make mistakes. Simply learn from them and keep practicing.
Written Pattern for Crochet Hooded Cardigan:
Materials:
- Merino Gold 200 yarn (or a similar worsted weight yarn) in desired color
- 12mm crochet hook (or 8mm for a finer fabric)
- Scissors
- Yarn needle
- Stitch markers
- Measuring tape
You can download the PDF version of the written pattern for the Crochet Hooded Cardigan Pattern here for free:
Gauge:
Gauge isn’t as crucial for this project since it’s primarily shaped with measurements. However, a general guide is around 10 hdc stitches and 7 rows within a 10cm square.
Abbreviations:
- ch: chain
- hdc: half double crochet
- sl st: slip stitch
- st(s): stitch(es)
- rnd: round
- rep: repeat
- beg: beginning
Sizing:
This pattern is designed for a relaxed fit, so feel free to adjust the initial chain length for a wider or narrower finished garment. The sample measurements in this pattern are based on the video’s description, with the finished crochet cardigan reaching a little above the knee.
Initial Chain:
- For a sample size (like the video), start with a chain of 150cm (approx 59 inches).
Adjusting Size:
- If you want a shorter crochet hooded cardigan, reduce the length of the initial chain and subsequent measurements.
- If you want a wider crochet hooded cardigan, increase the initial chain and follow the increasing/decreasing instructions within the pattern proportionally.
Instructions:
Body:
- Beginning Chain:
- Using two strands of yarn, make a foundation chain of 150cm.
- Place a stitch marker in the first chain.
- Row 1:
- ch 1, skip the first ch from the hook, insert your hook in the second ch from the hook.
- Yarn over and pull up a loop.
- Yarn over and pull through 2 loops on your hook.
- HDC in each ch across the row.
- You’ll have approximately 150 hdc sts.
- Insert stitch marker in the last st.
- Turn.
- Row 2:
- Ch 1, HDC in the back loop of each st across the row.
- Insert stitch marker in the last st.
- Turn.
- Rows 3-15:
- Continue working in hdc, placing stitch markers at the end of each row.
- This builds up the hood and the front/back body portion.
- The finished height here should measure 15cm (approx 6 inches).
Shoulder Shaping:
- Row 16:
- Ch 1, HDC in the back loop of each st across until you have 30 sts remaining on your hook.
- Insert stitch marker in the last st.
- Skip the next 30 sts.
- HDC in the remaining sts on the hook.
- Insert stitch marker in the last st.
- Turn.
- Row 17-28:
- Ch 1, HDC in the back loop of each st across, maintaining the shoulder opening and the shoulder section.
- Insert stitch marker in the last st.
- Turn.
- You’ll continue creating hdc stitches in the back loop of each st along the shoulder.
- The finished height of the shoulder section should measure 15cm (6 inches).
Armhole Shaping:
- Row 29:
- Ch 1, HDC in the back loop of each st across until you have 30 sts remaining on the hook.
- Insert stitch marker in the last st.
- Skip the next 30 sts.
- HDC in the remaining sts on the hook.
- Insert stitch marker in the last st.
- Turn.
- Row 30:
- Ch 1, HDC in the back loop of each st across until you reach the end of the shoulder.
- Skip the remaining sts.
- Ch 13 (this will equal the skipped sts).
- HDC in the remaining sts on the hook.
- Insert stitch marker in the last st.
- Turn.
Back Panel:
- Row 31-56:
- Ch 1, HDC in the back loop of each st across the entire row.
- Insert stitch marker in the last st.
- The finished height of the back panel should be 30cm (approx 12 inches).
- Turn.
Second Shoulder Shaping:
- Row 57-68:
- Repeat Row 16-28, decreasing 30 stitches at the beg and end of the row.
- Continue creating hdc stitches in the back loop of each st along the shoulder, just like before.
Second Armhole Shaping:
- Row 69-70:
- Repeat Row 29-30, omitting stitches in the same way.
- Skip 30 stitches at the start and end of the row, and then chain 13 stitches to connect the shoulder to the opposite side.
Front Panel:
- Row 71-86:
- Ch 1, HDC in the back loop of each st across until you reach the end of the second shoulder.
- Ch 30 to match the earlier skipped stitches.
- HDC in the remaining sts on the hook.
- Insert stitch marker in the last st.
- The finished height of this section should match the first section, which measures 15cm (approx 6 inches).
- Turn.
Finishing the Body:
- Seaming:
- Fasten off.
- Weave in the ends.
- With a tapestry needle, seam the shoulders together using sl st.
- Seam the front and back pieces together along the front and side edges, using sl st to join the two pieces.
Sleeves:
- Sleeve 1:
- Ch 45 (adjust this for your desired sleeve length).
- Row 1: Ch 1, HDC in the second ch from the hook, and in each ch across.
- Row 2: Ch 1, HDC in the back loop of each st across.
- Repeat Row 2 until the sleeve reaches your desired length.
- Note: Use your arm as a guide.
- Attach sleeve to the armhole of the body.
- Sleeve 2:
- Repeat Sleeve 1.
- Attach sleeve to the second armhole.
Hood:
16. Hood Seaming:
* With a tapestry needle and yarn, seam the edges of the hood together.
Finishing:
- Weaving in ends:
- Weave in all remaining yarn ends.
Tips for Color Changes and Variations:
- For a color-blocked crochet hooded cardigan, introduce a new color of yarn at the end of a row, continuing with that color for a certain number of rows.
- For a striped crochet hooded cardigan, introduce a new color of yarn at the start of each row or every other row.
- Use your creativity and create your own fun, colorful color combos!
Want to Watch the Video Tutorial?
If you prefer a visual guide, you can watch the original video tutorial by @Hebrascrochet here:
Share Your Crochet Projects!
I’d love to see your creations! Feel free to share photos of your crochet hooded cardigans on Instagram, TikTok, or Facebook:
- Instagram: https://www.instagram.com/tubacrochet_
- TikTok: tiktok.com/@tubacrochet
- Facebook: https://www.facebook.com/tubacrochet/
Community Interaction
Do you have any questions or tips for others working on this crochet hooded cardigan? Feel free to share in the comments below! I love seeing your creativity and helping you grow as a crocheter.
Other Crochet Projects You’ll Love
Besides this crochet hooded cardigan, here are a few other crochet projects you might enjoy:
- Crochet Blanket Patterns: Create a cozy and beautiful blanket for your home.
- Crochet Shawl-Scarf: Perfect for adding a pop of color and warmth to any outfit.
- Crochet Hat: Keep your head warm and stylish during the colder months.
Conclusion
In conclusion, this crochet hooded cardigan pattern is a great way to create a cozy and stylish crochet hooded jacket for yourself or as a gift. Because it is a relatively easy pattern, it’s perfect for beginners and those new to crochet. Moreover, it allows for a lot of creative freedom, so you can customize it to fit your personal style.
Now that you have the pattern and instructions, you’re ready to get started. Remember to have fun and enjoy the process of creating something beautiful with your hands. Specifically, don’t be afraid to experiment with different colors and techniques. It’s a great way to express your creativity and make something truly unique.
Happy crocheting, and I can’t wait to see your finished crochet hooded cardigans!
Channel Link:
https://www.youtube.com/@Hebrascrochet
I hope you found this blog post helpful and inspiring! Happy crocheting!


