Hey there, fellow yarn enthusiasts! Are you ready to add a touch of handmade charm to your fall essentials? Or maybe you’re searching for that perfect little handmade gift idea? Well, you’ve come to the right place! In this tutorial, we’re diving into the wonderful world of amigurumi — specifically, how to crochet the most adorable little pumpkin keychain. Don’t worry if you’re a beginner; this project is super easy and oh-so-satisfying!
Crafting Your Crochet Keychain: Pumpkin Edition
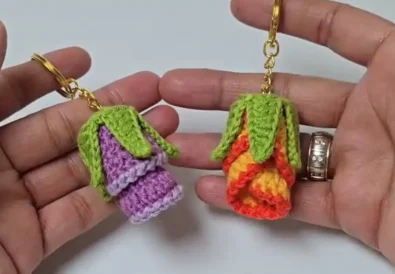
In this tutorial, we’re diving into a fun, fall-themed project—a Crochet Pumpkin Keychain! This delightful amigurumi pumpkin is the perfect accessory to welcome autumn and is easy enough for beginners. It’s a simple and quick DIY that’ll add a touch of handmade charm to your keys or bags. Whether you’re new to crochet or looking for a new seasonal craft, this crochet keychain is a great place to start. Moreover, it makes for an adorable gift or can even be part of your fall decor!
What You’ll Need for Your Crochet Keychain
Let’s talk materials. For this project, we’re working with cotton yarn, which is both durable and soft—ideal for keychains that get frequent use. You’ll need the following:
- Main yarn: Cotton yarn in pumpkin orange (DK weight)
- Stem yarn: Cotton yarn in green or brown (DK weight)
- Hook size: 2.5mm crochet hook
- Fiberfill stuffing: For shaping the pumpkin
- Keychain clip: A sturdy one to attach to your pumpkin
- Scissors, needle, and stitch marker for added convenience
This combination of yarns and tools will help create a perfect little pumpkin, but feel free to switch up the colors to match your personal style. You could even make a whole patch of multicolored pumpkins!
Why You’ll Love this Design
What’s great about this pumpkin keychain design is that it’s beginner-friendly but also versatile enough for more experienced crocheters to enjoy. Fall crochet projects like this are quick and satisfying, and once you get the hang of it, you can finish the entire keychain in no time. The crochet pumpkin keychain also allows you to play around with color—think whites for ghost pumpkins or deep reds for an autumnal look!
Your Pumpkin Keychain Journey Begins
Now that you’re excited about this pumpkin keychain, let’s begin!
Getting Started with Your Crochet Keychain Pattern
The foundation of any crochet keychain is your starting chain. We’re keeping it simple, and I’ll walk you through each step in this crochet tutorial. If you’re new to crochet, this is the perfect opportunity to practice some of the most basic stitches, such as the chain stitch and half double crochet.
Chain Stitch Foundation
To begin with, start by making 18 chains. This will form the base of your pumpkin. If you want your pumpkin to be taller, you can add more chains in multiples of two, but for this tutorial, we’re sticking to 18.
Chain stitch is one of the most fundamental crochet techniques. You’ll start with a slipknot, then yarn over and pull through the loop. Repeat until you have 18 chains, and keep them fairly loose—about 8 cm in length.
Understanding the Stitch Count
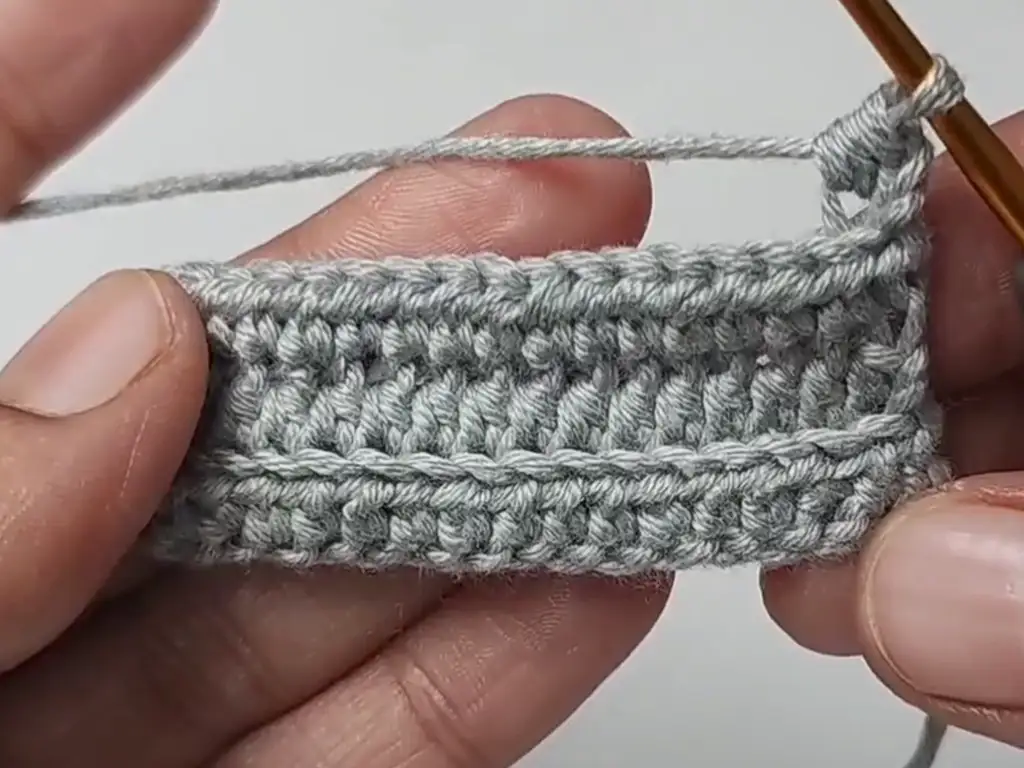
From this point, you’ll work in rows of half double crochet (HDC). In this crochet pumpkin pattern, the stitch count remains consistent across the rows, which helps keep things easy to follow, even for beginners. We’ll use half double crochet stitches throughout this pattern, so once you master this, you’re good to go!
Creating Your First Rows
For the first row, you’ll be working 16 half double crochets. Skip the first two chains from the hook and start in the third chain. By the end of this row, you’ll have a nice even strip that will form the start of your pumpkin keychain.


Creating the Crochet Pumpkin Keychain Body
The body of the crochet pumpkin keychain is created by repeating rows of half double crochet. This gives it a nice texture and structure, perfect for a pumpkin!
Half Double Crochet Magic
The half double crochet (HDC) is a great stitch for beginners because it’s a bit taller than a single crochet but not as loose as a double crochet. To make this stitch, yarn over, insert the hook, pull up a loop, yarn over again, and pull through all three loops on the hook.
Repeat this across each row of your crochet pumpkin keychain.
Building the Pumpkin Body
Now, repeat the rows. Work in back loops only (BLO) for that signature pumpkin texture. You’ll do this for a total of 18 rows. Keep turning your work after every row to ensure it’s even.
Row Repetition & Pattern
As you continue crocheting, you’ll notice the horizontal ridges forming—this is key to achieving the classic pumpkin keychain look. These ridges create the distinct “nodes” of the pumpkin when it’s gathered and stuffed later on.
Achieving the Perfect Size
Your rectangular piece should be about 13 cm tall after completing the 18 rows. If you want a smaller pumpkin, try reducing the number of rows, but keep it an even number (12, 14, or 16 rows) to maintain the pumpkin’s symmetry.


Assembling Your Crochet Keychain: Pumpkin Perfection
With the rectangle done, it’s time to turn this flat piece into a pumpkin keychain!
Folding & Seaming the Pumpkin
Fold the rectangle in half and use a slip stitch to seam the two edges together. This will form a cylinder. Make sure to use the back loops of the half double crochet stitches for a seamless join.
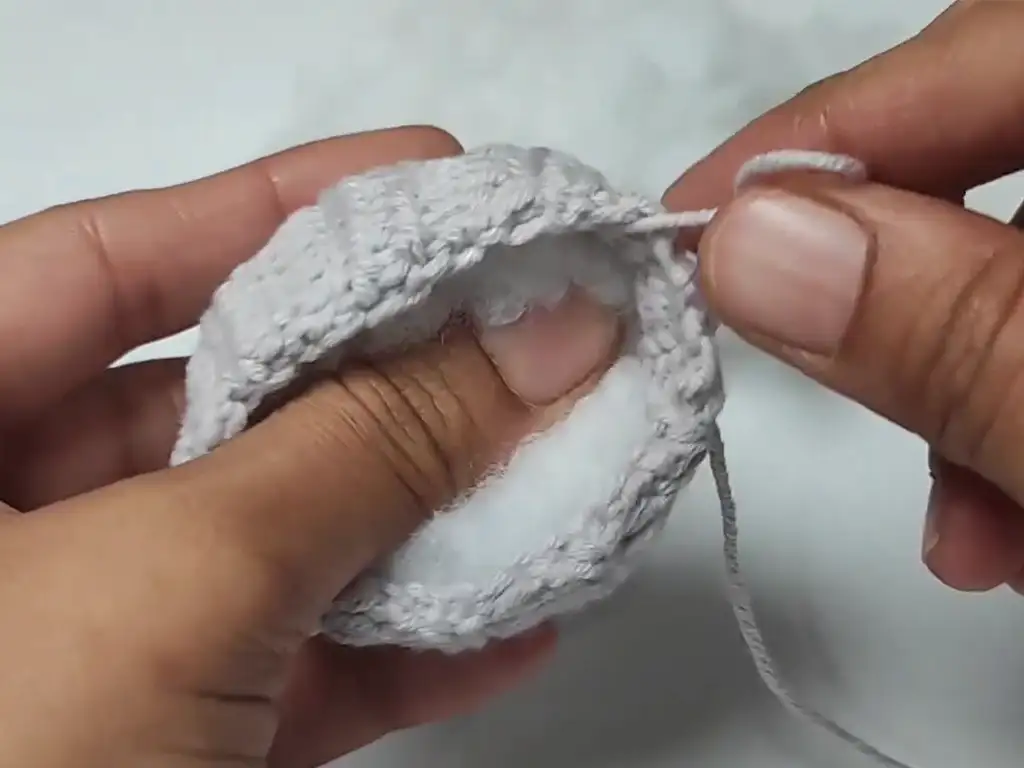
Crochet Keychain: Stuffing & Shaping
Now, take the open end of the cylinder and weave your yarn through the stitches to close it. Pull tight to form the top of your pumpkin, and then fill the body with fiberfill. Don’t overstuff—it should feel firm but squishy!
Creating the Defined Nodes
This is where the magic happens! After stuffing, weave your yarn through the top loops again to close the bottom of the pumpkin. Pull it tight and wrap the yarn around the pumpkin to create those signature nodes. You’ll want about six or eight ridges, depending on how many rows you worked.
Finishing Touches for Your Crochet Keychain
Your crochet pumpkin keychain is almost ready, but we can’t forget the stem!
Crochet Keychain: Making the Adorable Stem
The stem is created using single crochets. Start with a magic ring and crochet eight single crochets into it. Join the round with a slip stitch and continue working in rounds, alternating between increasing and single crochets to form a slightly tapered stem.
Crochet Keychain: Attaching the Stem
Sew the stem securely onto the top of the pumpkin. You can choose to sew it in the middle or slightly off-center, depending on the look you want.
Crochet Keychain: Adding the Keychain Ring
Lastly, attach your keychain clip to the top of the pumpkin. Use a sturdy jump ring or directly attach it to the top of the stem. And voilà—your DIY crochet keychain is complete!


More Crochet Keychain Ideas & Inspiration
Finished your pumpkin keychain? Why stop there? There are endless possibilities for creating crochet keychain variations.
Beyond the Pumpkin: Crochet Keychain Variations
Consider making a tiny crochet ghost, apple, or even a mini sunflower to match your pumpkin. Seasonal crochet amigurumi keychains make great gifts and fun projects.

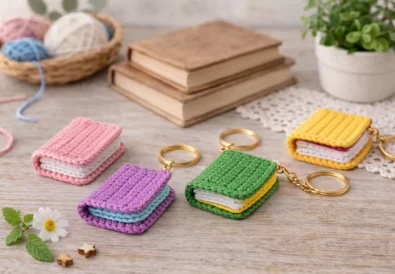
Crochet Keychain: Gift Ideas & Uses
These keychains make perfect gifts for friends, family, or teachers. They can also be used as bag charms, zipper pulls, or even stocking stuffers during the holidays.
Crochet Keychain: Where To Find More Patterns
Looking for more patterns? Visit @TubaCrochet on YouTube here for additional tutorials. Don’t forget to check out her video on how to crochet this pumpkin here.
Other Crochet Projects You’ll Love
- Easy Crochet Pumpkin Pattern for Beginners
- Crochet Sunflower Pattern
Conclusion
To wrap up, this Crochet Pumpkin Keychain is a fun, beginner-friendly project that offers so many possibilities for customization. With this free crochet pattern, you can create a simple, handmade keychain that’s perfect for fall, gift-giving, or just adding a little personal touch to your keys. Ultimately, the best part is that once you’ve mastered the crochet pumpkin keychain, you’re ready to take on even more creative crochet keychain ideas.
Don’t forget to share your finished projects with us on Instagram here, TikTok here, and Facebook here. We can’t wait to see your amazing creations! Download the Crochet-Keychain-Pattern here and start crocheting your own keychains today!