Crocheting is a craft full of creativity and versatility, and today, we are diving into one of the most fun and satisfying designs you can make: the crochet puff stitch keychain. This simple, quick, and beginner-friendly project combines the magic of the crochet puff stitch with the charm of a personalized, handmade accessory. Whether you’re looking to add a fun accessory to your bag, create a thoughtful gift, or simply practice new crochet techniques, this crochet keychain pattern is the perfect project.
In this tutorial, you will learn everything you need to know to make your very own crochet puff stitch keychain from start to finish. We’ll walk through each step, discuss materials, and provide tips to make sure your keychain turns out perfectly. The beauty of this design lies in its simplicity, making it accessible for crocheters of all skill levels, especially beginners. Let’s get started and bring some crochet magic into your day!

Why a Crochet Puff Stitch Keychain?
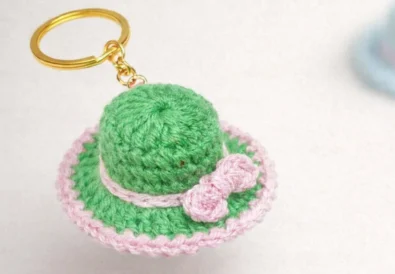
This crochet puff stitch keychain is so charming. It is also very functional! It adds a touch of handmade love. You can attach it your keys or bag. This project is fantastic. It is quick, satisfying, and perfect for beginners. It also makes a thoughtful gift. The finished design is so soft and squishy. It is irresistible.
Why Choose This Easy Crochet Project?
First of all, have you ever wanted a fun, quick project? Something you can start and finish in an afternoon? This easy crochet project is perfect! In addition, it is ideal for crocheters of all levels. Especially beginners. This project is for you! It introduces you to the wonderful world of crochet stitches. Specifically the crochet puff stitch. Moreover, it’s a fantastic way to use up those yarn scraps. In fact, you can make several keychains from just one skein! You will really enjoy this.
The Charm of Handmade Crochet Gifts
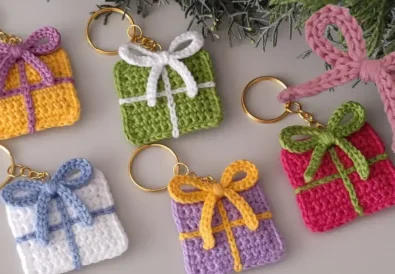
Secondly, handmade gifts have a special touch. Indeed a handmade crochet keychain is a thoughtful present. It’s unique, and shows you care. It is practical, too. As a result, this makes it a perfect gift for friends, family, or even yourself! Besides, who doesn’t love a cute accessory for their keys or bag? To put it another way, it’s a small project with a big impact. In other words, it’s the perfect combination of fun, creativity, and practicality! Overall, it is such a great way to show someone you care.
Getting Started: Materials for Your Easy Crochet Keychain
To begin, gather your materials.
Materials:
- Yarn:
- Type: Worsted weight yarn (medium weight) is recommended.
- Colors: The original design uses two colors. The example: Color A is purple, Color B is green. Feel free to get creative with your color choices!
- Fiber: Acrylic, cotton, or a blend will work well.
- Thickness: Look for a weight category of 4 (medium).
- Crochet Hook:
- Size: G/4.0mm or H/5.0mm crochet hook. Use a hook that’s appropriate for your chosen yarn weight. A smaller hook creates a tighter weave. That is great for this project.
- Keychain Clip:
- Size: Approximately 1 inch.
- Type: You can find these at craft stores or online.
- Scissors: For cutting yarn.
- Yarn Needle: For weaving in ends.
Essential Yarn Choices for Your Project
First, let’s talk yarn! For this project, you’ll want a worsted-weight yarn. In other words, a medium-weight yarn. This ensures your keychain is sturdy. Yet still soft. Although you can use any fiber, acrylic or cotton are great. They are durable and come in tons of colors! Don’t be afraid to mix and match colors. In addition to creating unique combinations. Therefore, choose colors that make you happy! Ultimately, your yarn choice can really personalize your keychain.
Picking the Right Crochet Hook and Tools
Next, your hook! A size G/4.0mm or H/5.0mm hook is a good starting point. However, always check the yarn label. The label can guide you for the hook size. Although a smaller hook than usual is ideal. It creates a tighter weave for this project. A yarn needle is also essential. You will need it for weaving in those ends. Of course, a pair of scissors is a must-have. To sum it up, gather your tools, and you’re ready to go.
The Magic of the Puff Stitch: Learn the Basic Technique
The puff stitch is the star here. It’s all about creating a fluffy texture. This stitch adds depth to the design. Learning this stitch might seem tough. I assure you, it’s not hard at all! Let’s explore the basics and the details now.
What is a Crochet Puff Stitch?
Before we dive into the pattern, let’s learn about the star: the puff stitch. The crochet puff stitch is a textured stitch. It creates a “puffy” or raised look. To put it another way, it’s like a little cloud of yarn! In fact, it’s easier than it looks. It involves yarn overs and pulling up loops. All done in a single stitch. In this tutorial, we’ll break it down step-by-step. Undoubtedly, you will find it fun to learn.
Simple Instructions for Learning the Puff Stitch
Let’s start with the basics. 1. Yarn over. 2. Insert your hook into the stitch. 3. Yarn over again. 4. Pull up a loop. You will repeat these steps within the same stitch. In the same way, you create multiple loops on your hook. The number of loops determines the puffiness. For instance, more loops make a bigger puff. Once you have enough loops, yarn over. Then, pull through all loops on the hook. Finally, chain 1. That closes the puff stitch.
How to Increase Your Puff Stitches
To illustrate increasing with puff stitches is simple. You could add an extra chain space between puffs. You could also work two puff stitches into the same chain space. Separate them by a chain. This will add extra puff stitches. In short, it will make the circle wider.
Practice Makes Perfect: Try a Swatch
Before starting the keychain, practice the puff stitch. Make a small swatch. This helps you get comfortable with the technique. It also helps you adjust your tension. To begin with, chain a few stitches. Then, work several rows of puff stitches. Most importantly, focus on making them consistent. Don’t worry if they’re not perfect at first. Keep practicing, and you’ll get the hang of it! Indeed, practice makes perfect.


Step-by-Step Crochet Puff Stitch Keychain Tutorial
Now for the main event! Let’s crochet a keychain together.
Written Pattern:
Note: This pattern uses US crochet terms.
Abbreviations:
- ch: chain
- sc: single crochet
- sl st: slip stitch
- st: stitch
- sts: stitches
- [ ]: repeat instructions within brackets as many times as directed.
Special Stitch:
- Puff Stitch (puff): Yarn over, insert hook into indicated stitch, yarn over, pull up a loop. [Yarn over, insert hook into same stitch, yarn over, pull up a loop] 3 more times for a total of 4 times, resulting in 9 loops on the hook. Yarn over and pull through all 9 loops on hook. Chain 1 to close the puff stitch. The number of times you repeat the [ ] will change to create different size puff stitches.
Gauge:
Gauge isn’t crucial for this project. But if you want to make sure it turns out the right size, aim for about 4 single crochets and 4 rows to equal 1 inch. You can adjust your hook size up or down to reach the desired tension. For this project, it’s best to use a smaller hook than usual to create a tighter weave.
Creating the Magic Circle Base
First Circle (Make 2):
Round 1 (Color A):
- To start, make a magic ring. Wrap the yarn around your fingers. Leave a 4-inch tail. Insert your hook under the first strand. Grab the second strand. Pull it through. That creates a loop on your hook. Ch 1. This secures the loop. It’s like a slip knot, but don’t tighten it. The magic ring creates an adjustable loop.
- Ch 3. This is your first stitch.
- Make a puff stitch in the ring. Yarn over, insert your hook into the ring, yarn over, pull up a loop, [yarn over, insert your hook into the ring, yarn over, pull up a loop] 3 more times, 9 loops on hook. Yarn over, pull through all 9 loops. Ch 1. That closes the puff stitch.
- *Ch 1, make another puff stitch in the ring; repeat from * 10 more times. You will have 12 puff stitches in the ring.
- Ch 1.
- Pull the yarn tail of your magic ring tight. This closes the hole.
- Join with a sl st to the top of the beginning ch-3. Insert your hook into the top of the beginning ch-3, yarn over, pull through both the stitch and the loop on your hook. That is a slip stitch.
- You should have 12 puff stitches. They are separated by ch-1 spaces.
- Ch 1, fasten off. Cut the yarn. Leave a 6-inch tail. Pull the tail through the loop. Tighten it.
Making the First Crochet Puff Stitch Circle
Round 2 (Color B):
- Join Color B with a sl st in any ch-1 space from Round 1.
- Ch 3.
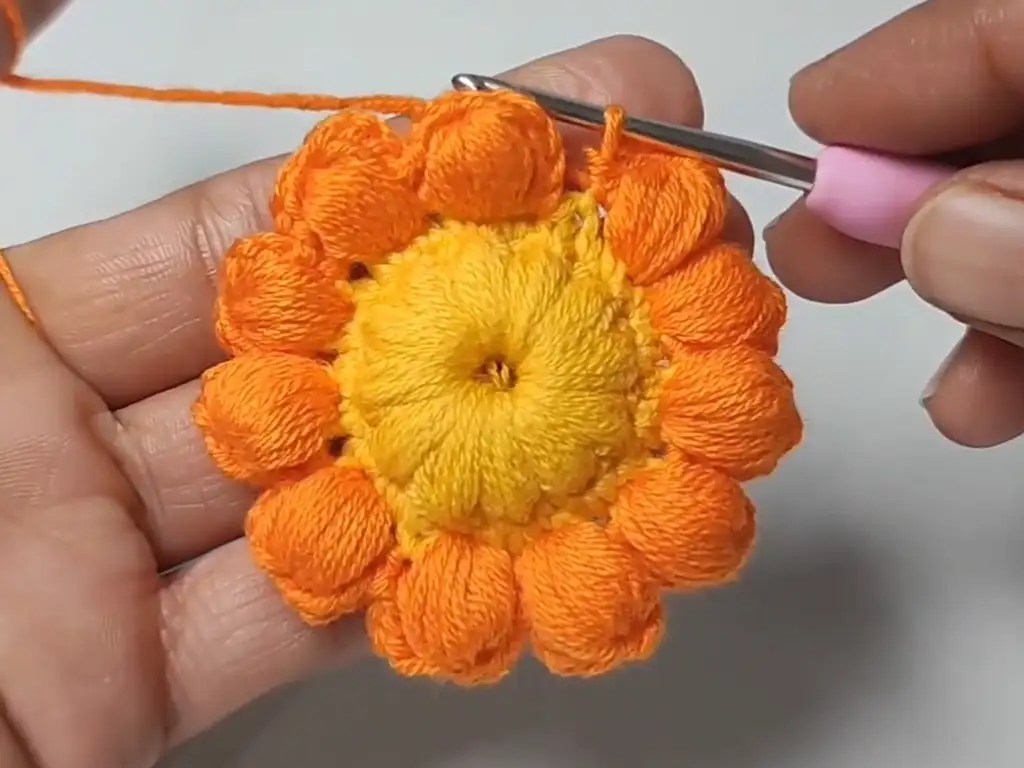
- Make a puff stitch in the next ch-1 space. This puff stitch will be bigger: yarn over, insert hook, yarn over, pull up a loop, [yarn over, insert hook, yarn over, pull up a loop] 6 more times, 15 loops on hook. Yarn over, pull through all loops, ch 1.
- *Ch 3, sc in the next ch-1 space, ch 3, make a puff stitch in the next ch-1 space (7 times, 15 loops); repeat from * around. Do this until you have 11 puff stitches.
- For the 12th puff stitch, we will modify it. We will attach the keychain clip. Make a puff stitch in the next ch-1 space (7 times, 15 loops). After collecting all the loops, place the bottom of the keychain clip against the hook, yarn over, pull through all loops, ch 1. That secures the keychain clip.
- Ch 3, sl st in the next ch-1 space.
- You should have 12 puff stitches this round.
- Ch 1, fasten off.
Creating the Second Circle and Combining the Pieces
Second Circle:
Repeat rounds 1 and 2. Do not fasten off after completing the second circle.
Joining the Circles:
- With Color A, place the wrong sides of the circles together. The right sides should face outwards. Join the circles with a sl st in any ch-1 space.
- Ch 1.
- Now, single crochet the circles together. Sc in each stitch around. Work through both thicknesses.
- When you reach the end, join with a sl st to the first sc.
- You should have about 24 sc. Stitch count may vary.
- Ch 1, fasten off.

Adding Your Keychain Clip with Crochet Puff Stitches
We will attach the keychain clip during the creation of the final puff stitch on the second round. Specifically, when you make the 12th puff stitch of the second circle’s second round, place the keychain clip against your hook. Then, complete the puff stitch as usual. Finally, yarn over and pull through all loops, including the loop of the keychain clip.
Completing Your Easy Crochet Keychain
To wrap up, weave in any loose ends on the inside of the keychain. Use your yarn needle. Trim any excess yarn. As you can see, you now have a beautiful crochet puff stitch keychain!
Finishing Touches: Assembling Your Handmade Crochet Keychain
These finishing steps can enhance your project. It also ensures everything is perfect. Let’s make that final touch that makes everything so beautiful! These steps are often overlooked. But they are key to professional-looking results!
Weaving In Your Yarn Ends for a Clean Finish
After you’ve joined your circles, you’ll have some yarn ends. To begin with, use your yarn needle. Weave these ends through the stitches on the inside of the keychain. This creates a neat finish. Moreover, it prevents unraveling. In other words, your keychain will be durable and look professional. Certainly, taking the time to do this makes all the difference.
Customizing Your Crochet Keychain With Color and Beads
Now for the fun part! You can customize your keychain. For example, use different yarn colors. Additionally you can add beads. To illustrate, string beads onto your yarn before crocheting. Or, sew them on afterward. In fact, the possibilities are endless! Ultimately, let your creativity shine. Create a keychain that’s uniquely you. In short, make it your own!
Adding a Loop for Easier Attachment
Finally, consider adding a small crocheted loop. This makes attaching the keychain easier. To do this, chain a few stitches. Then, join them to form a loop. Attach this to the top of your keychain. As a result, it will be even more functional. Besides, it adds a nice touch! Overall, it is a great addition.
Crochet Puff Stitch Flower Variations and Ideas
The crochet puff stitch is super versatile. You can use it to create so many shapes. Think beyond the simple circle. You can use it to create fun and whimsical projects! It’s really fun to try new things with this technique.
Crochet Puff Stitch Ideas for Your Project
Beyond the basic pattern, there are many ways to get creative. For instance, try different color combinations. You could also experiment with different yarn weights. Furthermore, you might add embellishments. Such as buttons or charms. Each variation will create a unique look.
Turn Your Puff Stitch Circle Into a Flower Design
This puff stitch circle easily transforms into a flower! In addition to changing colors try adding a contrasting center. Also you can sew on a button. Or crochet a small circle. Attach it to the middle. Indeed, this creates an adorable flower design. Moreover, it adds dimension and visual interest. In fact, it is such a cute design.
More Crochet Puff Stitch Ideas
Once you’ve done that, don’t stop at keychains! The puff stitch is versatile. Use it for other projects. For example, make headbands, coasters, or even blankets. In the same way, you can incorporate the puff stitch into larger designs. In particular, you can create beautiful textures. To put it another way, the possibilities are endless.
Troubleshooting: Common Issues with Crochet Puff Stitches
Problems sometimes occur. It’s normal, especially when learning. Let’s address common issues. I will help you solve these problems. In other words, let’s find a way to make it work!
Why is my Crochet Puff Stitch So Loose?
Sometimes, puff stitches can be too loose. This often happens due to inconsistent tension. To begin, make sure you’re pulling up your loops to the same height each time. Also, try using a slightly smaller hook. In the end, this can help create tighter stitches.
What if My Puff Stitch Is Too Tight?
Conversely, your puff stitch might be too tight. In that case, try loosening your grip on the yarn. Additionally, make sure you’re not pulling your loops too tightly. However, if it’s still too tight, consider using a larger hook. Certainly, finding the right balance is key.
Tips for Consistent Puff Stitches
Above all, consistency is crucial for beautiful puff stitches. To start, practice regularly. Pay attention to your tension. As you continue, you’ll develop a rhythm. Equally important, try to relax your hands. This prevents your stitches from becoming too tight. Finally, don’t be afraid to frog (undo) your work and redo it if you’re not happy with the result. Ultimately, the goal is to create even, fluffy puffs.
Showcase Your Unique Crochet Creation
Finally, you’ve finished your crochet puff stitch keychain! It is a unique creation. Therefore, be proud of your work. Share your project with the world. Use it yourself. Gift it to a loved one. Or make more in different colors!
In short, this project is rewarding. You can make something beautiful and functional. This project used a free pattern. It is downloadable as a PDF. You can download it here: https://crochetstrends.com/wp-content/uploads/2024/12/Crochet-Puff-Stitch-Keychain-Pattern.pdf.
In addition, the video tutorial for this pattern is a great resource. It is by @TubaCrochet. You can find the channel here: (https://www.youtube.com/@TubaCrochet). Check out the video here: https://www.youtube.com/watch?v=DCGGxa1Eq6w.
Moreover, share your creations on social media! Tag @TubaCrochet on Instagram (https://www.instagram.com/tubacrochet_), TikTok (tiktok.com/@tubacrochet), and Facebook (https://www.facebook.com/tubacrochet/). Use relevant hashtags. Such as #crochetpuffstitch, #crochetkeychain, and #handmade. This connects you with other crocheters.
Most importantly, I’d love to see your finished projects! Share your photos in the comments below. Tell us about your color choices. Did you make any modifications? Your creations can inspire others.
Other Crochet Projects You’ll Love
If you enjoyed making this crochet puff stitch keychain, why not try some other fun projects? Check out our blog for more tutorials on crochet puff stitch flowers, crochet bags, and blankets. Happy crocheting, and keep creating!