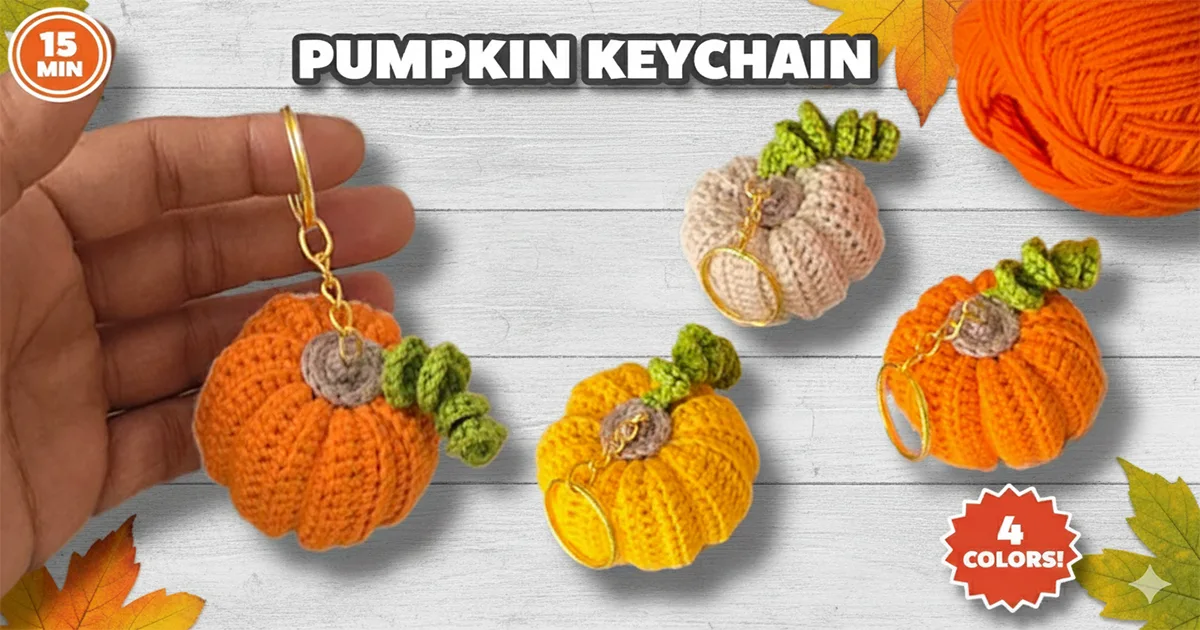
If you’ve been searching for a crochet pumpkin keychain pattern that’s quick, easy, and absolutely adorable, you’ve come to the right place!
As the cozy fall season begins, many of us crave simple handmade projects — something you can finish in one sitting and proudly gift to friends or use as decoration. This easy crochet pumpkin keychain is the perfect solution: it’s beginner-friendly, takes only 10–15 minutes, and requires very little yarn.
Whether you want to make cute crochet keychains for craft fairs, autumn markets, or Halloween gifts, this tutorial will walk you through everything step-by-step. Watch the full video below and follow along with the detailed written pumpkin keychain pattern right here!
Video Tutorial: Easy Crochet Pumpkin Keychain | Crochet Craftsman
Watch the full step-by-step video tutorial above!
Materials You’ll Need for This Crochet Pumpkin Keychain
| Material | Description | Quantity |
|---|---|---|
| Yarn | DK weight (3) cotton or blend – orange | 10–15 g |
| Yarn | DK weight (3) – green | 5 g |
| Yarn | DK weight (3) – black (optional for details) | 2 g |
| Crochet hook | 2.5 mm – 3 mm (US C/2 – D/3) | 1 |
| Stuffing | Polyester fiberfill | Small amount |
| Keychain ring | Metal or plastic | 1 |
| Gold ring | Optional decorative accent | 1 |
| Tapestry needle | For sewing | 1 |
| Scissors | Sharp | 1 |
WATCH FIRST!
PRO TIP: See exactly how I work with these materials in the video tutorial above! It makes following the pattern 10x easier.
Abbreviations Used in the Pumpkin Keychain Pattern
| Abbrev. | Term | Meaning |
|---|---|---|
| ch | chain | foundation stitch |
| sc | single crochet | basic stitch |
| inc | increase | 2 sc in same stitch |
| dec | decrease | sc 2 together |
| sl st | slip stitch | join or finish round |
| MR | magic ring | adjustable loop |
| rnd | round | one complete circle |
| st | stitch | individual loop |
CROCHET PUMPKIN KEYCHAIN PATTERN – STEP BY STEP
How to Crochet Pumpkin Body (Main Part of the Keychain)
Using orange yarn
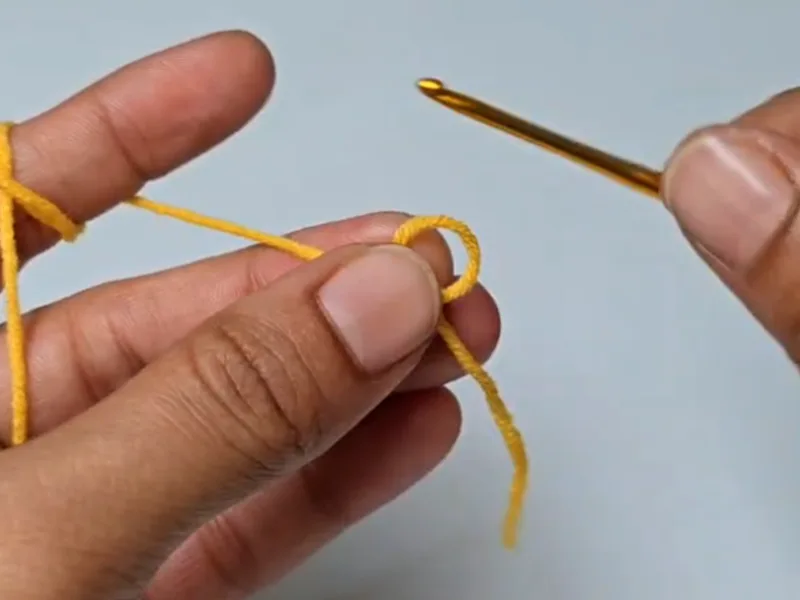
Rnd 1: Make a magic ring, 6 sc into MR, pull tight [6 sts]
Video 1:25 – How to make a magic ring
Rnd 2: 6 inc [12 sts]
Tip – Place a stitch marker at the start of each round.
Round 3: (1 sc, 1 inc) × 6 [18 sts]
Rnd 4: (2 sc, 1 inc) × 6 [24 sts]
Your pumpkin base is ready.
Rnd 5–8: 24 sc even [24 sts]
Video 3:40 – Shows tension and height formation.
Round 9: (2 sc, 1 dec) × 6 [18 sts]
→ Start light stuffing.
Rnd 10: (1 sc, 1 dec) × 6 [12 sts]
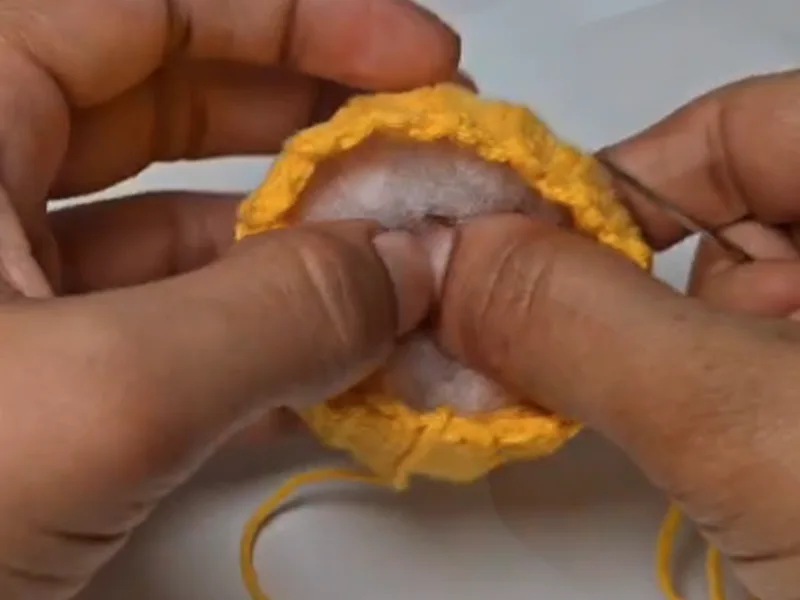
Video 5:15 – Stuffing demo
Rnd 11: 6 dec [6 sts] → Add final stuffing.
Fasten off and leave a long tail. Thread through remaining 6 stitches, pull tight to close, secure, and weave end.
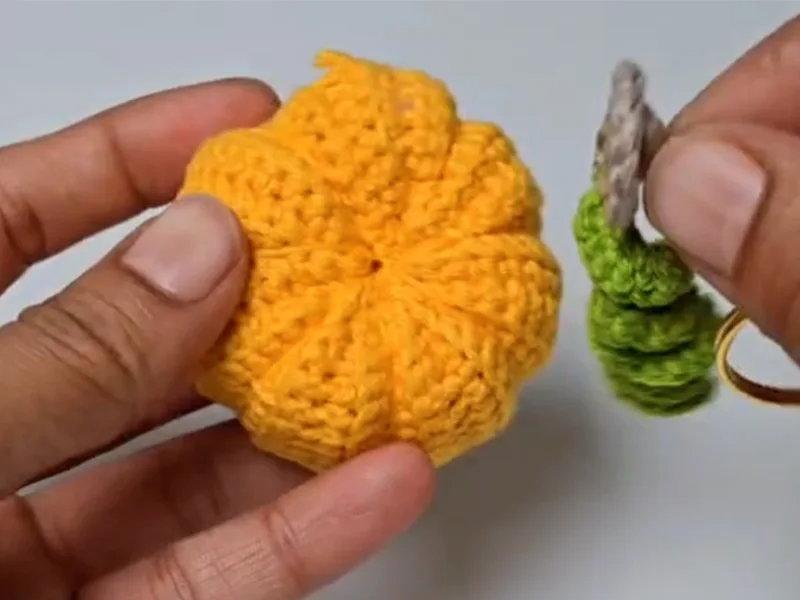
Shaping the Crochet Pumpkin (Ridges & Texture)
Video 6:30 – How to form pumpkin ridges.
Using orange yarn and tapestry needle:
- Insert needle from bottom center to top.
- Wrap yarn around the outside of pumpkin.
- Repeat 5–6 times evenly to form ridges.
- Pull gently each time to indent slightly.
- Secure firmly at bottom.
Pro Tip: Don’t pull too tight or you’ll flatten the pumpkin.

TRICKY TECHNIQUE ALERT!
This ridge technique is hard to explain in text!
Watch the video at 5:09 to see my exact hand movements and tension in real-time. It makes all the difference!
Crochet Pumpkin Stem and Leaf Tutorial
Stem – Green or Brown Yarn
Rnd 1: MR, 4 sc [4 sts]
Rnd 2–3: 4 sc each round [4 sts] → Forms a tiny stem.
Fasten off leaving a long tail for sewing.
Leaf (Optional)
Ch 6.
Row 1: In 2nd ch from hook → sl st, sc, hdc, dc, ch 1, turn.
Row 2: Skip 1st st, dc, hdc, sc, sl st.
Fasten off with tail for attaching.
Video 8:45 – Leaf curling demo.
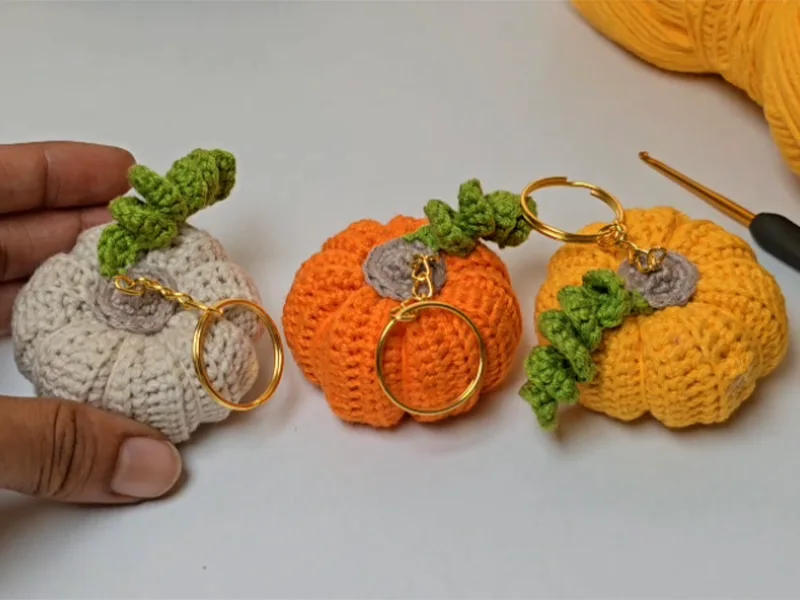
Assembly – Finishing Your Pumpkin Keychain
- Sew stem to top center of pumpkin.
- Attach leaf beside stem at a natural angle.
- (Optional) Add gold ring around stem for shine.
- Insert and secure keychain ring through stem.
- Hide all yarn tails inside and reshape pumpkin.
Video 9:20 – Finishing details and assembly.
Tips for a Perfect Crochet Pumpkin
Tension
- Keep stitches even – not too tight or loose.
- Use a marker to track rounds.
- Count stitches after each round.
Stuffing
- Add small amounts gradually.
- Firm but soft to the touch.
- Add final stuffing before closing.
Colors & Variations
- White pumpkin = cream yarn
- Striped pumpkin = alternate orange + yellow every 2 rnds
- Glitter pumpkin = metallic orange yarn
Common Mistakes
Overstuffing flattens ridges
Pulling ridges too tight distorts shape
Wrong hook size changes proportion
Size Adjustments
- Mini keychain → 4 ply yarn + 2 mm hook
- Larger decor → chunky yarn + 5 mm hook
- Ornament → stop after Rnd 7
WANT THE PRINTABLE VERSION?
DOWNLOAD THE FREE PDF PATTERN!
Creative Uses for Crochet Pumpkin Keychains
Perfect for fall markets, teachers’ gifts, and holiday decor!
| Use | Idea |
|---|---|
| Fall Decor | Scatter around mantle or shelf |
| Bag Charm | Add to purse or backpack |
| Gift | Pair with handwritten thank-you note |
| Car Charm | Hang from mirror |
| Party Favor | Perfect for Thanksgiving tables |
Bulk Tip: Crochet bodies first, then stems – assembly line style!
5 pumpkins ≈ 1 hour | Cost ≈ $1 each
Packaging Idea: Wrap in cellophane with cinnamon stick for scent and fall vibe.
LOOKING FOR MORE FALL PROJECTS?
Popular patterns from our collection:
→ Crochet Autumn Leaves Pattern – 5 minutes each!
→ How to Crochet Pumpkin in 3 Sizes – Perfect for home décor
→ Halloween Ghost Keychain – Spooky & cute
→ Crochet Tulip Flower – Beautiful DIY Bouquet
FAQ – Crochet Pumpkin Keychain Pattern
Q: How long does it take to make one pumpkin keychain?
A: 10–15 minutes once you’re familiar with the pattern. First-timers may need 20–25 minutes.
Q: Can I use different yarn weights?
A: Yes! Use a smaller hook (2mm) for fingering weight, or larger hook (4mm) for worsted weight. Adjust stuffing accordingly.
Q: My pumpkin looks lumpy. What am I doing wrong?
A: Common causes:
- Overstuffing – Use less fiberfill
- Uneven tension – Practice consistent stitches
- Wrong hook size – Try one size smaller
Q: Can I make this without the ridges?
A: Absolutely! Skip the ridge-shaping step for a smooth, round pumpkin. It’s still adorable and faster to make!
Q: How do I wash these keychains?
A: Hand wash gently in cold water with mild soap. Air dry flat. Avoid machine washing to protect the shape and keychain hardware.
Q: Can I sell items made from this pattern?
A: Yes! You can sell finished items. Please credit “Pattern by Crochet Craftsman” in your listings.
Q: What if I don’t have a magic ring?
A: You can start with ch 2, then 6 sc in the second chain from hook. It works just as well!
WATCH & DOWNLOAD
Watch the full tutorial on YouTube
Download the free PDF pattern here
Thank You for Crocheting With Me!
I hope you LOVE making these adorable pumpkin keychains as much as I do!
Whether you’re making them for yourself, as gifts, or to sell at craft fairs, I know they’ll bring smiles to everyone who sees them.
Remember:
- Drop a comment if you have questions
- Share your finished pumpkins on social media
- Subscribe for more quick patterns
- Rate this pattern below (helps other crocheters find it!)
Happy crocheting!
Watch the full video tutorial here
Download the printable PDF pattern
And don’t forget to tag us at @CrochetCraftsmann when you share your pumpkins online — we love seeing your creations!
Watch the full video tutorial above for visual guidance!
© 2025 Crochet Craftsman. All rights reserved.
You may sell finished items made from this pattern. Please credit “Pattern by Crochet Craftsman” in your listings.