Are you looking for a stylish and sustainable way to carry your essentials? Look no further than the trendy macrame yarn bag! This unique blend of crochet and macrame techniques creates a beautiful and functional bag that’s perfect for summer days, trips to the market, or even as a chic everyday accessory.
In this step-by-step tutorial, we’ll guide you through creating your very own handmade bag using a simple and beginner-friendly crochet macrame bag pattern. Whether you’re new to crochet or a seasoned pro, you’ll love the relaxed yet elegant vibe of this DIY macrame bag.
A Beginner-Friendly Project
The macrame yarn bag is an ideal project for beginners and seasoned crafters alike. With its simple design and beautiful results, it’s perfect for those looking to make a versatile accessory. This project is rated beginner, making it accessible for those new to crocheting. Whether you’re heading to the beach, the market, or just want a stylish everyday bag, this macrame rope bag is the perfect fit.
Gather Your Supplies
First of all, let’s gather all the necessary supplies for our macrame yarn bag project. You’ll need:
- Macrame Yarn: We recommend using 100% polyester number 3 macrame threads in 5 different colors. You can choose any colors you like, but it’s fun to experiment with a variety! The brand Spago Tomorrow is a great option, and it’s a very popular choice for crochet.
- Crochet Hook: A 2.5 mm crochet hook is perfect for this project.
- Scissors: Scissors are essential for cutting your macrame yarn.
- Tapestry Needle: You’ll use this to weave in the ends of your macrame yarn.
- Measuring Tape: To check your gauge and bag size.
- Bag Handles: Opt for leather handles, wooden handles, or even crochet your own!
Mastering the Essential Crochet Stitches
This crochet macrame bag pattern utilizes a few basic crochet stitches that are easy to learn:
- Chain stitch (ch): The chain stitch is the foundation stitch that forms the base of your crochet work. You create a chain by making loops with your crochet hook, and each loop is called a chain.
- Double crochet (dc): The double crochet is a versatile stitch that creates a taller, more textured fabric than a single crochet. It involves wrapping the yarn around the hook twice before pulling it through two loops.
- Slip stitch (sl st): The slip stitch is used to connect two loops together. It’s a very simple stitch, and it’s often used at the end of a row.
- Single crochet (sc): The single crochet creates a tighter, denser fabric than a double crochet. It involves wrapping the yarn around the hook once before pulling it through two loops.
Don’t worry if these stitches are new to you. Many online resources, including videos and tutorials, can help you master them quickly!
Step by Step Instructions: Crocheting Your Own Macrame Yarn Bag
This crochet tutorial is based on the wonderful video tutorial by @TubaCrochet, which you can find here.
Now, let’s get started on our crochet macrame bag journey! Follow this free crochet macrame bag pattern with lining to create your own unique accessory.
Pattern Overview
The macrame yarn bag consists of a rectangular base with an intricate design on the sides, finished with sturdy handles.
Base of the Bag:


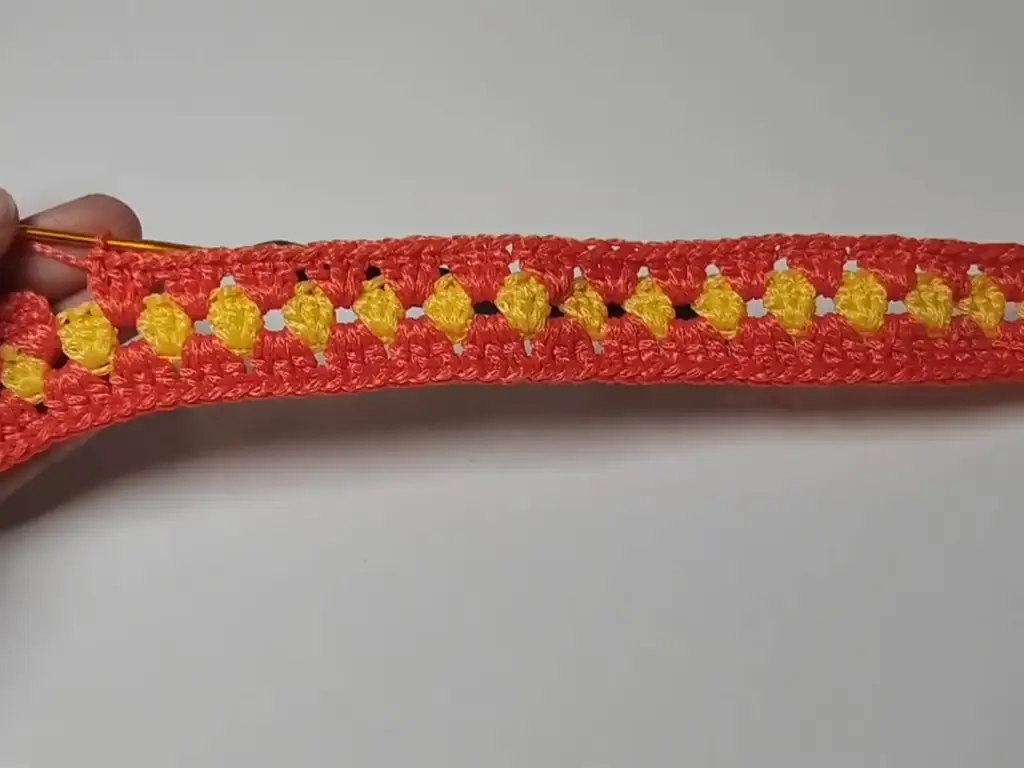
Row 1 (Yellow):
- ch 59 (approx. 23 cm)
- Skip 4 ch, 3 dc in 5th ch
- Skip 2 ch, 3 dc in the same space
- Skip 2 ch, 3 dc in the same space
- Repeat steps 3 and 4 until the end of the row, making a total of 18 double crochet groups side by side.
- Skip 2 ch, dc in the top of the last ch
- ch 1, cut the rope, and change to Color 2 (Light Blue)
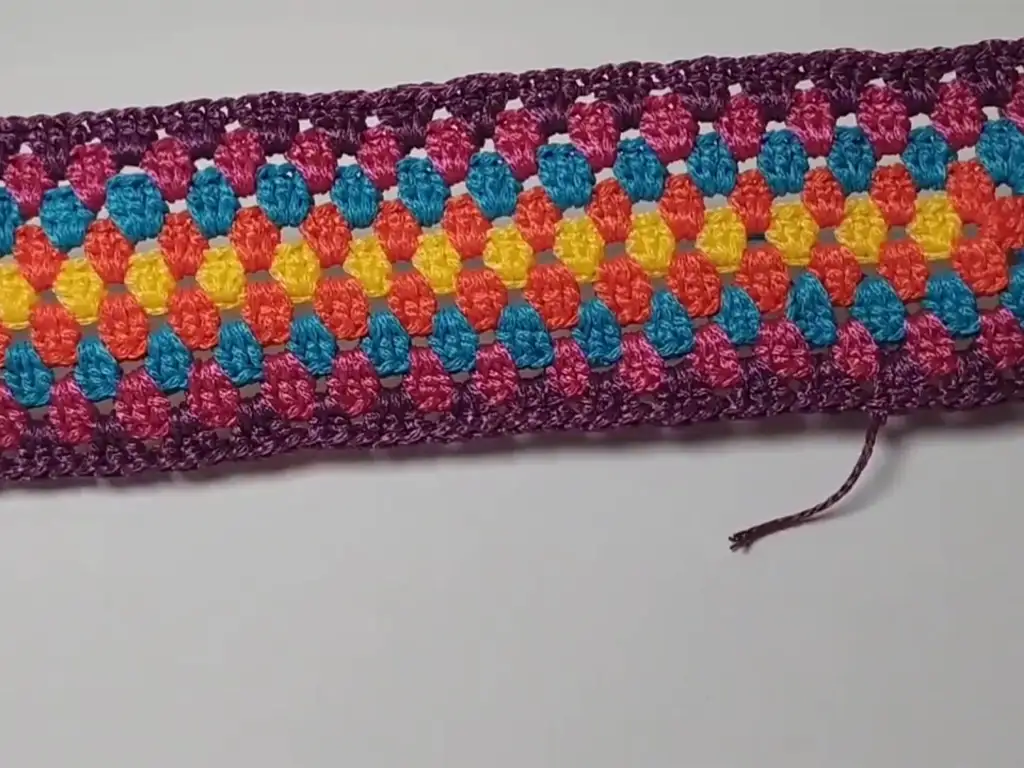
Row 2 (Light Blue):
- Join Color 2 to the top of the last ch (in the middle of any two crochet groups)
- ch 3, 2 dc in the same space
- 3 dc in the middle of the next group of crochets
- In the last space of the row, create a corner: 3 dc, 3 ch, 3 dc, 3 ch, 3 dc
- 3 dc in the middle of all crochet groups until the end of the row, without making a chain between them.
- At the turning point: 3 dc, 3 ch, 3 dc, 3 ch, 3 dc
- 3 dc in the middle of all crochet groups until the end of the row, without making a chain between them.
- sl st at the top of the first ch, ch 1, cut the rope, and change to Color 3 (Orange).
Rw 3 (Orange):
- Join Color 3 to the top of the last ch (in the middle of any two crochet groups)
- ch 3, 2 dc in the same space
- Continue crocheting until you reach the turning point.
- 3 dc in the middle of the group.
- In each of the 2 chain spaces in the turn, create a corner: 3 dc, 2 ch, 3 dc
- 3 dc in the middle of the crochet group until you reach the next turning point.
- In each of the 2 chain spaces in the turn, create a corner: 3 dc, 2 ch, 3 dc
- Repeat steps 6 and 7 for the 1st short side and continue until the end of the row.
- sl st at the top of the first ch, ch 1, cut the rope, and change to Color 4 (Purple).


Rw 4 (Purple):
- Join Color 4 to the top of the last ch (in the middle of any two crochet groups)
- ch 3, 2 dc in the same space
- Continue crocheting until you reach the corner.
- 3 dc in the middle of the group.
- In the corner: 3 dc, 2 ch, 3 dc
- 3 dc in the space between two corners
- In the next corner: 3 dc, 2 ch, 3 dc
- 3 dc in the middle of all the groups until you reach the other corner.
- In the chain spaces of the next corner: 3 dc, 2 ch, 3 dc
- 3 dc in the space between 2 corners. After making the turn, 3 dc in the middle of the group and continue until the end of the row.
- sl st at the top of the first ch, ch 1, cut the rope, and change to Color 1 (Yellow).
Row 5 (Yellow):
- Join Color 1 to the top of the last ch (near the corner)
- ch 3, 2 dc in the same space
- 3 dc in the middle of all the groups until you reach the corner.
- Repeat the process in the bottom row for the corners: 3 dc, 2 ch, 3 dc.
- 3 dc in the middle of the group.
- Repeat the operations in the bottom row and 3 dc in the middle of all groups.
- When you come to the next short side: 3 dc in the corners, 2 ch, 3 dc
- 3 dc in the intermediate spaces. 3 dc in the middle of the groups on the long side and continue until the end of the row.
- This completes the bottom of the bag.


Rising Sides:
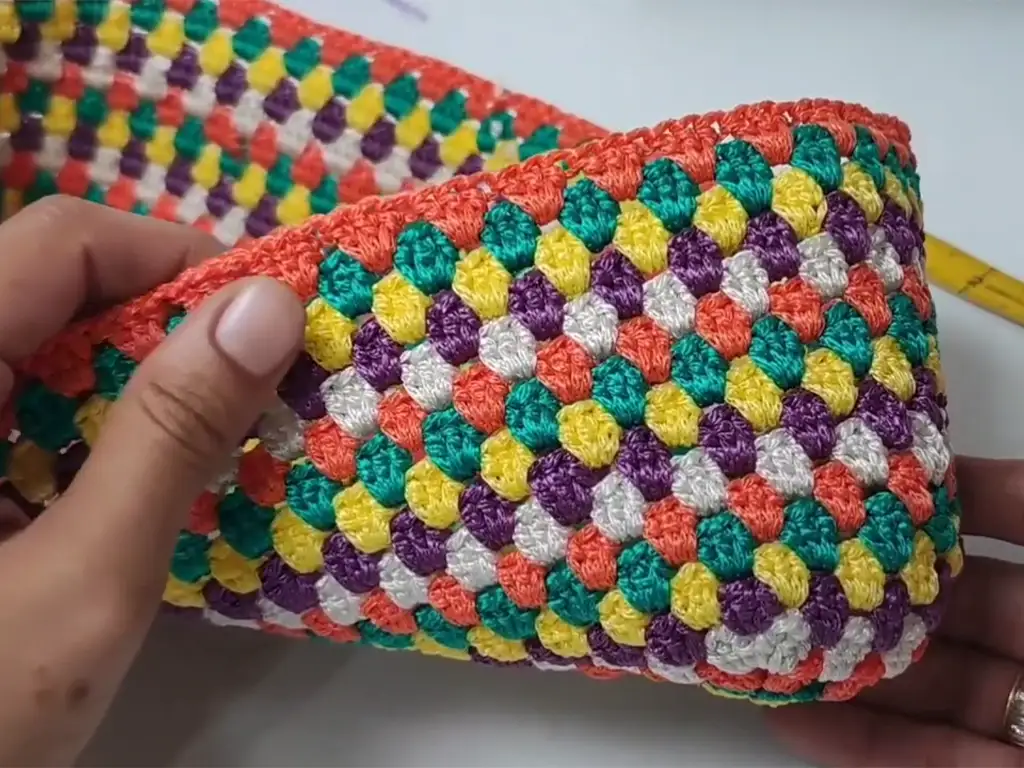
Row 6 (Yellow):
- Join Color 1 to the top of the last ch (in the middle of any two crochet groups)
- ch 3, 2 dc in the same space
- 3 dc in the middle of all the groups until you reach the corner.
- Since it will no longer create corners, 3 dc in the spaces in the corners.
- 3 dc in the middle of the group until you reach the next corner.
- 3 dc in the corner, 3 dc in the middle of the next group.
- Without doing anything else, 3 dc in the middle of the group, including the corners, and continue until the end of the row.
Rw 7 (Light Blue):
- Join Color 2 to the top of the last ch (in the middle of any two crochet groups)
- ch 3, 2 dc in the same space
- 3 dc in the middle of all groups until the end of the row.
Repeat Rows 6 and 7: Continue increasing the bag’s height by repeating Rows 6 and 7 until you have half the desired bag length.
V-Stitch Pattern:
Row 8 (Cream):
- Join Color 5 to the top of the last ch (from any crochet top)
- ch 5, dc in the same space
- Skip 2 spaces, dc, 2 ch, dc (V-stitch) in the same space
- Skip 2 spaces, dc, 2 ch, dc (V-stitch) in the same space.
- Continue making V-stitches in this way until the end of the row.
- sl st at the top of the 3rd ch.
- sl st in the middle of the V-stitch.
Row 9 (Cream):
- ch 5, dc in the same space
- Make V-stitches in the middle of all the V-stitches made in the bottom row (dc, 2 ch, dc).
- Continue until the end of the row.
- sl st at the top of the 3rd ch.
Repeat Row 9: Continue increasing the height of the bag by repeating Row 9 until you reach the desired bag height.
Mouth of the Bag:
Rw 10 (Cream):
- ch 1, sc in the same space
- 2 sc in the center of each V-stitch.
- Continue until the end of the row.
- sl st at the top of the first ch.
Rw 11 (Cream):
- ch 1, sc from the top of the next sc until the end of the row.
- sl st at the top of the first ch.
Row 12 (Cream):
- ch 1, sc from the top of the next sc until the end of the row.
- sl st at the top of the first ch.

Finishing:
- ch 1, sl st on top of all the stitches in the bottom row until the end.
- Cut the rope and weave in the ends.
Handles:
- Sew the leather or fabric handles to the sides of the bag.
Tips:
- When changing colors, be sure to weave in the ends to prevent unraveling.
- Don’t be afraid to experiment with different colors and patterns!
- If you are new to crochet, watch video tutorials for techniques you are unsure about.
Customizing Your Macrame Yarn Bag: Color Choices and Design Ideas
One of the best things about this Macrame Yarn Bag project is that it’s very customizable! Here are some design ideas:
- Color Combinations: Try different color combinations to create a unique look. For example, you can use a gradient of colors for a modern look, or you can stick to a monochromatic palette for a more classic style.
- Pattern Variations: You can experiment with different crochet stitches to create texture and interest in your Macrame Yarn Bag. For example, you can use a combination of single crochet and double crochet to create a striped pattern, or you can add a border of bobble stitches.
- Embellishments: Add embellishments to your Macrame Yarn Bag to give it a personal touch. You can use beads, tassels, or fabric flowers. For example, you could add a fringe of beads around the top edge of the bag.
Adding the Finishing Touches: Handles and Embellishments for Your Macrame Yarn Bag
Now for the fun part! You can attach leather handles or crochet your own using macrame cord or yarn. Feel free to get creative and add tassels, beads, or other embellishments to personalize your macrame yarn bag.

Macrame Yarn Bag Care: Tips for Washing and Storage
To keep your crochet macrame bag looking its best, hand wash it with a mild detergent and lay it flat to dry. Store it in a cool, dry place away from direct sunlight to prevent fading.
Styling Ideas for Your New Macrame Yarn Bag: From Summer to Market
Congratulations on creating your own macrame rope bag! Now, the fun part: styling it for every occasion.
- Beach Days: Pack your sunscreen, towel, and a good book in your spacious crochet beach bag.
- Market Trips: Your sturdy crochet market bag can handle all your fresh produce and goodies.
- Everyday Outings: Dress up or down your macrame bag – it’s the perfect accessory for a casual lunch date or a shopping trip with friends.
Other Crochet Projects You’ll Love
If you enjoyed making this macrame yarn bag, be sure to check out @TubaCrochet‘s other amazing crochet tutorials on YouTube (https://www.youtube.com/@TubaCrochet). She has a wealth of crochet bag patterns for every skill level.
If you’re ready for more creative crochet projects, there’s a world of possibilities out there! Here are some ideas:
- Crochet Beach Bag: Create a practical and stylish crochet beach bag.
- Crochet Market Bag: Perfect for carrying your groceries and other essentials.
- Crochet Tote Bag: This classic bag is versatile and perfect for everyday use.
- Crochet Blanket: Cozy up with a crochet blanket.
Conclusion
We hope you found this tutorial helpful and inspiring! Don’t forget to share your finished macrame yarn bags on Instagram using the hashtag #tubacrochet_ or on TikTok by tagging @tubacrochet. We can’t wait to see your beautiful creations! Please leave a comment below if you have any questions or want to share your tips. Happy crocheting!


