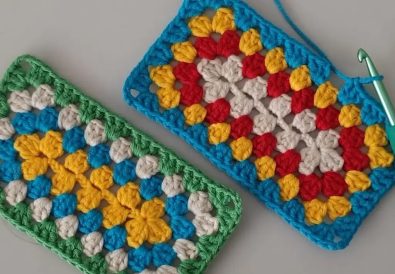
Discover easy, free crochet patterns for granny square projects – skirts, coats, quilts, and more, perfect for beginners!
Crochet, an art form rich in history and creativity, has always been a favorite among craft enthusiasts. Among the many patterns available, granny squares stand out as both classic and versatile. In this article, we’ll explore easy crochet granny square patterns perfect for creating DIY clothes, along with useful tips and detailed instructions.
Materials and Colors
When it comes to crochet, choosing the right yarn is crucial. For granny squares, medium-weight yarns like wool, cotton, or acrylic blends work best. Popular color choices range from vibrant hues to pastel tones, allowing for personalized color combinations. Essential materials include:
- Medium-weight yarn in various colors
- Crochet hook (size depends on yarn)
- Scissors
- Yarn needle
The Pattern Basics


- Starting the Granny Square:
- Make a slip knot.
- Chain 4 and join with a slip stitch to form a ring.
- Round 1:
- Chain 3 (counts as the first double crochet).
- Make 2 double crochets into the ring (completing the first ‘shell’ or cluster).
- Chain 2 for the corner space.
- Make 3 double crochets into the ring.
- Repeat the process of chaining 2 and making 3 double crochets twice more.
- Chain 2 and join with a slip stitch to the top of the initial chain 3.
- Round 2:
- Slip stitch over to the first corner space.
- Chain 3 for the first double crochet.
- Add 2 more double crochets, chain 2, and 3 more double crochets in the same space (first corner made).
- Chain 1 for the space between corners.
- In the next corner space, work 3 double crochets, chain 2, and 3 double crochets.
- Repeat for the remaining corner spaces, chaining 1 between each corner.
- Join with a slip stitch to the top of the initial chain 3.
- Subsequent Rounds:
- Continue in a similar fashion, slip stitching to the first corner.
- Each corner will have 3 double crochets, chain 2, and 3 double crochets.
- Sides will grow with each round, adding a shell (3 double crochets) in each chain-1 space from the previous round.
- Always chain 1 between shells on the sides.
- Join each round with a slip stitch and begin the new round accordingly.
- Finishing:
- Once the square reaches the desired size, cut the yarn, leaving a tail.
- Pull the tail through the last loop and weave in the ends with a yarn needle.
Expanding the Square


To expand the square, start each new round in a corner space. Continue with the pattern of 3 double crochets, chain 2, and 3 more double crochets in each corner. The beauty of the granny square lies in its adaptability – it can grow as large as needed.
Creating DIY Clothes
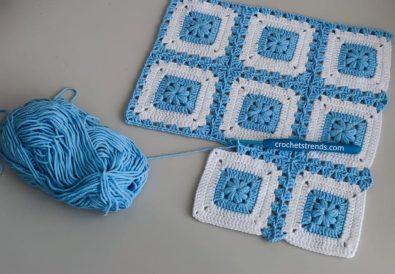
With a stack of granny squares, you can stitch them together to make skirts, coats, quilts, and more. The assembly process is straightforward – just stitch the squares together using a yarn needle or crochet them together with slip stitches.
Tips and Tricks
- To ensure uniformity, count your stitches in each round.
- Block your squares for a neater finish.
- Experiment with color transitions for a unique look.

Learn More on TubaCrochet
For a more comprehensive guide, check out TubaCrochet’s YouTube channel. Watch her detailed tutorial on granny squares here to enhance your understanding and skills.
Sharing Your Creations
Once you’ve completed your project, share your creations on Instagram at tubacrochets and TikTok at tubacrochet. Engage with the community and get inspired by others’ works.
Conclusion
Crochet granny squares open up a world of creativity and functionality. Whether you’re a beginner or a seasoned crocheter, these patterns offer endless possibilities to create something unique and personal. So, pick up your crochet hook and let your creativity flow!


