

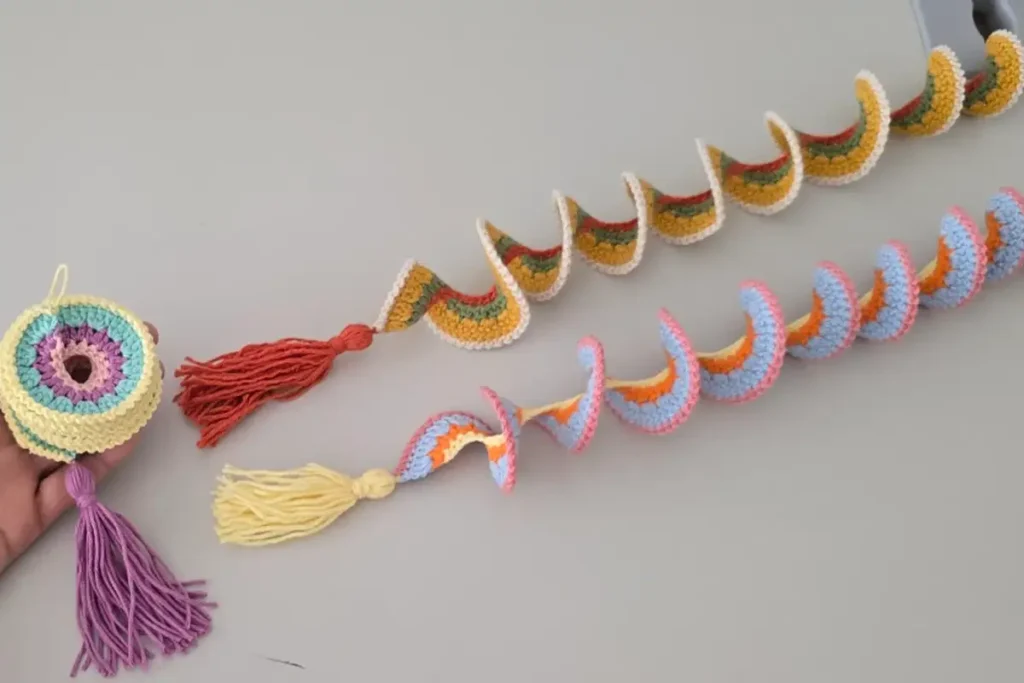
Looking for a quick and joyful crochet project? You’ll love this colorful crochet wind spinner! In this tutorial, we’ll show you exactly how to make your own—from the first chain to the final tassel. Whether you hang it on your balcony, porch, garden, or even indoors, it’s sure to bring a playful, whimsical touch to your space.
This pattern is beginner-friendly and super customizable—you can switch up the colors, yarn, and size to make it uniquely yours. You’ll also find a free downloadable PDF below, so you can print it or save it for later.
Let’s dive in and add a pop of motion and color to your home with this delightful spiral spinner!
Materials You’ll Need for Your Crochet Wind Spinner
To get started on your wind spinner, here’s what you’ll need:
- Yarn: 5-ply (medium weight) cotton-acrylic blend yarn
– Color A: Light Pink
– Color B: Purple
– Color C: Mint Blue
– Color D: Lemon Yellow - Fiber Content: 50% Cotton, 50% Acrylic
- Crochet Hook: 2.20 mm
- Scissors & Yarn Needle for cutting and weaving ends
- Optional: Tassel, bead, or ring for hanging
Gauge is not critical for this pattern, but tighter tension helps the spiral hold its shape better.
Feel free to experiment with color combinations to match your home or garden decor!
How to Crochet the Wind Spinner Base
Let’s go through the full process to create your colorful spiral wind spinner! Each row adds a new layer of texture and color. Here’s how to get started:
Step 1: Foundation Chain
Begin with Color A (Light Pink).
- Make a slip knot and crochet 95 chains.
- Your chain should measure around 38 cm (15 inches).
- You can make it longer or shorter based on how big you want your spinner to be.
- Just make sure your number of chains is odd for a smooth spiral.
Tip: Don’t pull your chains too tight—looser tension will make the spiral curve better.
Step 2: Work the Base Row
- Starting in the second chain from your hook, make 1 single crochet (sc) into each stitch.
- Work your way down the entire row. You should have 94 stitches.
- Switch to Color B (Purple) at the end of the row.
- Chain 2 and turn your work.
- Cut the first color yarn.
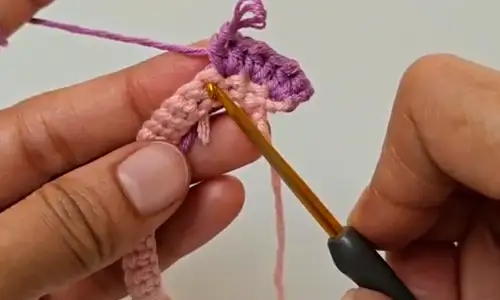
Crochet the V-Stitch Row
Now we’ll add texture using the V-stitch:
- Into the first stitch, crochet: (1 half double crochet, chain 1, 1 half double crochet).
- Repeat that in every stitch across: (hdc, ch 1, hdc) all in the same stitch.
- At the end of the row, make one last V-stitch and chain 1.
- Fasten off and join Color C (Mint Blue) at the top of the row.
The V-stitches will help the spiral take shape and give a beautiful open texture!
Step 4: Add the Treble Crochet Ridges
With Color C:
- Join your yarn into the center of the first V-stitch.
- Chain 3 (counts as your first treble crochet).
- Work 2 more treble crochets (tr) into the same space.
- In every V-stitch across, make 3 treble crochets.
- Finish with a last set of 3 tr in the final V-stitch.
- Chain 1 and fasten off.
This row gives the wind spinner its signature spiral twist!


Step 5: Final Edge & Optional Hanging Loop
Switch to Color D (Lemon Yellow):
- Join your yarn to the top of the first stitch.
- Chain 1, slip stitch into the next stitch.
- Repeat: (ch 1, sl st) into each stitch across the row.
- This creates a neat border along the edge.
- At the end, chain 1 and fasten off.
You can leave a long tail and tie a knot to create a hanging loop, or attach a wooden ring or bead if you’d like!
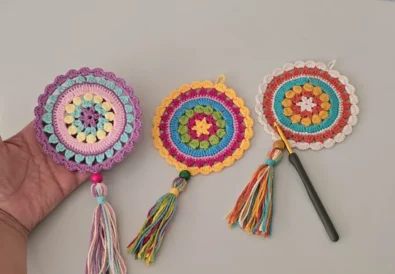
Color Suggestions for Your Crochet Wind Spinner
One of the best things about this crochet wind spinner pattern is how easily you can play with colors! Here are some eye-catching combinations to inspire your next spinner:
Recommended Color Set (used in the tutorial):
- Color A – Light Pink (#FCA3B7)
- Color B – Purple (#A88CFA)
- Color C – Mint Blue (#30C6A3)
- Color D – Lemon Yellow (#F6E95F)
These soft yet vibrant shades create a playful, summery look that really stands out when the wind catches the spinner!
Other Color Combos You’ll Love:
- Tropical Breeze: Coral, Aqua, Lime, Sunset Orange
- Pastel Dream: Baby Pink, Lavender, Mint, Pale Yellow
- Bold Contrast: Black, White, Red, Gold
Choose yarns with a slight shine or cotton-acrylic blends to get the best drape and movement in your spinner.
Tips and Customization Ideas
Want to make your spinner even more unique? Here are a few ways to personalize it:
- Change the length: Add or subtract chains to adjust the overall size.
- Use gradient or ombre yarns for effortless color transitions.
- Add a tassel, charm, or wooden bead at the bottom to create extra movement.
- Hang it outdoors (balcony, garden, patio) or even indoors near a sunny window.
- Use it as a gift topper! Mini versions make amazing decorative touches on wrapped presents.
This is a great stash-busting project, too—use leftover yarn to mix and match without waste.
Final Thoughts
And there you have it—a beautiful, breezy crochet wind spinner to brighten up your space! Whether you hang it on your balcony, by a window, or in your garden, it’ll dance in the wind and bring a pop of color and joy.
Did you try a bold rainbow? A pastel palette? Or something totally unique?
I’d love to hear what colors you used and how yours turned out—drop a comment below or tag me on social media!
Make sure to grab your free PDF pattern here
And don’t forget to watch the full video tutorial on @CrochetCraftsmann
If you enjoyed this project, please share it with your yarn-loving friends—it really helps support the channel.

Other Crochet Projects You’ll Love
Looking for more colorful and beginner-friendly patterns? Try these next:
- Easy Crochet Rose Coaster Pattern – Beautiful and Beginner Friendly
Perfect for adding a floral touch to your table. - Crochet Rosebud Keychain – Simple and Stylish DIY Gift
A fun, functional mini project using basic stitches.
Frequently Asked Questions (FAQ)
How long is the finished wind spinner?
With 95 starting chains, the finished spinner measures about 38–40 cm, depending on yarn and tension.
Can I use fewer colors?
Absolutely! You can use 2 or even 1 color and still create a great spiral. But using 4 contrasting shades gives the best visual impact.
What kind of yarn works best?
Medium-weight (5-ply) cotton/acrylic blends are ideal. They hold shape well and drape beautifully.
What yarn works best for a crochet wind spinner?
Blends like 50% cotton + 50% acrylic work well, but any medium-weight yarn will do.
Is this a good beginner project?
Yes! If you know how to chain, single crochet, half double, and treble, you’re good to go. It’s a perfect first spiral project.


If you want to to actually spin, attach a fishing spinner at the top…
Oh wow, that’s such a clever idea! Thank you for sharing — adding a fishing spinner would make it truly spin beautifully!