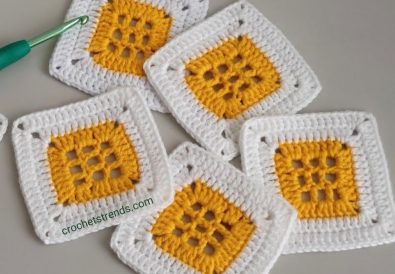
Are you ready to add a touch of whimsy to your crochet repertoire? Today, we’re diving into the world of the classic heart granny square, a timeless crochet motif that’s as versatile as it is charming. Whether you’re a seasoned crocheter or a curious beginner, this pattern is a delightful project that’s sure to capture your heart.
In this blog post, I’ll guide you through creating your very own heart granny square. We’ll cover everything from materials and basic stitches to shaping the heart and adding those final, polished touches.
Materials and Tools for Your Heart Granny Square
- Yarn: Choose a medium weight yarn in your favorite color. Cotton, acrylic, or a blend works beautifully.
- Crochet Hook: A 4mm hook is perfect for this pattern.
- Scissors
- Tapestry Needle: For weaving in those pesky ends.
Mastering the Core Stitches: A Granny Square Essential
Before we start, let’s refresh our memory on the crochet essentials for this project:
- Chain Stitch (ch): The foundation of many crochet creations.
- Single Crochet (sc): A basic, tight stitch.
- Double Crochet (dc): Adds height and creates lovely rows.
If you feel a little rusty, don’t worry! There are tons of fantastic tutorials online.
Notes:
- Each round is joined with a slip stitch to the first chain stitch of the starting chain.
- Chain 3 at the beginning of a round counts as the first double crochet.
- Turning chains are not included in the stitch count.
How to Crochet the Heart Shape: Step by Step Guide
Now, let’s unlock the magic of the heart granny square! Follow this written pattern closely, and feel free to check out the wonderful Crochet Khazana YouTube tutorial (https://www.youtube.com/watch?v=AxDTri54aAY) for visual guidance.
Written Pattern:
Let’s Begin!


Row 1 (Red):
- Make a magic circle.
- Chain 3 (counts as first dc), 2 dc in the circle, ch 2, 3 dc in the circle. Repeat this sequence twice more (total of 12 dc).
- Ch 2, sl st to the top of the first ch 3 to join the round. (12 dc)
Row 2 (Red):
- Sl st into the next stitch, ch 1.
- Corner increase: Work 8 dc in the same chain-2 space from the previous round. (This creates the first point of the heart.)
- Ch 1, sc in the next ch-2 space from the previous round.
- Corner increase: Ch 1, work 2 sc, ch 1, 2 sc in the same ch-2 space from the previous round. (This creates the dip at the top of the heart.)
- Ch 1, sc in the next ch-2 space from the previous round.
- Ch 1, sl st to the middle dc at the top of the corner increase we made in step 2. (16 sc, 8 dc)


Round 3 (White):
- Sl st into the next stitch, ch 2. (Switch to white yarn here)
- Dc in each dc and sc stitch around, placing 2 dc in each corner space (corner increases).
- Join with a sl st to the first ch 2 of the round. (24 dc)
Round 4 (White):
- Sl st into the next stitch, ch 2.
- Work 2 dc in each dc stitch around, placing 3 dc in each corner space (corner increases).
- Join with a sl st to the first ch 2 of the round. (36 dc)


Row 5 (Red):
- Sl st into the next stitch, ch 2. (Switch back to red yarn here)
- Work decrease over the next two dc stitches: dc in the first dc, ch 2, dc in the top of the second dc.
- Dc in the next dc stitch.
- Decrease: dc in the next two dc stitches.
- Continue alternating dc stitches with decrease stitches around the entire round. (This row shapes the top of the heart.)
- Join with a sl st to the first ch 2 of the round. (28 dc)
Row 6 (Red):
- Sl st into the next stitch, ch 2.
- Dc in each dc stitch around.
- Join with a sl st to the first ch 2 of the round. (28 dc)
Round 7 (Optional – White):
- Sl st into the next stitch, ch 2. (Optional: Switch to white yarn here for a contrasting border)
- Dc in each dc stitch around.
- Join with a sl st to the first ch 2 of the round. (28 dc)
Round 8 (Optional – Red):
- Sl st into the next stitch, ch 2. (Optional: Switch back to red yarn here)
- Dc in each dc stitch around.
- Join with a sl st to the first ch 2 of the round. (28 dc)
Tips:
- Pay attention to your tension throughout to create an even square.
- Mark the beginning of each round with a stitch marker for ease.
- You can adjust the size of your heart granny square by adding or subtracting rounds.
- Experiment with different colors and
Finishing Your Heart Granny Square: Perfecting the Details
Almost there! Weave in your ends securely, and voila – you’ve crafted your heart granny square with love.
Creative Ways to Use Your Heart Granny Squares
The possibilities are endless! Here are a few ideas:
- Heartfelt Blanket: Create a cozy throw filled with warmth.
- Keychains & Accessories: Add a sweet touch to your everyday items.
- Garland: String them together for a whimsical decoration.
Other Crochet Projects You’ll Love
Inspired to crochet more? Try these adorable patterns:
Let’s Connect!
Share photos of your heart granny square projects on Instagram (@tubacrochet_) and TikTok (@tiktok.com/@tubacrochet! I can’t wait to see what you create. And don’t forget to leave a comment – let’s build a vibrant crochet community together!
Happy crocheting!


