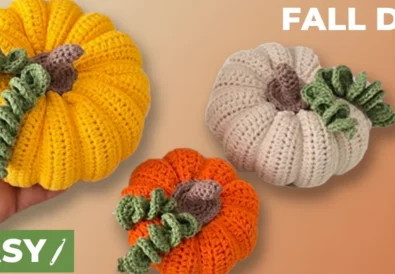
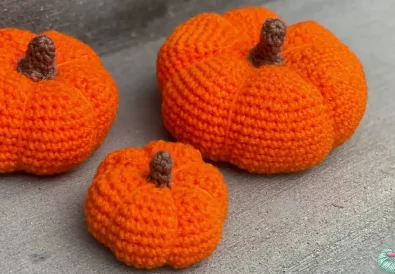
Nothing says fall quite like the vibrant colors of autumn leaves. Crochet pumpkin leaves offer a unique and charming way to bring that seasonal spirit into your home. Crochet fall leaves for pumpkins can be used in countless ways, from embellishing handmade pumpkins to creating stunning garlands and wreaths. In this tutorial, we’ll explore a step-by-step guide to crocheting these beautiful leaves, perfect even for beginners. Let’s get started on creating some cozy fall vibes!
Crochet Pumpkin Leaves: A Step-by-Step Guide
Crochet pumpkin leaves are small, crocheted leaf shapes, typically designed to resemble the leaves found on pumpkin vines. They’re a popular addition to crochet pumpkin decoration leaves and other fall-themed crochet projects. To put it another way, they are your crocheted answer to bringing the beauty of fall foliage into your crafting.
Choosing the Right Yarn for Your Crochet Pumpkin Leaves
The beauty of crochet pumpkin leaves lies in their versatility. You can use a wide range of yarn types and colors to achieve different effects. Specifically, worsted weight yarn (medium thickness) in autumnal shades like orange, red, yellow, and brown works wonderfully. For instance, you might choose acrylic yarn for durability or cotton yarn for a softer feel. Experiment with different textures and colors to find what you love!
Understanding the Crochet Stitches Used in the Pattern
This crochet pumpkin leaves pattern primarily uses two basic crochet stitches: the single crochet (sc) and the chain stitch (ch). To begin with, if you’re new to crochet, don’t worry! These stitches are easy to learn and we’ll guide you through each step. Moreover, there are plenty of online resources and tutorials available if you need a refresher.
Adapting the Size of Your Crochet Pumpkin Leaves
The crochet pumpkin leaves pattern we’ll be using is easily adaptable. To illustrate, you can make smaller leaves by reducing the number of chains in the foundation chain. Conversely, for larger leaves, simply increase the foundation chain. Undoubtedly, you can play with the number of rows to adjust the width of the leaf as well.
Gathering Your Supplies for Crochet Pumpkin Leaves
Before we dive into the crochet pumpkin leaves pattern, let’s gather the necessary supplies. Having said that, make sure you have everything ready to go so you can enjoy a smooth crocheting experience.
Essential Materials List:
- Yarn: Worsted weight yarn in your desired colors (see yarn recommendations above).
- Crochet Hook: 2.5 mm hook (or size needed to match your chosen yarn).
- Scissors: For cutting yarn.
- Yarn Needle: For weaving in ends.
Recommended Yarn Colors for Autumnal Leaves:
As you can see from nature’s palette, autumn leaves come in a stunning array of colors. To begin, consider using shades of orange, red, yellow, brown, and even a touch of green for a realistic look. Subsequently, you can also experiment with variegated yarns that blend multiple colors for a beautiful effect. Definitely, have fun with your color choices!
The Crochet Pumpkin Leaf Pattern: Getting Started
Now that you know what materials you need, let’s begin crocheting our pumpkin leaves! Moving on to the first steps of the pattern, we’ll lay the foundation for our beautiful leaves.
Making the Foundation Chain
The foundation chain determines the length of your crochet pumpkin leaf. To start, make a slip knot and place it on your crochet hook. Then, chain the desired number of stitches. For example, the pattern we’ll be using starts with a chain of 15. Initially, this might seem like a small detail, but it plays a crucial role in shaping your leaf.
Starting the First Row of Single Crochet
Once you’ve done that, we’ll start working the first row of single crochets. As you continue, remember that the first stitch of each row is worked into the second chain from the hook. In other words, we’re skipping the first chain to create a neat edge. Certainly, take your time and ensure each stitch is well-defined.
Working the Crochet Pumpkin Leaf Pattern: Row-by-Row Instructions
Now, let’s dive into the heart of the crochet pumpkin leaves pattern with detailed row-by-row instructions. To wrap up each row, we’ll guide you through the specific stitches and techniques needed.
Row-by-row Instructions (numbered for clarity):
- Row 1:
- Ch 15 (or your desired length for the leaf).
- Starting in the second chain from the hook, work 13 sc across the chain.
- In the last chain, work 1 sc, ch 2, 1 sc. This creates the first point of the leaf.
- Row 2:
- Ch 1 (counts as a turning chain). Turn your work.
- Work 1 sc in each of the next 10 sc.
- Skip the 2-ch space from the previous row.
- Ch 1. Turn your work.
- Row 3:
- Work 1 sc in each of the next 11 sc (including the sc made on top of the ch-1 from the previous row).
- In the 2-ch space, work 1 sc, ch 2, 1 sc.
- Continue working 1 sc in each of the remaining sc across the row.
- Row 4 and Beyond:
As you can see, the pattern continues in a similar fashion, creating the leaf shape by decreasing stitches on either side of the 2-ch space. To illustrate, you’ll work fewer sc stitches in each row as you move towards the tip of the leaf. Indeed, this gradual decrease is what gives the leaf its characteristic pointed shape.
Understanding Increases and Decreases in the Pattern
Most importantly, mastering increases and decreases is key to shaping your crochet pumpkin leaves. Nevertheless, don’t be intimidated! Despite this, they are simple techniques once you get the hang of them. Introducing the concept of increases, they involve adding extra stitches, while decreases involve removing stitches. In addition to shaping the leaf, these techniques also add visual interest and texture.
Working in Back Loops for a Defined Texture
To sum up, the crochet pumpkin leaves pattern often calls for working in the back loops only (BLO) of the stitches. Ultimately, this creates a subtle ridge along the leaf, giving it a more defined and textured look. Beside its aesthetic appeal, working in BLO can also help to keep your stitches neat and even.
Adding the Finishing Touches to Your Crochet Pumpkin Leaves
Now that you know how to work the main part of the crochet pumpkin leaves pattern, let’s move on to the finishing touches. As well as, these steps ensure that your leaves look polished and professional.
Weaving in the Ends
Specifically, weaving in the ends is an essential part of any crochet project. Overall, it helps to secure your work and prevent it from unraveling. Likewise, it also gives your finished piece a clean and tidy appearance. Nonetheless, take your time with this step and weave in the ends securely.
Adding a Stem (if applicable)
Still, some crochet pumpkin leaves patterns include instructions for adding a stem. Even though it’s an optional step, it can add a realistic touch to your leaves. Initially, you might find it a bit fiddly, but it’s worth the effort for the added detail.
Creative Ideas Using Your Crochet Pumpkin Leaves
Meanwhile, once you’ve mastered the crochet pumpkin leaves pattern, the possibilities are endless! Accordingly, here are some creative ideas to get you started:
Embellishing Pumpkins
Primarily, crochet pumpkin leaves are a perfect addition to crocheted or fabric pumpkins. Notably, they add a touch of realism and dimension to your handmade pumpkins. Significantly, you can attach them with a yarn needle or fabric glue.
Making Garland or Wreaths
Lastly, you can string crochet pumpkin leaves together to create beautiful garlands or wreaths. Obviously, these make stunning fall decorations for your home or as gifts for loved ones. In this tutorial, we’ll explore different ways to connect the leaves for a cohesive and visually appealing design.
Crochet Pumpkin Leaf Placemats or Coasters
That is to say, get creative and think beyond traditional applications. Including using your crochet pumpkin leaves to make unique placemats or coasters. Once you’ve done that, you’ll have a conversation starter at your next fall gathering.
Adding them to other Fall projects
As you continue, you can incorporate crochet pumpkin leaves into a wide variety of other fall-themed projects. For example, you could add them to hats, scarves, blankets, or even use them as appliques on clothing. First of all, let your imagination run wild!
Troubleshooting Common Issues with Crochet Pumpkin Leaves
Of course, even experienced crocheters encounter occasional challenges. Definitely, don’t get discouraged if you run into any issues while working on your crochet pumpkin leaves.
Fixing Mistakes in Your Crochet Pumpkin Leaves
Afterward, if you make a mistake, don’t panic! Definitely, it’s easy to unravel a few rows and correct your work. Actually, mistakes are a normal part of the learning process. Really, embrace them as opportunities to improve your skills.
Tips for Maintaining Neat Stitches
Then, maintaining consistent tension is key to creating neat and even stitches. Additionally, try to keep your yarn tension relaxed and avoid pulling it too tight. Before starting a new row, take a moment to check your tension and adjust as needed.
Crochet Pumpkin Leaves Pattern (Based on the tutorial by @TubaCrochet on YouTube (https://www.youtube.com/@TubaCrochet) – Video link: https://www.youtube.com/watch?v=NDHbBGBqZR8&t=279s)
Materials:
- Yarn: Himalaya Amigurumi brand cotton yarn (or any worsted weight cotton or acrylic yarn).
- Crochet Hook: 2.5 mm
- Scissors
- Yarn Needle
Gauge: Not critical for this project.
Finished Size: Approximately 6 cm wide and 11 cm long (including stem).
Abbreviations (US Terms):
- ch: chain
- sc: single crochet
- sl st: slip stitch
Instructions:
- Row 1 (Foundation Chain):
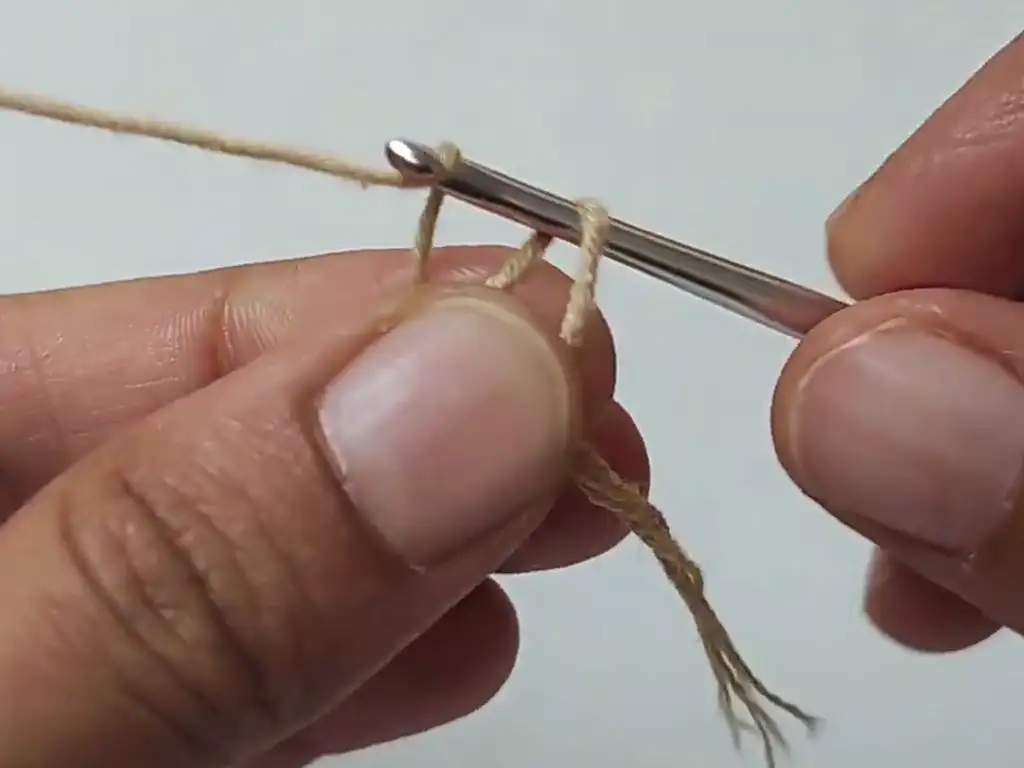
- Make a slip knot and place it on your crochet hook.
- Ch 15.
- Row 2:
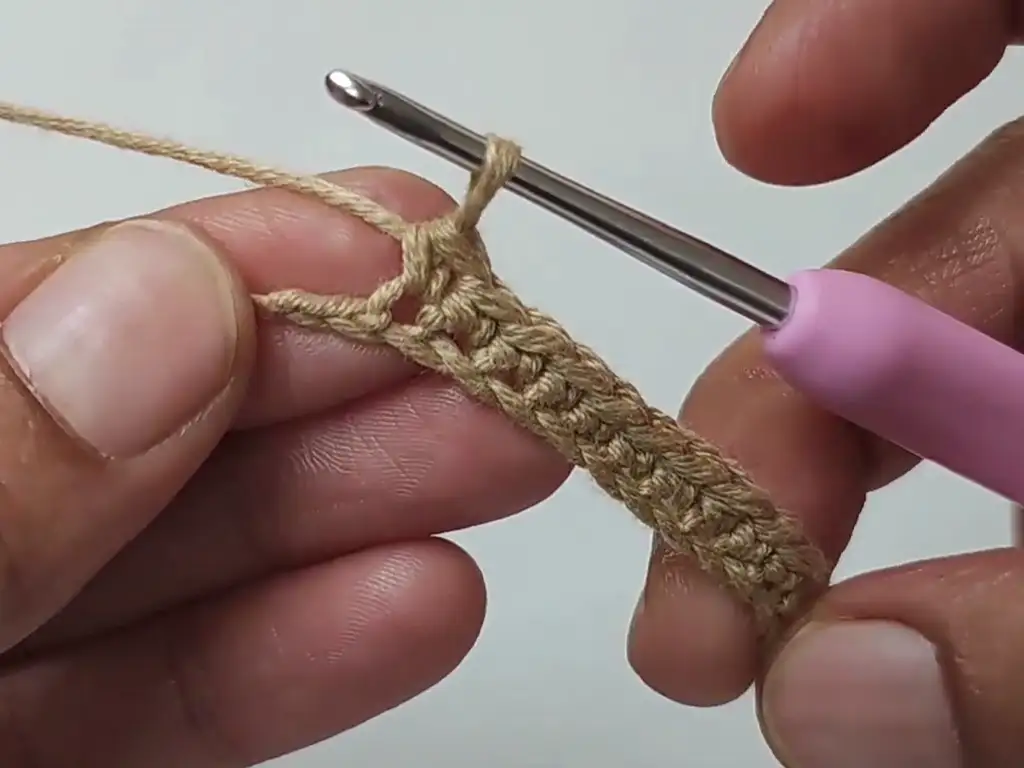
- Starting in the second chain from the hook, work 13 sc across the chain.
- In the last chain, work 1 sc, ch 2, 1 sc.
- Row 3:
- Ch 1. Turn your work.
- Work 1 sc in each of the next 10 sc.
- Skip the 2-ch space.
- Ch 1. Turn your work.
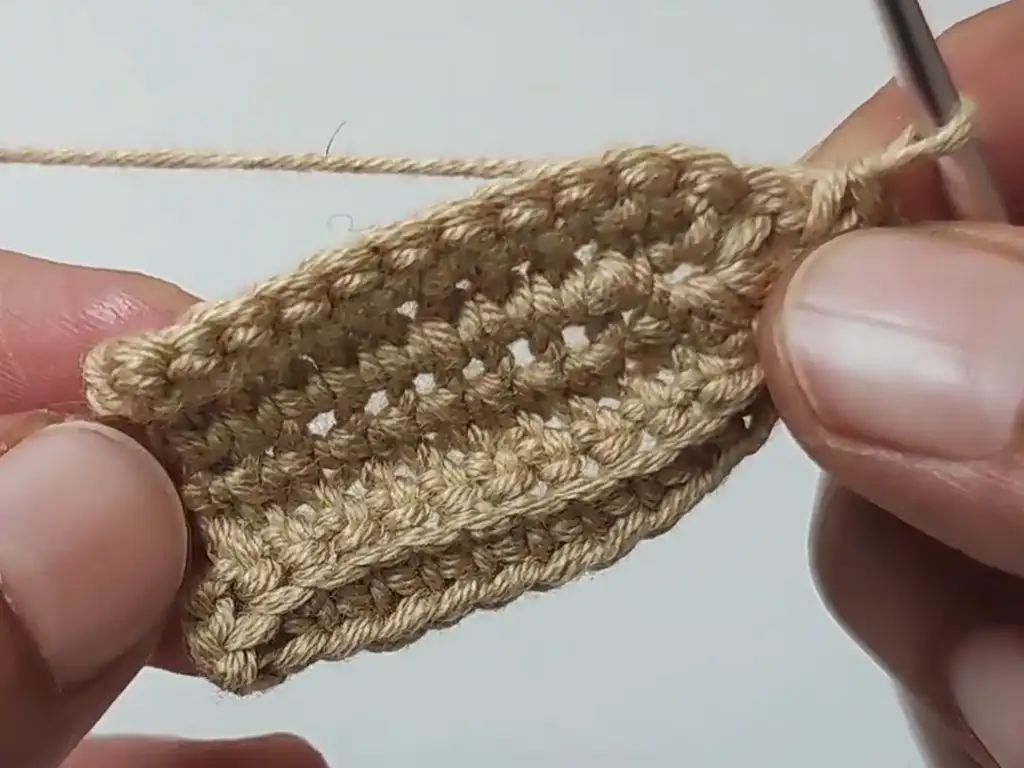
Row 4:
- Work 1 sc in each of the next 11 sc.
- In the 2-ch space, work 1 sc, ch 2, 1 sc.
- Continue working 1 sc in each of the remaining sc across the row.
- Row 5:
- Ch 1. Turn your work.
- Work 1 sc in each of the next 11 sc.
- Skip the 2-ch space.
- Ch 1. Turn your work.
- Row 6:
- Work 1 sc in each of the next 12 sc.
- In the 2-ch space, work 1 sc, ch 2, 1 sc.
- Continue working 1 sc in each of the remaining sc across the row.
- Rows 7 – (Adjust for Desired Leaf Shape):
Continue working in this pattern, decreasing the number of sc worked on either side of the 2-ch space by 1 or 2 stitches in each row to create the tapered shape of the leaf.
Always skip the last 2 stitches at the end of each row before turning your work.
Remember that the last sc of each row should be worked into the first sc of the 2-ch space from the previous row.
- Last Row (Stem Row):
- Ch 1. Turn your work.
- Work 1 sc in each sc across the row until you reach the 2-ch space.
- Work 1 sc in the 2-ch space.
- Ch 9.
- Starting in the second chain from the hook, work 8 sl st across the chain.
- Work 1 sc in the 2-ch space.
- Continue working 1 sc in each of the remaining sc across the row.
- Ch 1. Fasten off, leaving a long tail for sewing.

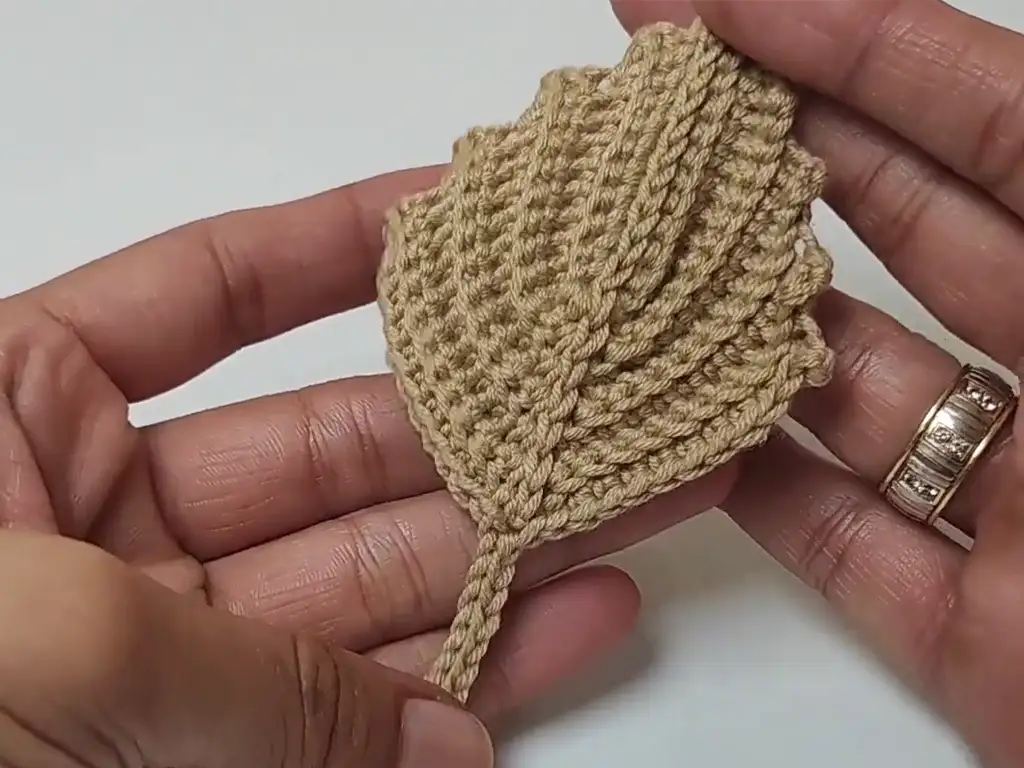
Finishing:
- Using your yarn needle, weave the tail through the top of the leaf, making a sl st in each stitch to create a neat edge.
- Weave in all loose ends.
- Increasing and Decreasing Rows:
- To increase: Add more sc stitches on either side of the 2-ch space in each row.
- To decrease: Skip 1 or 2 stitches at the beginning and end of each row before working the 2-ch space.
Download the Free Pattern:
For those who prefer a detailed written pattern, you can download the free crochet pumpkin leaves pattern at Crochet Trends. This PDF offers step-by-step instructions, making it even easier to follow along. During the download process, you might encounter a brief wait, but it’s worth it for the convenience of having the pattern readily available. Before you start crocheting, it’s a good idea to print out the pattern or save it to your device for easy access. Immediately after downloading, take a moment to familiarize yourself with the abbreviations and instructions.
Other Crochet Projects You’ll Love
Now that you’ve mastered crochet pumpkin leaves, why not explore other fall-themed crochet projects? As you continue your crochet journey, you might enjoy crocheting pumpkins or dive into crochet flowers for springtime decor. In addition to these, there are countless other crochet projects that can add a touch of autumn charm to your home.


Conclusion
Crocheting pumpkin leaves is a rewarding and enjoyable project that allows you to bring the beauty of fall into your home. With this step-by-step guide and a little practice, you’ll be creating stunning crochet pumpkin leaves in no time. Don’t forget to share your creations on Instagram (https://www.instagram.com/tubacrochet_/), TikTok (tiktok.com/@tubacrochet), and Facebook (https://www.facebook.com/tubacrochet/). We’d love to see your beautiful crochet pumpkin leaves andhow you’ve incorporated them into your fall decor!
Happy crocheting!


