
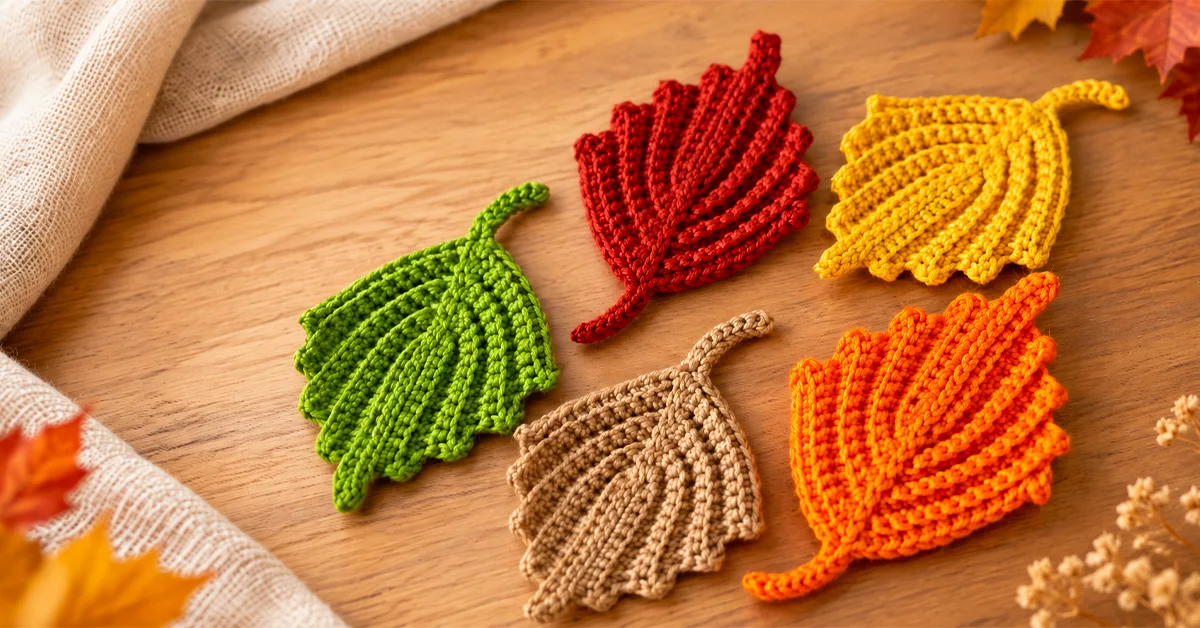
This crochet fall leaf gets its ribbed texture from a simple back-loop technique.
The raised ridges come from working into the back loops, while the stepped shaping builds the leaf gradually on both sides. A simple slip-stitch detail through the center finishes the shape and gives the leaf a clean front.
The finished leaf measures approximately 6 cm (2.4 in) wide and 11 cm (4.3 in) long, including the stem.
The pattern is written in US crochet terms and uses chains, single crochet, and slip stitches.
You can also browse more seasonal projects in the Crochet Fall Decor collection.
Why You’ll Like This Crochet Ribbed Fall Leaf
The texture is the part that makes this leaf stand out.
Instead of working through both loops, you work into the back loops through much of the pattern. This creates the raised lines you can see across the finished leaf.
The shaping is also easy to customize. The starting chain controls the length, while the number of stepped sections controls the width.
For this version, the leaf has four shaped steps on each side.
You can make several leaves in different fall colors and use them as small seasonal decorations, appliqués, or accents for other crochet projects.
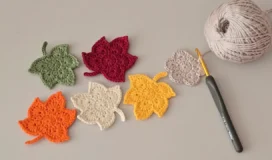
If you enjoy making autumn leaves, you may also like the Easy Crochet Maple Leaf Pattern.
Crochet Ribbed Fall Leaf Materials
For the sample shown in the tutorial, I used:
- Himalaya Himagurumi cotton yarn
- 2.5 mm crochet hook
I used fall-inspired shades for the samples, but you can choose any colors you like.
Finished Size
Approximately:
6 cm (2.4 in) wide × 11 cm (4.3 in) long, including the stem
US Crochet Abbreviations
- ch – chain
- sc – single crochet
- sl st – slip stitch
- ch-2 sp – chain-2 space
Download the Free PDF Pattern
Prefer to work from a printable copy?
Download the Free Crochet Fall Leaf PDF Pattern
The written pattern on this page remains available below, so you can follow whichever format is easier for you.
Crochet Ribbed Fall Leaf Video Tutorial
If you prefer to see the stitch placement and shaping as you work, follow the full video tutorial:
Watch the Crochet Fall Leaf Video Tutorial
Crochet Ribbed Fall Leaf Written Pattern
Foundation
Make a slip knot.
Ch 15.
Starting in the second chain from the hook, make 13 sc.
You should have 13 sc.
In the last chain, work:
1 sc, ch 2, 1 sc
The starting chain sets the length of the leaf.
Begin Shaping
After the corner, make 10 sc.
Leave the last 2 stitches unworked.
Ch 1 and turn.
Work in the back loops.
Make 11 sc.
In the ch-2 space, work:
1 sc, ch 2, 1 sc
Continue with single crochet until you have 11 sc after the corner.
Leave the last 2 stitches unworked.
Ch 1 and turn.
Start in the first back loop and work to the ch-2 space.
Make 12 sc.
In the ch-2 space, work:
1 sc, ch 2, 1 sc
Continue Shaping
Continue working in the back loops.
Leave the last 2 stitches unworked.
On the next section, make 10 sc.
Leave the last 2 stitches unworked.
Ch 1 and turn.
Work back toward the ch-2 space.
Make 11 sc.
Pay close attention to the last stitch before the corner.
In the ch-2 space, work:
1 sc, ch 2, 1 sc
Start in the corner back loop.
Continue across until only 2 stitches remain.
You should have 11 sc.
Leave the last 2 stitches unworked.
Ch 1 and turn.
Work in the back loops to the ch-2 space.
Place the last stitch just before the corner chain.
In the ch-2 space, work:
1 sc, ch 2, 1 sc
Continue across the row.
Leave the last 2 stitches unworked.
Ch 1 and turn.
Repeat the same sequence to add more stepped shaping.
The number of steps determines the width of the leaf.
For this leaf, continue until you have 4 steps.
Make the Stem
Once the four steps are complete, work in the back loops to the ch-2 space.
You can adjust the stem length.
For this pattern:
Ch 9.
Starting in the second chain from the hook, slip stitch back down the chain.
You should have 8 slip stitches.
Make 1 sc in the same space.
Then continue working across.
At the end, you should have 4 steps on both sides.
Ch 1 and cut the yarn.
Add the Center Detail
With the back of the leaf facing you, join the yarn at the first corner.
The center slip stitches will face the front.
Work slip stitches along the center.
Make a slip stitch in each ch-2 space.
Continue through every ch-2 space.
Then slip stitch across the starting chains.
Make the final slip stitch.
Ch 1 and cut the yarn.
Finishing
Weave in the yarn ends on the back.
Your crochet leaf is finished.
The finished size is approximately:
6 cm (2.4 in) wide × 11 cm (4.3 in) long, including the stem
If you want another fall project after this one, try the Easy Crochet Pumpkin Pattern in 3 Sizes or the Fall Pumpkin Coaster Crochet Pattern. Both are already part of the site’s fall crochet collection.
Frequently Asked Questions
How do I get the ribbed texture on the leaf?
The raised ridges are created by working your single crochets into the back loops.
Can I make the crochet leaf bigger or smaller?
Yes. The starting chain sets the length of the leaf, while the number of stepped shaping sections determines the width.
Can I make the leaf stem longer or shorter?
Yes. You can adjust the stem length by changing the number of chains. This pattern uses 9 chains.
Why do I leave the last two stitches unworked?
Leaving the last two stitches unworked helps create the stepped shaping along the sides of the leaf.
How is the center detail made?
The center detail is made with slip stitches worked through the chain-2 spaces and across the starting chains.
Is this pattern written in US or UK crochet terms?
This pattern is written in standard US crochet terminology.
Is this crochet leaf pattern beginner-friendly?
Yes. The pattern uses basic stitches such as chains, single crochet, and slip stitches.
How big is the finished crochet leaf?
The finished leaf measures approximately 6 cm (2.4 in) wide and 11 cm (4.3 in) long, including the stem.
More Fall Crochet Patterns
If you want to keep working on seasonal projects, these are good next patterns:
- Easy Crochet Maple Leaf Pattern
- Easy Crochet Pumpkin Pattern in 3 Sizes
- Fall Pumpkin Coaster Crochet Pattern
- Browse All Crochet Fall Decor Projects
The Fall Decor category currently contains the maple leaf, pumpkin, pumpkin coaster, and other seasonal patterns, so it is the most relevant primary hub for this article.
Final Thoughts
This crochet ribbed fall leaf uses a small set of basic stitches, but the back-loop texture gives it a much more detailed look.
Once you understand the shaping sequence, you can adjust the length, width, and stem to suit your project. Make one leaf on its own or crochet several in different fall colors.
For the printable version, use the free PDF above. If you want to see the shaping in motion, follow the video tutorial as you work.
Follow Crochet Craftsman
YouTube – Crochet Craftsman
Instagram – @tubacrochet_
Facebook – Crochet Craftsman
Pinterest – Tuba Crochet