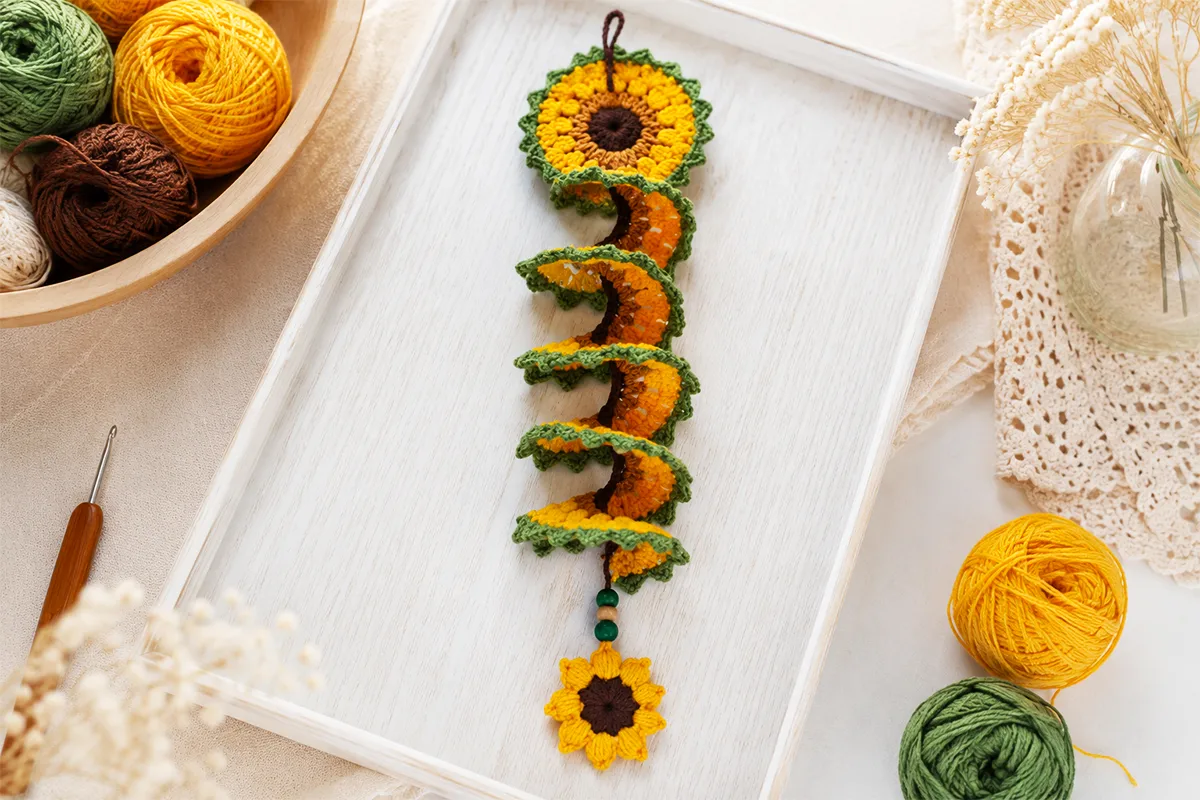
If you love cheerful handmade decor, this crochet sunflower wind spinner is such a sweet project to make. It starts as a simple crochet strip, and with a little bit of shaping at the end, it turns into a beautiful 3D spiral sunflower spinner.
This project is perfect for a porch, balcony, window, garden corner, or craft fair display. The sunflower colors make it bright and happy, and the little beads and sunflower charm at the bottom give it that finished handmade touch.
In this tutorial, you will learn how to crochet the main wind spinner body, add the green leafy edge, make the hanging loop, decorate the bottom, and shape the flat crochet strip into a 3D spiral.
You can watch the full video tutorial here:
Watch the Crochet Sunflower Wind Spinner Video
You can also download the written PDF pattern here:
Download the Crochet Sunflower Wind Spinner Pattern PDF
Why You’ll Love This Crochet Sunflower Wind Spinner
This is one of those projects where the final twist feels a little magical. You crochet it flat, row by row, and then at the end, the whole strip twists into a pretty spiral shape.
It is also a nice project if you enjoy crochet pieces that are decorative but still simple enough to follow. The stitch repeats are easy to understand, and once the rows are finished, the shaping part is very satisfying.
This sunflower wind spinner is a great choice if you want:
- A cheerful crochet porch decoration
- A handmade garden or balcony ornament
- A cute crochet gift idea
- A craft fair-friendly project
- A sunflower crochet project with a 3D effect
- A beginner-friendly crochet decoration using basic stitches
If you enjoy this kind of outdoor crochet decor, you may also like this related tutorial:
Easy Crochet Wind Spinner Pattern for Beginners
About This 3D Crochet Wind Spinner Pattern
This crochet wind spinner is worked in rows. You begin with a foundation chain, then build the body with half double crochet, V-stitches, double crochet groups, and a green leafy edge.
The fullness in the later rows is what helps the piece curl. Once the strip is finished, you gently twist it from the hanging loop and open the spiral with your fingers.
For the sunflower look, the colors are arranged like this:
- Row 1: dark brown
- Row 2: mustard
- Rows 3 and 4: yellow
- Final edge: green
This color order gives the spinner that sunflower look, while the green edge frames the yellow spiral like little leaves.
Skill Level
Easy / Beginner-friendly
This pattern is suitable for beginners who already know the basic crochet stitches. You should be comfortable with chain, single crochet, half double crochet, double crochet, and slip stitch.
The pattern does not use complicated shaping. The 3D effect comes from adding more stitches into the rows and twisting the finished strip at the end.
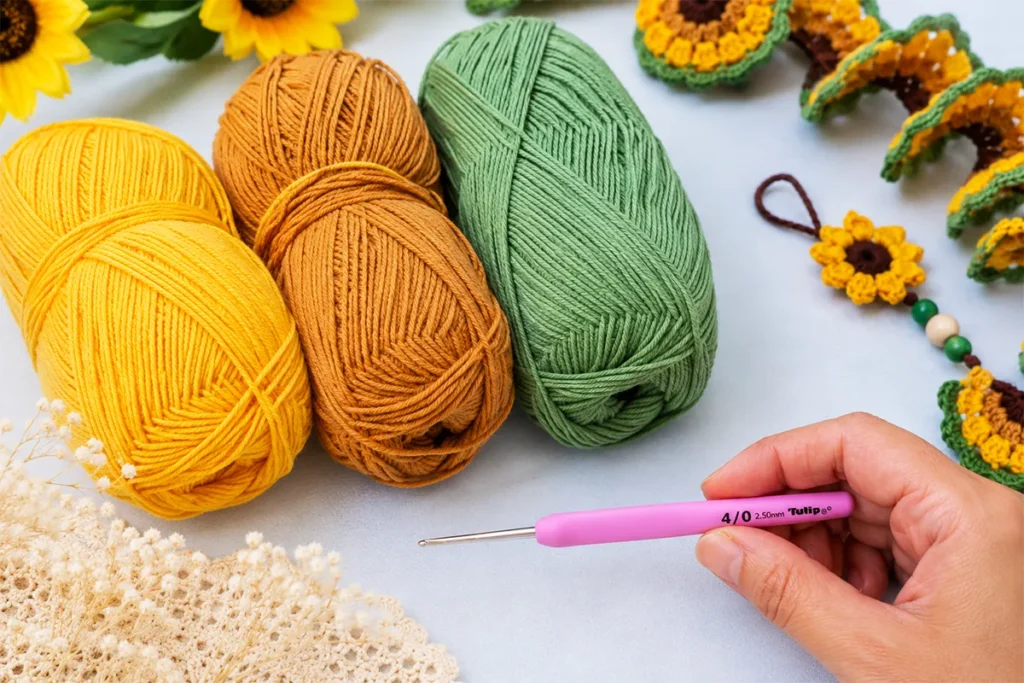
Crochet Sunflower Wind Spinner Materials
To make this crochet sunflower wind spinner, you will need:
- Cotton yarn in dark brown, mustard, yellow, and green
- 2.5 mm crochet hook
- Decorative beads
- Small sunflower charm or crochet sunflower motif
- Scissors
- Yarn needle
The tutorial uses cotton yarn and a 2.5 mm crochet hook. Cotton yarn is a nice choice for this project because it helps the stitch texture look clean and defined.
For more handmade gift-style crochet ideas, you can also browse the
Crochet Gift Ideas collection.
US Crochet Terms and Abbreviations
This pattern uses US crochet terms.
- ch = chain
- sc = single crochet
- hdc = half double crochet
- dc = double crochet
- sl st = slip stitch
- st = stitch
- sp = space
Finished Size for the Sunflower Crochet Wind Spinner
You can make this wind spinner as long or as short as you like.
For a nice hanging size, a starting length of about 35–40 cm / 14–16 inches works well.
In the video tutorial, I started with 80 chains.
If you want a longer wind spinner, start with more chains. If you want a shorter one, make fewer chains. Just remember that your finished size can change depending on your yarn, hook size, and tension.
Crochet Sunflower Wind Spinner Written Pattern
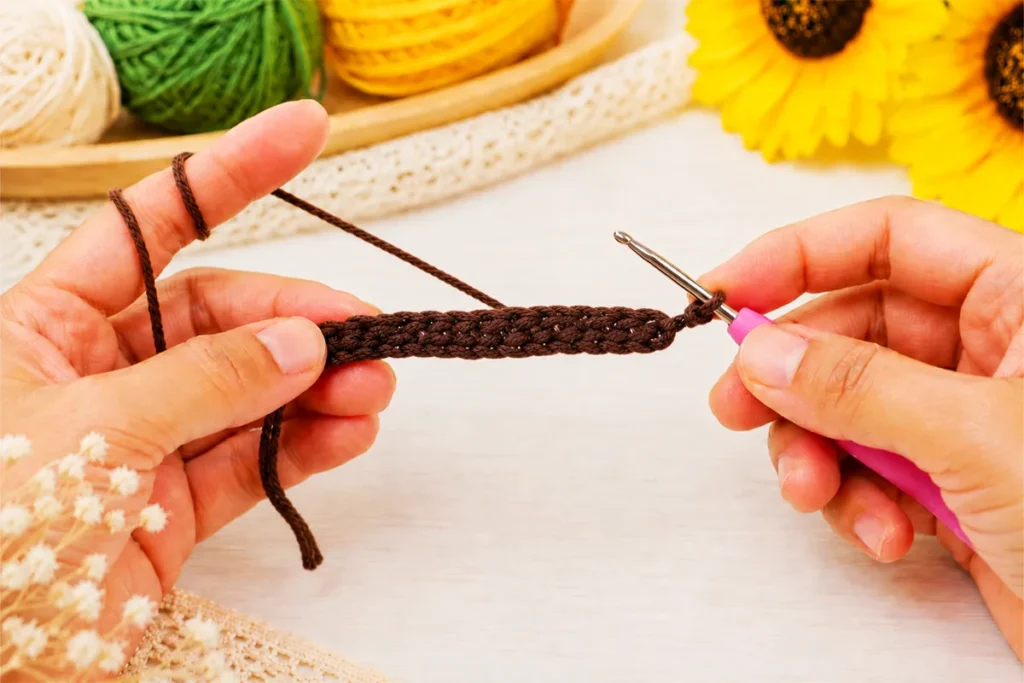
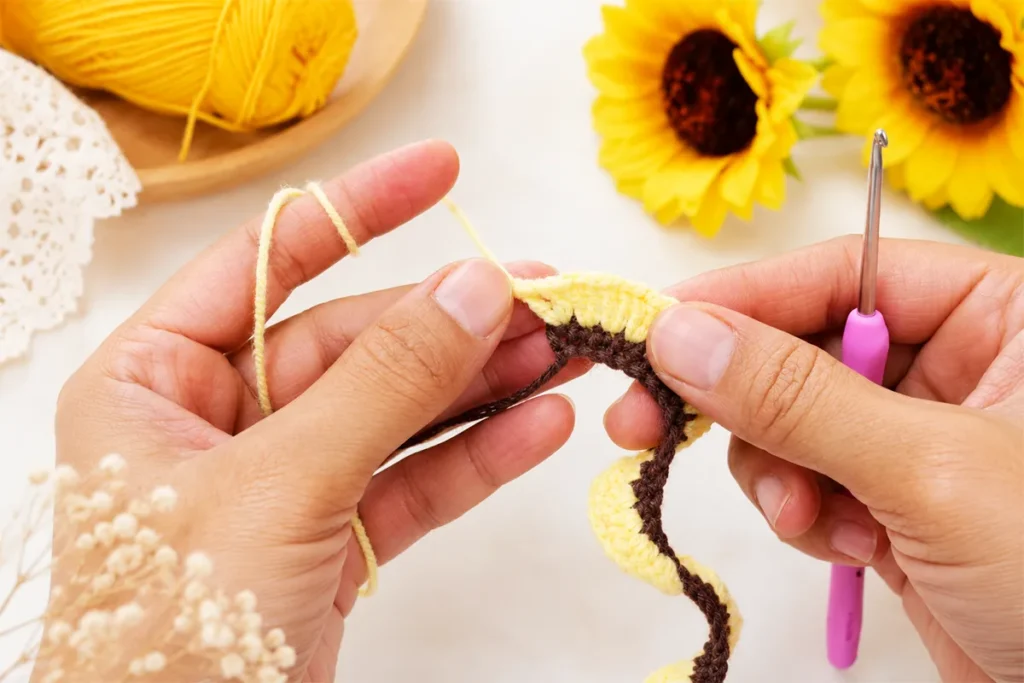
Row 1: Start the Crochet Wind Spinner Strip
Start with dark brown yarn.
Make a slip knot.
Chain 80, or chain to your desired length.
Start in the 3rd chain from your hook.
Work 1 hdc in each chain across the row.
When you reach the end of the row, chain 1 and cut your yarn.
Go back to the beginning of the row. You will continue from the beginning with color 2.
Row 2: Make the V-Stitch Crochet Row
Join color 2 to the first stitch.
Chain 5.
Work 1 dc in the same stitch.
This makes your first V-stitch.
Now continue across the row with V-stitches.
A V-stitch is:
dc, ch 1, dc
Work one V-stitch into each stitch across the row. Repeat until you reach the end of the row.
Try to keep your V-stitches even as you work. This row helps build the structure for the spiral shape later.
After the last V-stitch, chain 1 and cut your yarn.
Now go back to the beginning of the row and add the next color.
Row 3: Add Fullness to the Sunflower Crochet Pattern
Join your yarn in the center of the first V-stitch.
Chain 3.
Work 2 dc in the same space.
This begins the fuller sunflower row.
Now work 3 dc in each V-stitch across the row.
In the tutorial, I do not chain between the groups because I want the texture to stay full.
If your work feels too tight, you can chain 1 between the groups.
Continue across the row.
At the end, work 3 dc in the last V-stitch.
Chain 1 and cut your yarn.
Now add color 4 from the beginning of the row.
Row 4: Shape the 3D Spiral Crochet Wind Spinner
Join your yarn to the beginning chain.
Chain 2.
Work 3 dc in the same stitch.
This row adds more fullness to the crochet strip. That fullness is what helps the wind spinner twist into shape later.
Work 4 dc into the space between each 3-dc group from the previous row.
Repeat this all the way across.
As you work, the strip will start to look fuller and more ruffled. That fullness is what helps the strip twist into a spiral later.
At the end of Row 4, work 3 dc in the last dc.
The sunflower body is now ready.
Next, you will add the green leafy edge.
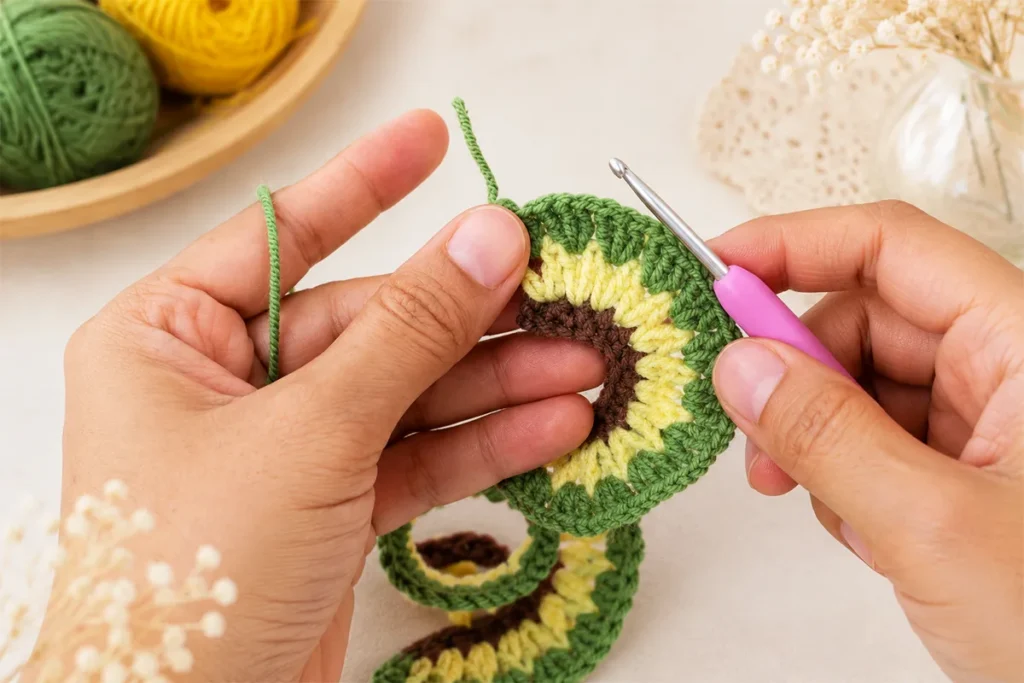
How to Crochet the Green Leafy Edge for a Sunflower Wind Spinner
Chain 1 and cut your yarn.
Go back to the beginning of the row.
Join green yarn to the beginning chain.
Chain 1.
Work 1 hdc in the same stitch.
Chain 2.
In the same stitch, work:
1 hdc, then 1 sc
This creates the first little leafy point.
Now work 1 sc on the 3rd dc.
Insert your hook into the gap between the groups.
In that gap, work:
2 sc
1 hdc
ch 2
1 hdc
2 sc
This creates one small leafy point.
Repeat this sequence across the row:
In the next gap, work 2 sc, 1 hdc, ch 2, 1 hdc, 2 sc.
Work 1 sc on the 3rd dc of the group.
Keep the points facing outward as you work. When the wind spinner curls, this green edge will frame the sunflower shape beautifully.
Continue the same green edge repeat to the end of the row.
At the end, work 1 sc on the last dc.
Chain 1 and cut your yarn.
Weave in the tail neatly on the back side.
How to Make the Crochet Wind Spinner Hanging Loop
Use the first color to make the hanging loop.
For this project, I used the dark brown yarn.
Join the yarn to the brown chain at one end of the wind spinner.
Make 25–30 chains.
You can adjust the loop length depending on where you want to hang your wind spinner.
In the tutorial, I made 25 chains.
Slip stitch into chain 12 or 13 to close the loop.
Slip stitch one more time.
Cut your yarn.
Weave the tail through the chains to hide it neatly.
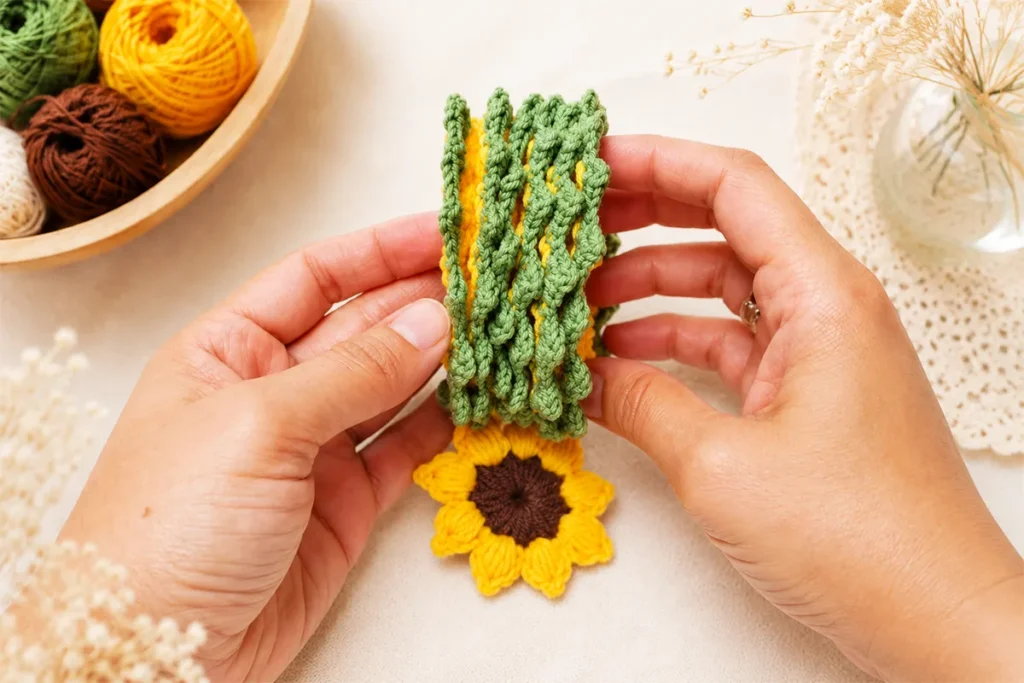
Add Beads and a Sunflower Charm to Your Crochet Wind Spinner
Now decorate the bottom of the wind spinner.
You can use beads, a small sunflower charm, or a crochet sunflower motif.
In the video tutorial, I used beads and a small sunflower charm for the bottom detail.
Attach the beads and sunflower charm securely to the bottom of the crochet strip.
If you want to make your own sunflower motif, you can visit this related sunflower tutorial:
DIY Crochet Flowers: How to Make a Stunning Sunflower Bouquet
You can also use a small flower detail from another wind spinner project if you like this style:
Easy Crochet Wind Spinner Tutorial for Scrap Yarn Decor
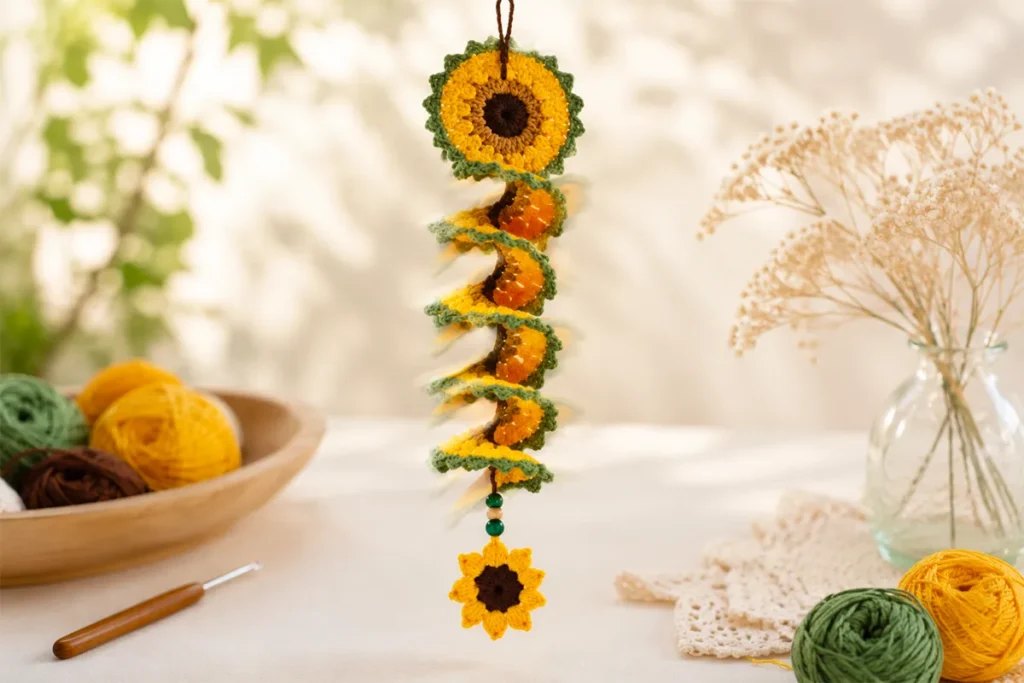
How to Shape the 3D Crochet Wind Spinner
Now comes the fun part.
Hold the wind spinner from the hanging loop.
Gently twist the crochet piece from the hanging loop to shape the spinner.
As you twist it, the flat crochet strip will begin to turn into a 3D spiral.
After shaping it, open the spiral gently with your fingers.
Do not pull too hard. Just let the spiral relax into shape.
Once it opens, you will see the sunflower wind spinner take its final 3D form.
Where to Use Your Crochet Sunflower Wind Spinner
This crochet sunflower wind spinner is lovely for outdoor and indoor decor.
You can hang it on:
- A porch
- A balcony
- A window
- A garden corner
- A patio
- A craft fair display
- A handmade gift basket
It also makes a sweet handmade gift for someone who loves flowers, sunflowers, garden decor, or cheerful home decorations.
If you enjoy decorative crochet pieces, you may also like this colorful outdoor project:
Easy Crochet Wind Spinner – Colorful DIY Garden Decor
Tips for a Neat Crochet Sunflower Wind Spinner
Keep Your Tension Even
Try to keep your stitches relaxed and even. If the rows are too tight, the strip may feel stiff and harder to shape.
Use Cotton Yarn for Defined Stitches
Cotton yarn helps the stitches look clean and gives the wind spinner a nice handmade texture.
Add a Chain Between Groups If Needed
In Row 3, the tutorial does not chain between the 3 dc groups. But if your crochet feels too tight, you can add ch 1 between the groups.
Open the Spiral Gently
After twisting the strip, use your fingers to open the spiral little by little. This helps the green leafy edge sit nicely around the sunflower body.
Make It Your Own
You can change the colors for different seasons. Try orange and brown for fall, red and green for Christmas, or pastel colors for spring.
Watch the Full Crochet Sunflower Wind Spinner Tutorial
If you like watching each step as you crochet, you can follow the full video tutorial on YouTube:
You can also visit my YouTube channel for more crochet tutorials:
Crochet Craftsman on YouTube
Download the Crochet Sunflower Wind Spinner PDF Pattern
You can download the written pattern here:
Download the Crochet Sunflower Wind Spinner PDF
Save it for later, print it, or keep it open while you follow the video tutorial.
More Crochet Wind Spinner and Handmade Gift Ideas
If you enjoyed this crochet sunflower wind spinner, you may also like these related crochet projects:
- Easy Crochet Wind Spinner Pattern for Beginners
- Easy Crochet Wind Spinner Tutorial for Scrap Yarn Decor
- DIY Crochet Flowers: How to Make a Stunning Sunflower Bouquet
- Crochet Gift Ideas – Handmade Gifts for Everyone
You can also follow along on social media for more crochet inspiration:
Frequently Asked Questions About Crochet Sunflower Wind Spinner
Is this crochet sunflower wind spinner beginner-friendly?
Yes, this crochet sunflower wind spinner is beginner-friendly if you know basic crochet stitches like chain, single crochet, half double crochet, double crochet, and slip stitch. The project is made in rows, and the spiral shape is created at the end by gently twisting the finished crochet strip.
What materials do I need for this crochet sunflower wind spinner?
You will need cotton yarn in dark brown, mustard, yellow, and green, a 2.5 mm crochet hook, beads, and a small sunflower charm or crochet sunflower motif for the bottom. You will also need scissors and a yarn needle to finish and hide the yarn tails.
What hook size is used for this crochet wind spinner?
This tutorial uses a 2.5 mm crochet hook. You can use a slightly different hook size if your yarn is thicker or thinner, but the finished size and texture may change.
How long should the starting chain be?
A starting chain of about 35–40 cm, or 14–16 inches, works well for this wind spinner. In the tutorial, I started with 80 chains.
Can I make the wind spinner longer or shorter?
Yes. You can chain any length you like. Make a longer starting chain for a longer wind spinner, or make fewer chains for a shorter one. Just keep in mind that the finished spiral length will depend on your yarn, hook size, and tension.
What is the V-stitch in this pattern?
The V-stitch used in this pattern is made with one double crochet, chain one, and one double crochet in the same stitch. In short, it is written as dc, ch 1, dc.
Why does the crochet strip turn into a 3D spiral?
The 3D spiral shape forms because each row adds more fullness to the crochet strip. The V-stitches, 3 double crochet groups, and 4 double crochet groups create a ruffled shape. When you twist the finished strip from the hanging loop, it turns into a spiral wind spinner.
What should I do if my crochet feels too tight?
If your work feels too tight, you can chain 1 between the double crochet groups. In the tutorial, I do not chain between the groups to keep the texture full, but adding a chain can help if your tension is tight.
How do I decorate the bottom of the wind spinner?
You can decorate the bottom with beads, a small sunflower charm, or a crochet sunflower motif. In this tutorial, I used beads and a small sunflower charm to finish the hanging detail.
Where can I hang this crochet sunflower wind spinner?
You can hang it on a porch, balcony, window, garden corner, craft display, or anywhere you want to add a cheerful handmade decoration. It also makes a lovely handmade gift or craft fair item.
Final Thoughts
This sunflower wind spinner is such a cheerful project, and the final spiral makes it feel extra special. It begins with a simple strip, but once you twist it into shape, it becomes a bright 3D sunflower decoration that looks lovely when it hangs and moves.
It is a nice project for using cotton yarn, practicing simple stitches, and making something decorative without a complicated pattern.
I hope you enjoy making your own crochet sunflower wind spinner. If you make one, I would love to see how it turns out.
Happy crocheting!