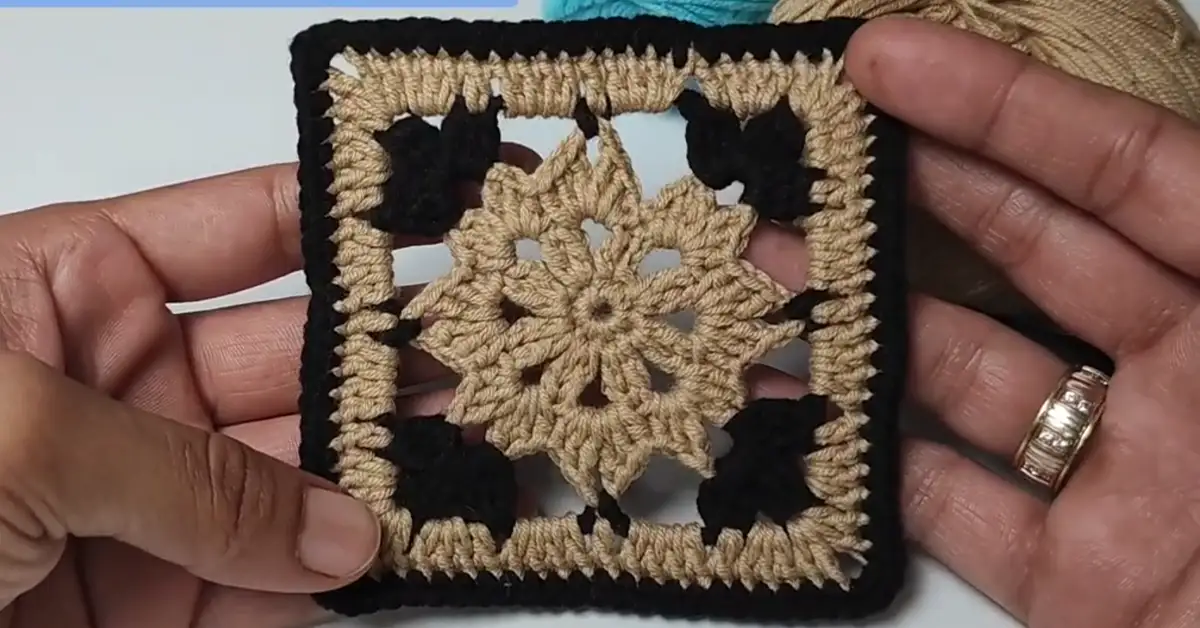
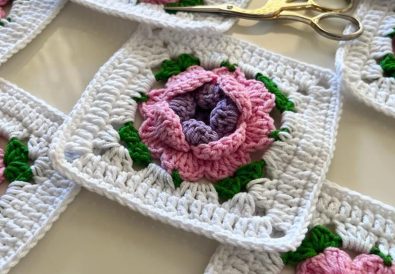
Dive into the delightful world of crochet with this easy-to-follow guide on creating a classic granny square. This versatile crochet square pattern is the foundation for countless projects, but today, we’ll be focusing on crafting a cozy and colorful granny square blanket. Whether you’re a complete beginner or looking for a relaxing project to add a touch of handmade charm to your home, this easy crochet square pattern is perfect for you.
This crochet square is a wonderful introduction to the art of crochet. The finished project is a beautiful, textured square that can be joined together to create blankets, afghans, bags, and more! The difficulty level is beginner-friendly, making it a great starting point for those new to crochet.
Getting Started
First of all, let’s gather our essentials. To start, you’ll need some yarn, a crochet hook, and a pair of scissors. Of course, feel free to add a stitch marker and a tapestry needle for weaving in ends, but those are optional. In addition to these tools, you might want a comfy chair and a good cup of tea to make your crafting experience even more enjoyable!
Choosing the Right Yarn for Your Crochet Square
Definitely, yarn choice plays a vital role in the overall look and feel of your finished crochet square. For instance, for a cozy and durable blanket, you might opt for a worsted weight cotton yarn like the one used in the video by @TubaCrochet (link to her channel: https://www.youtube.com/@TubaCrochet). To illustrate, she uses Himalaya Amigurumi Cotton Yarn. Indeed, this yarn is soft, easy to work with, and comes in a wide variety of vibrant colors. Notably, the colors used in the video are a light base color (Color A), a contrasting color for the second round (Color B), and a third color for the final border (Color C).
Initially, experiment with different colors to find combinations that spark your creativity! Meanwhile, if you prefer a lighter and more airy blanket, you could consider using a DK weight yarn. Accordingly, the hook size should also be adjusted to match the yarn weight. Primarily, remember to always check the yarn label for recommended hook sizes.
Yarn Characteristics:
- Color: The original pattern uses multiple colors, including blue, milky coffee, and bright accents. You can experiment with your own color palette to match your style.
- Thickness: This yarn is medium-weight, ensuring that your squares hold their shape.
- Material: 100% cotton, which provides a soft texture and excellent stitch definition.
Understanding Crochet Square Abbreviations
Before we jump into the pattern, let’s familiarize ourselves with some common crochet abbreviations. Currently, these abbreviations are used in patterns worldwide, making them essential for any crocheter. During this tutorial, we’ll be using the following abbreviations:
- ch – chain
- sc – single crochet
- hdc – half double crochet
- dc – double crochet
- trc – triple crochet
- sl st – slip stitch
- popcorn: popcorn stitch (5dc in same stitch, remove hook, insert hook in first dc, pull loop through last loop on hook)
- […] – repeat instructions within brackets as indicated
- ( ) – total number of stitches at the end of the round/row
Immediately, let’s move on to the exciting part – creating our crochet square!
Essential Tools for Crochet Square Success
Besides the yarn and hook, there are a few other tools that can make your crochet square pattern journey smoother. Also, a good pair of scissors is essential for clean yarn cuts. And a tapestry needle will come in handy for weaving in ends neatly. Again, a stitch marker can help you keep track of your rounds, especially when working with intricate patterns. Equally important, good lighting and a comfortable workspace can make a big difference in your enjoyment and productivity. Finally, don’t forget your favorite beverage and a cozy spot to settle in for some creative time!
Mastering the Basic Crochet Square
Now that you know the basics, let’s dive into the crochet square pattern itself! This pattern is worked in rounds, starting from the center and building outwards.
Step-by-Step Guide to the Classic Crochet Square Pattern
Let’s get started with the crochet square pattern! In this tutorial, we’ll follow the pattern demonstrated in the video by @TubaCrochet. To begin with, make sure you have your yarn and hook ready. Now that you know the basics, let’s begin!
(Color A) Round 1:
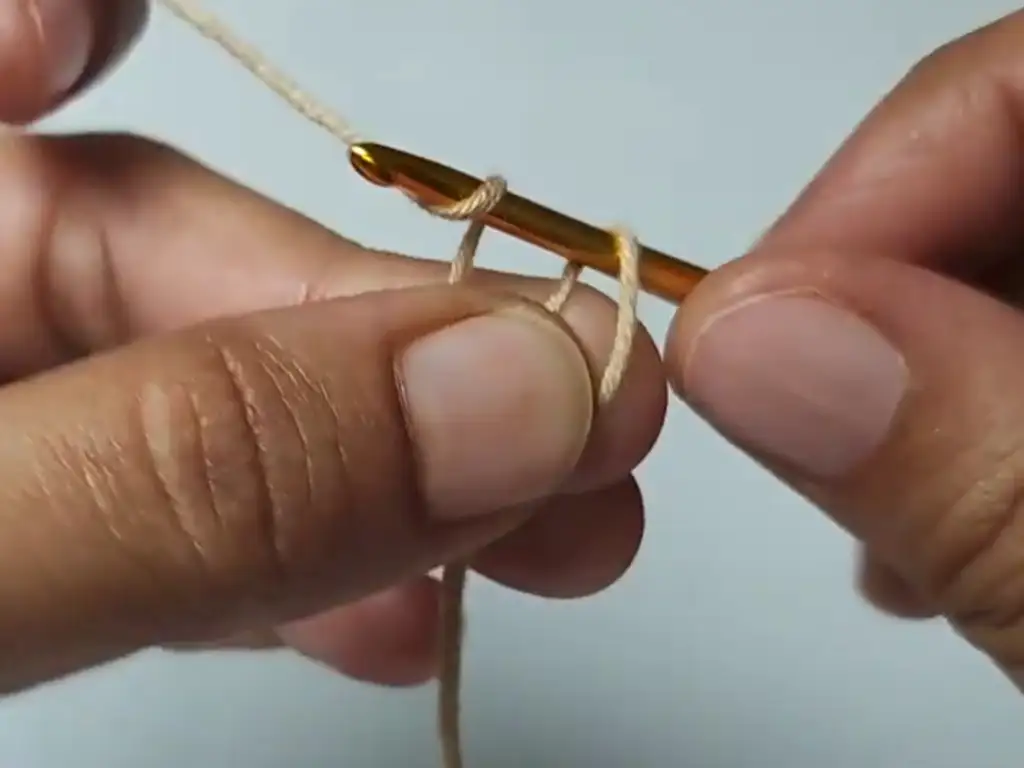
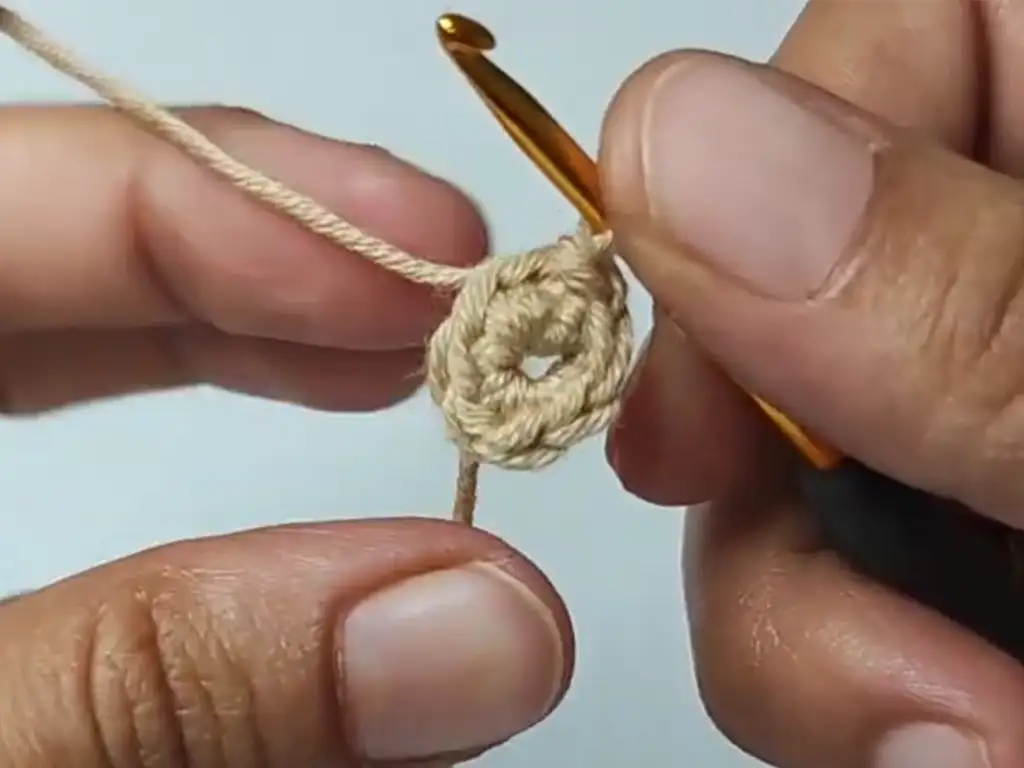
- Make a magic ring.
- Ch 1, 8 sc into the ring.
- Sl st to the top of the first ch.
- Ch 3, tr into the same space.
- Ch 2, 2 tr into the top of the next sc.
- Repeat steps 5 and 6 for the remaining sc, making 2 tr in each space with 2 ch between them.
- Ch 2, sl st to the top of the first ch (you have 8 groups of 2 tr).
- Sl st to the top of the bottom 2 tr.
Secondly, we’ll build upon this foundation, creating the iconic granny square shape.
(Color A) Round 2:
- Ch 1.
- Hdc, dc, tr in the next ch space.
- Ch 3, tr, dc, hdc in the same space.
- Repeat steps 2 and 3 for the next 2 ch spaces.
- Sl st to the top of the first ch.
- Ch 1, cut the yarn, change to a new color.
- Fasten the new yarn to the top of any 2 ch spaces.
After that, we’ll add some texture and visual interest with the next round.
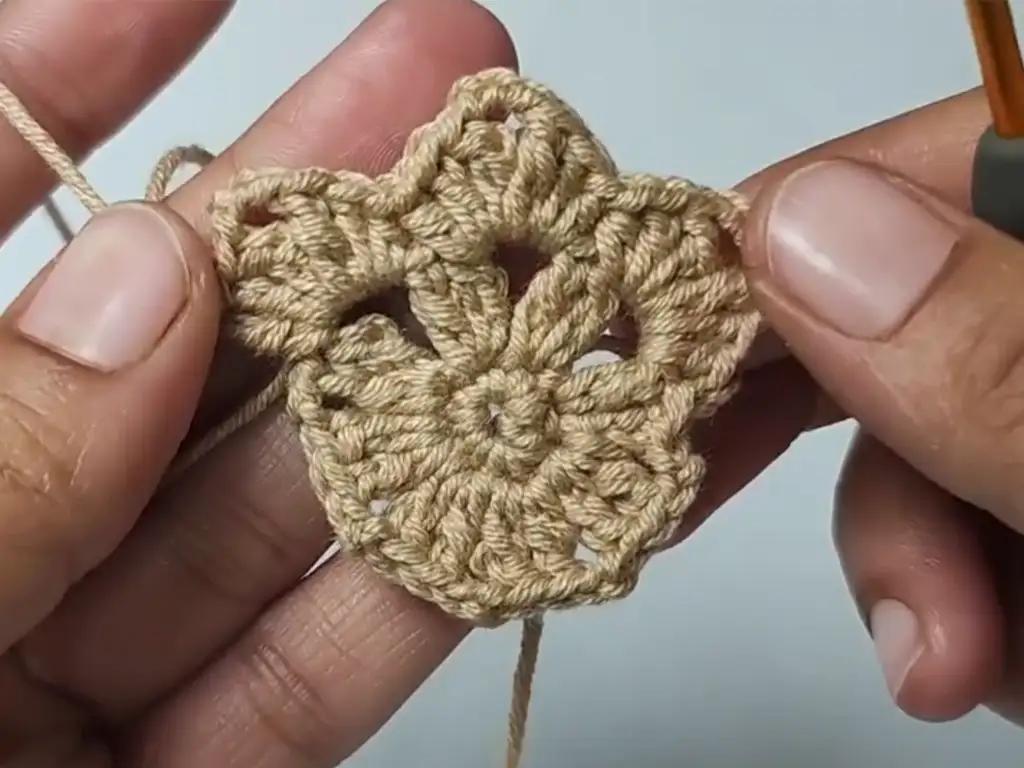
Round 3 (Color A):
- Ch 3, make a Pop stitch.
- Ch 2, repeat the pattern of 2 tr, 2 ch, 2 tr into the same space (3 groups total).
- Ch 4, sc into the next ch space.
- Ch 4, repeat the pattern of 3 groups of 2 tr, 2 ch, 2 tr into the next ch space.
- Repeat steps 3 and 4 for the remaining ch spaces, creating a corner with each group of 3 tr.
- Ch 4, sl st to the top of the first group.
- Ch 1, cut the yarn, change to a new color.
- Fasten the new yarn to the top of any 2 ch spaces.
Consequently, we’ll create the corners and add more visual flair.
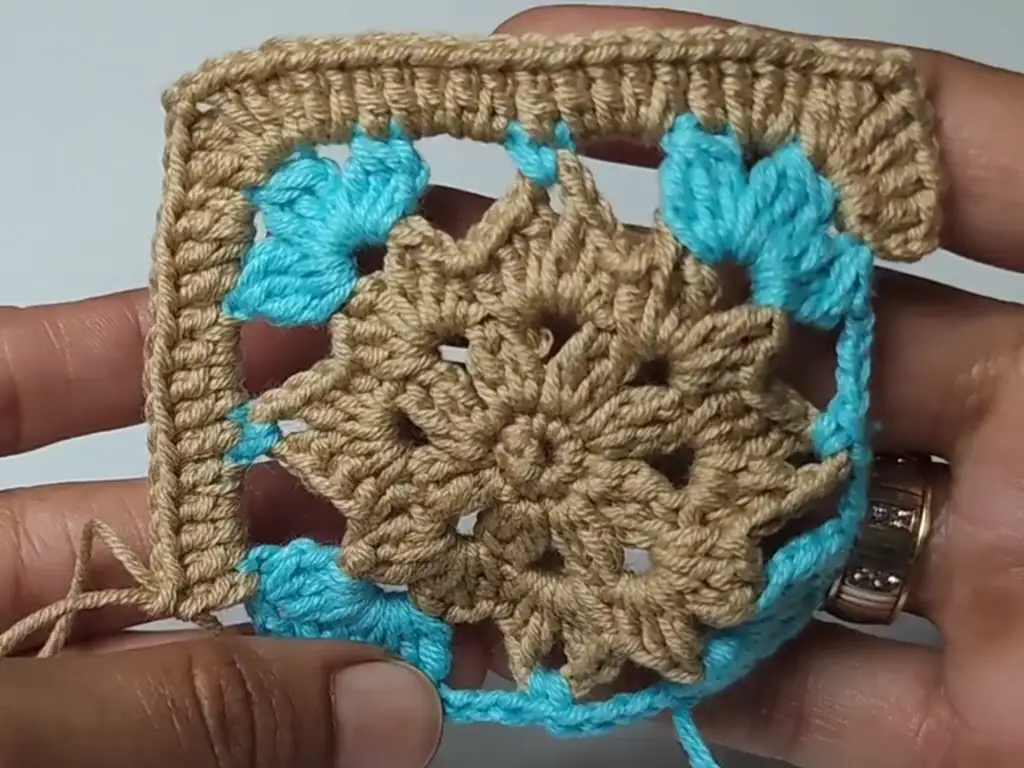
(Color B) Round 4:
- Ch 3, 2 dc into the same space.
- 2 tr, ch 2, 2 tr into the top of the middle pattern in the previous row.
- 3 dc into the next 2 ch spaces.
- 1 dc to the top of the last pattern in the previous row.
- 4 dc into each of the 4 ch spaces, and 1 dc on top of the sc.
- Repeat steps 2-5 for the remaining ch spaces, replicating the corner pattern.
- Sl st to the top of the first ch.
- Ch 1, cut the yarn, change to a new color.
- Fasten the new yarn to the top of any ch space.
Finally, we’ll complete the square with a final round of stitches.
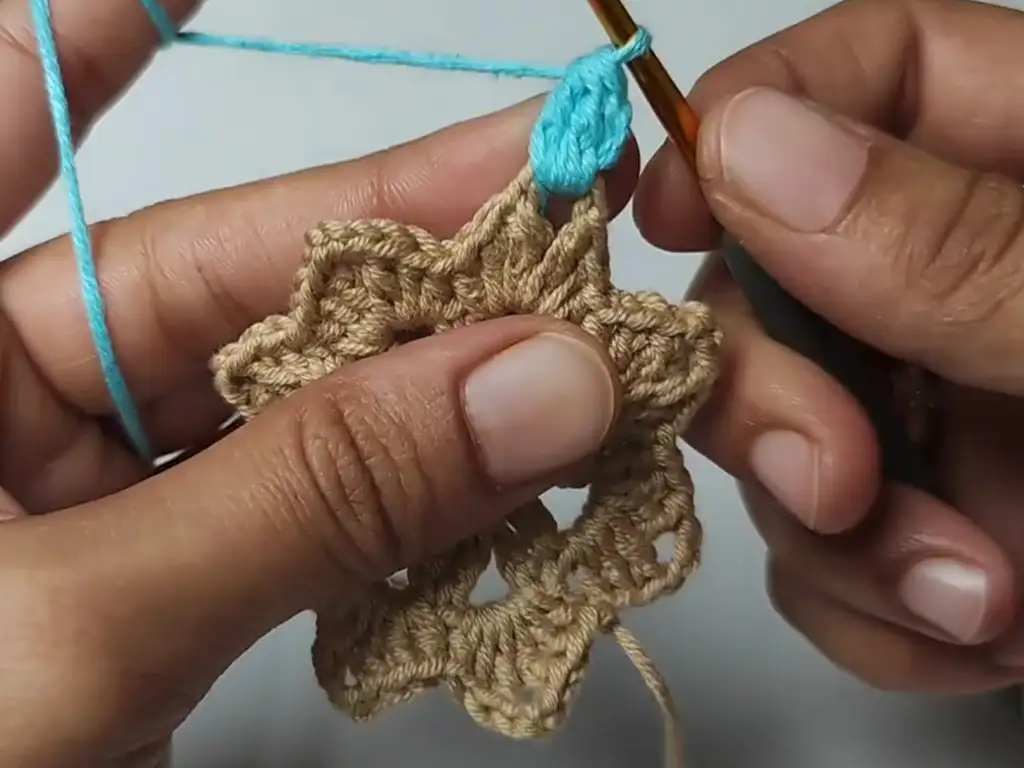
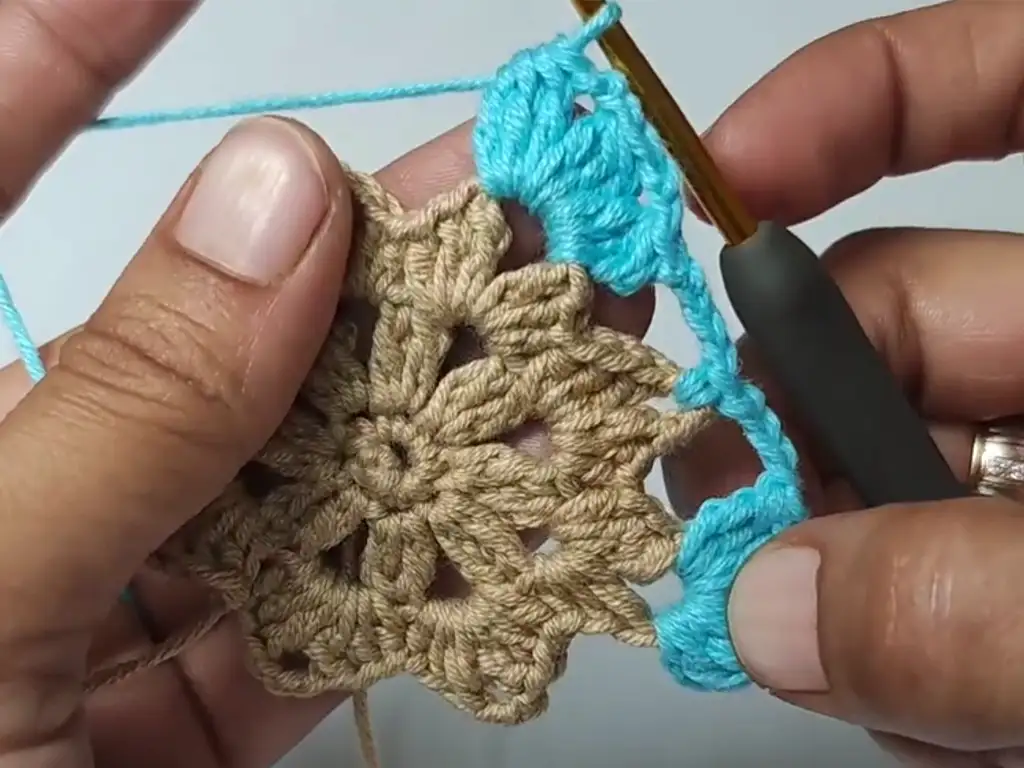
Round 5 (Color C):
- Fasten off Color B. Join Color C with a sl st in any ch-2 space.
- ch 3 (counts as 1 dc). 2 dc in the same space.
- 2 trc, ch 2, 2 trc in the next ch-2 space (between popcorn stitches).
- 3 dc in the next ch-2 space.
- 1 dc in the next sc.
- 4 dc in the next ch-4 space.
- Repeat steps 2-6 around. (8 corner groups and 8 side groups)
- sl st in the top of the starting ch-3.
- Fasten off and weave in ends.
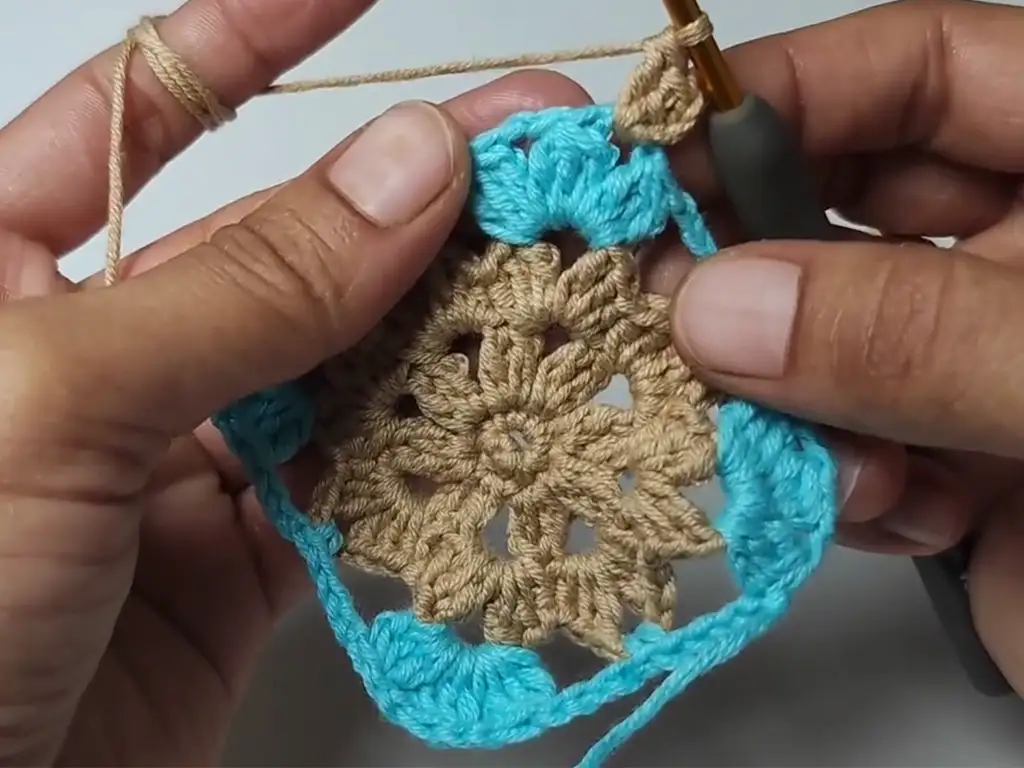
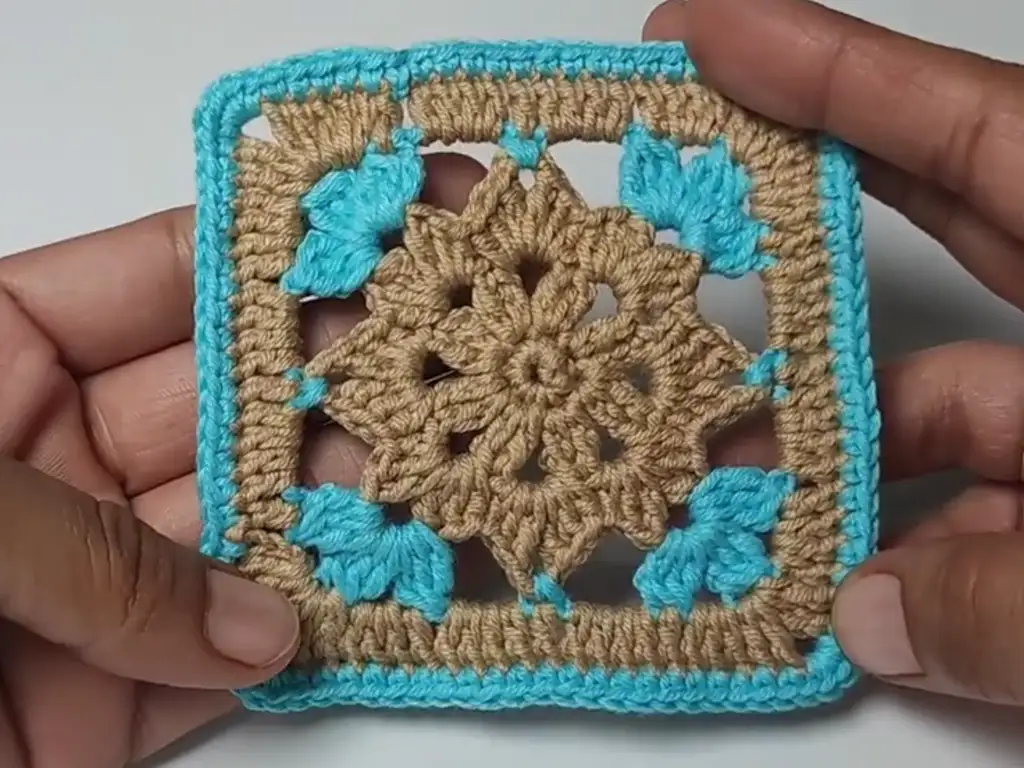
Round 6 (Color C):
- Join Color C with a sl st in any stitch.
- ch 1. sc in each stitch around until you reach a corner ch-2 space.
- 4 sc in the corner ch-2 space.
- Continue with sc in each stitch around until the next corner, then repeat step 3.
- Continue in this manner around.
- sl st in the first sc.
- Fasten off and weave in ends.
After that, you’ll have a beautifully textured crochet square! After completing one square, you’ll be eager to make more. That’s the addictive nature of crochet square patterns! Subsequently, you can use these squares to create a variety of projects, including the classic granny square blanket.

Troubleshooting Common Crochet Square Pattern Mistakes
As you can see, the crochet square pattern is fairly straightforward. Undoubtedly, you might encounter a few common mistakes along the way. For example, losing count of your stitches is a common mishap. First of all, don’t worry! Of course, it happens to the best of us. Definitely, just take a deep breath and try counting your stitches again. Afterward, you can use a stitch marker to help you keep track. Definitely, practice makes perfect!
Actually, another common mistake is incorrect tension. Really, if your stitches are too tight or too loose, it can affect the overall shape and size of your crochet square. Then, try to maintain a consistent tension throughout your work. Additionally, practicing on scrap yarn can help you find your perfect tension.
Practicing Your Crochet Square Pattern Technique
Finally, don’t be afraid to practice! The more you practice, the more confident you will become with your crochet skills. It’s a great idea to make a few squares before moving on to larger projects. Experiment with different color combinations and stitch variations.
Variations on the Classic Crochet Square Pattern
Now, let’s spice things up! Since then, the classic crochet square pattern is a fantastic foundation, but there are endless ways to customize it and make it your own. Soon, you’ll be creating unique and stunning crochet squares that reflect your personal style.
Adding Texture to Your Crochet Square Pattern
To begin, let’s explore how to add texture to your crochet square. To put it another way, you can use different stitch combinations to create interesting surface designs. In conclusion, experimenting with different stitches can add a whole new dimension to your crochet squares.
In general, you can try incorporating puff stitches, bobble stitches, or even shell stitches. Briefly, these stitches create raised textures that add visual interest to your work. In summary, don’t be afraid to get creative and try out new stitch patterns!
Exploring Different Crochet Square Pattern Stitches
To summarize, the world of crochet is filled with a vast array of stitches, each with its own unique charm. Let’s get started by exploring some of the stitches that can be used in crochet square patterns. In this tutorial, we’ll briefly touch upon a few popular choices.
To begin with, the single crochet (sc) is the most basic stitch and is often used as the foundation for many patterns. Now that you know the single crochet, let’s move on to the half double crochet (hdc), which is slightly taller and creates a tighter fabric. As well as these basic stitches, there are more intricate stitches like the double crochet (dc) and the triple crochet (trc), which produce taller stitches and more open fabric. Specifically, you can use these stitches to create different textures and visual effects in your crochet squares.
Creating Unique Crochet Square with Color Changes
Overall, color plays a significant role in the visual appeal of your crochet square pattern. Likewise, changing colors strategically can create stunning patterns and designs. Nonetheless, you can create stripes, checkerboard patterns, or even intricate colorwork designs. Still, experimenting with different color combinations can be a lot of fun and allow you to express your creativity!
Even though the pattern in the video uses three colors, you can adapt it to use more or fewer colors. Initially, try using a single color for a minimalist look, or use multiple colors for a vibrant and playful design. Meanwhile, the possibilities are endless!
Creating a Granny Square Blanket with Your Crochet Square Patterns
Accordingly, you’ve mastered the crochet square pattern and explored various variations, it’s time to put your skills to the test and create a beautiful granny square blanket! Primarily, this is a rewarding project that allows you to showcase your creativity and create a cozy and functional piece for your home.
Joining Your Crochet Square Patterns Together
Notably, there are several ways to join your crochet squares together. Significantly, one common method is the slip stitch join, where you simply slip stitch the squares together along their edges. Introducing, another popular method is the single crochet join, which creates a more defined seam. In addition to these methods, you can also use a whip stitch or a mattress stitch to join your squares invisibly.
Adding a Border to Your Crochet Square Blanket
To sum it up, adding a border to your granny square blanket is a great way to frame your hard work and add a finishing touch. Ultimately, you can choose a simple border, like a single crochet or a half double crochet, or opt for a more elaborate border with decorative stitches.
Finishing Touches for Your Crochet Square Blanket
Notably, weaving in your ends is the final step. This will ensure your blanket is neat and tidy and will prevent any loose ends from unraveling.
Tips and Tricks for Perfect Crochet Square Patterns
Here are a few additional tips and tricks to help you achieve perfect crochet square patterns:
Maintaining Consistent Tension in Your Crochet Square Patterns
Nevertheless, maintaining consistent tension is crucial for a professional-looking finished product. Practice regularly to develop a consistent tension that works for you.
Counting Stitches Accurately in Your Crochet Square Patterns
Despite this, counting your stitches accurately is essential for maintaining the correct size and shape of your crochet squares. Take your time and count carefully, especially when working with intricate patterns.
Avoiding Common Crochet Square Pattern Errors
Introducing, by paying attention to detail and practicing regularly, you can avoid common errors and create beautiful, flawless crochet squares.
Beyond the Basics: Exploring Advanced Crochet Square Patterns
Due to the popularity of crochet squares, there are countless variations and advanced patterns to explore. In other words, once you feel comfortable with the basic crochet square pattern, you can branch out and try more complex designs. To wrap up, the world of crochet squares is vast and exciting!
As you can see, the crochet square pattern is a versatile and enjoyable craft that can be adapted to create a wide range of projects. Undoubtedly, you’ll be hooked on creating these beautiful squares in no time!
There, on the left, you can see a finished crochet square. In short, it’s a testament to the beauty and simplicity of this craft. To sum up, crochet square patterns are a wonderful way to express your creativity and create handmade treasures.
To begin, let’s recap the key takeaways from this tutorial. To put it another way, we’ve covered the basics of the crochet square pattern, explored variations, and discussed tips for success. In conclusion, you’re well-equipped to embark on your crochet square journey!
Increasing and Decreasing Rows
To modify the size of your crochet square, you can increase or decrease the number of stitches in each round.
Increasing: To make a larger square, add extra repeats within the rounds. For example, in Round 2, work ch 2, 2 tr in the next sc 10 times instead of 8.
Decreasing: To make a smaller square, reduce the number of repeats. For example, in Round 2, work ch 2, 2 tr in the next sc 6 times instead of 8.
Encouraging Creativity and Community Interaction
Crochet is not just about creating beautiful projects; it’s also about sharing your work and being part of a community. We encourage you to share your finished projects on Instagram @TubaCrochet_, TikTok @TubaCrochet, and Facebook @TubaCrochet. We would love to see how you’ve made these crochet square patterns your own!
Other Crochet Projects You’ll Love
Now that you know how to create a beautiful crochet square, why not explore other exciting crochet projects?
- Crocheting Amigurumi
- Creating Crochet Bags and Totes
- Designing Crochet Scarves and Shawls
Conclusion
The Crochet Square Pattern is a versatile, beginner-friendly project that opens up a world of creative possibilities. Whether you’re making a classic granny square blanket or experimenting with more intricate designs, the skills you develop with these squares will serve as a foundation for many future projects. Remember, the joy of crochet is not just in the finished product but in the process of creating something beautiful with your own hands. We’d love to hear from you! Share your tips, tricks, and experiences in the comments below. Happy crocheting!

