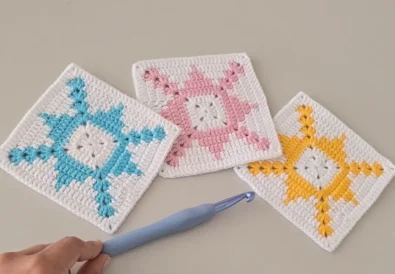
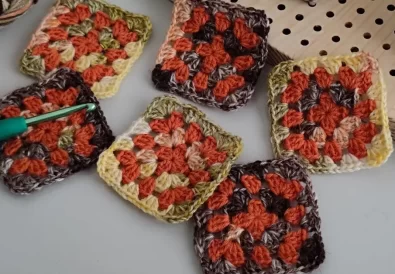
Granny squares are a staple in the world of crochet, known for their timeless appeal and versatility. These small squares can be stitched together to create stunning blankets, pillows, bags, and more. In this tutorial, we’re diving into a diy granny square with a unique twist: the waffle stitch. This textured design adds depth and interest to your projects, making it a standout piece in any collection. Notably, this pattern is beginner-friendly and perfect for anyone looking to explore new crochet techniques while sticking to the classic charm of granny squares.
What is a Granny Square?
Firstly, let’s talk about the star of the show: the granny square. It’s a timeless motif that has captured the hearts of crocheters for generations. In essence, a granny square is a small square worked in rounds, typically starting from a central point and growing outward. Generally, they are constructed using simple stitches, making them an excellent project for beginners. Notwithstanding its simplicity, the granny square offers endless possibilities for creativity.
The History of the Granny Square
The granny square has a rich history, dating back to the early 19th century. Originally, it was a way for thrifty crafters to use up leftover yarn scraps. The simple design of granny squares allowed them to create beautiful, multicolored blankets without any waste. Over time, the granny square evolved, becoming a beloved technique in its own right. Today, granny squares are still popular because of their simplicity and versatility.
Why Granny Squares Are So Popular
Granny squares are popular for many reasons. Firstly, they’re easy to learn, making them ideal for beginners. Secondly, they’re highly versatile, allowing you to create anything from small accessories to large blankets. Lastly, granny squares can be customized in countless ways, from color choices to stitch patterns. This means that even though the basic technique remains the same, each granny square project can be completely unique.
The Waffle Stitch Granny Square: A Unique Twist
The waffle stitch adds a delightful texture to the classic diy granny square. It’s a simple stitch that creates a deep, squishy texture reminiscent of a breakfast waffle. In this tutorial, we’ll show you how to combine this textured stitch with the traditional granny square structure to create a crochet square that’s not only visually appealing but also incredibly fun to work on.
Understanding the Waffle Stitch Texture
The waffle stitch is created by alternating front post double crochets (FPdc) with regular double crochets (dc). This pattern forms a grid-like structure with raised and recessed sections, giving it the signature “waffle” look. In this pattern, you’ll see how this stitch works beautifully to create a crochet square that’s thick, warm, and perfect for cozy projects.
Benefits of the Waffle Stitch for Granny Squares
The waffle stitch is an excellent choice for granny squares because it adds extra thickness and texture, making your finished projects more substantial and luxurious. Moreover, the stitch pattern is simple enough for beginners to master but offers enough interest to keep experienced crocheters engaged. Whether you’re making a blanket, a pillow, or another home décor item, the waffle stitch granny square is sure to impress.

Materials You’ll Need for Your Granny Square
Before we dive into the diy granny square tutorial, let’s talk about the materials you’ll need. First, choose your yarn. For this project, we recommend using a medium-weight yarn (worsted weight) in 100% acrylic or cotton for durability and easy care. You can select any color, but for a classic look, a neutral tone works well.
- Yarn: Medium-weight (worsted weight) yarn in your choice of color. For example, a soft cream or pastel shade works beautifully for a classic, cozy look.
- Hook: Use a size H/8 (5.0 mm) crochet hook. This size ensures that your stitches are tight enough to hold the texture but still soft and flexible.
- Other Supplies: Besides yarn and hook, you’ll need a pair of scissors and a tapestry needle for weaving in ends. If you like, you can also use stitch markers to keep track of your rounds.
Diy Granny Square Tutorial: Step-by-Step Guide
Now that you know what you need, let’s dive into the granny square tutorial!
Getting Started: The Magic Ring (or Foundation Chain)
To begin, we’ll start with a magic ring. If you’re unfamiliar with the magic ring, you can also start with a foundation chain of 4 stitches, then slip stitch the first and last chains together form a ring. The magic ring provides a neat and tidy center for your granny square. In this tutorial, we’ll be using the magic ring method.
- Round 1: Building the Granny Square Base
- Make a magic ring.
- Chain 3 (this counts as your first double crochet).
- Chain 1 (this creates the space between stitch groups).
- Work 3 double crochet stitches into the magic ring.
- Repeat steps 3 and 4 three more times. You should now have 4 groups of 3 double crochet stitches, separated by chain-1 spaces.
- Slip stitch into the top of the beginning chain-3 stitch close the round.
- Round 2: Expanding the Square
- Slip stitch into the first chain-1 space.
- Chain 3 (counts as a dc).
- Chain 1.
- Work 2 double crochet stitches into the same chain-1 space.
- Work 3 double crochet stitches into the next chain-1 space. Chain 1.
- Repeat from * around the entire granny square.
- Slip stitch into the top of the beginning chain-3 stitch close the round.


Rounds 3 & 4: Creating the Waffle Stitch Pattern
Here’s where the magic happens! We’ll start incorporating the front and back post double crochet stitches create the waffle stitch texture.
- Round 3:
- Slip stitch into the first chain-1 space.
- Chain 3 (counts as a dc).
- Chain 1.
- Work 2 double crochet stitches into the same chain-1 space.
- Front post double crochet (fpdc) around the next double crochet stitch. Work 2 regular double crochet stitches into the next 2 stitches. Front post double crochet (fpdc) around the next double crochet stitch. Work 2 double crochet stitches and chain 1 into the next chain-1 space.
- Repeat from * around the entire granny square.
- Slip stitch into the top of the beginning chain-3 stitch close the round.
- Round 4:
- Slip stitch into the first chain-1 space.
- Chain 3 (counts as a dc).
- Chain 1.
- Work 2 double crochet stitches into the same chain-1 space.
- Back post double crochet (bpdc) around the next double crochet stitch. Work 2 regular double crochet stitches into the next 2 stitches. Back post double crochet (bpdc) around the next double crochet stitch. Work 2 double crochet stitches and chain 1 into the next chain-1 space.
- Repeat from * around the entire granny square.
- Slip stitch into the top of the beginning chain-3 stitch close the round.
Continuing the Pattern: Increasing for Larger Granny Squares
After that, continue the pattern by alternating between Round 3 (fpdc) and Round 4 (bpdc) for as many rounds as you like. However, each time you work a round, increase the number of regular double crochet stitches between the front/back post stitches by 2. For example:
- Round 5 (fpdc round): Work 4 regular double crochet stitches between fpdc stitches.
- Round 6 (bpdc round): Work 4 regular double crochet stitches between bpdc stitches.
- Round 7 (fpdc round): Work 6 regular double crochet stitches between fpdc stitches.
- And so on…


Granny Square Variations: Color & Size Ideas
Now that you’ve mastered the basic waffle stitch granny square, let’s explore some fun variations!
Choosing Yarn Colors for Your Granny Square
First of all, have fun with color! Diy Granny squares are a fantastic way showcase your favorite yarn colors and create vibrant designs. You can choose a single color for a classic look, or mix and match different colors create eye-catching patterns.
Making Multicolored Granny Squares: Stripe & Gradient Effects
In addition, you can create stripes by changing colors at the end of each round. Alternatively, you can create a beautiful gradient effect by gradually transitioning between different shades of the same color or using a variegated yarn. For instance, you could use a light blue, a medium blue, and a dark blue create a soothing ocean-inspired granny square.
Adjusting Granny Square Size: More or Fewer Rounds
Moreover, the size of your diy granny square is entirely up you! Certainly, simply continue working rounds until your square reaches your desired dimensions. To illustrate, if you’re making a blanket, you might want larger granny squares, while smaller squares might be more suitable for a pillow or other crochet home decor projects.
Granny Square Projects: Blankets, Pillows & More!
Now, let’s talk about what you can do with all these beautiful granny squares! The possibilities are truly endless.
Granny Square Pillow Patterns & Inspiration
Indeed, granny squares make fantastic pillows! You can create a simple square pillow by joining four granny squares together, or get more creative with different shapes and layouts. For example, you could arrange granny squares in a diagonal pattern or create a patchwork effect by using different color combinations.
Other Creative Diy Granny Square Projects
Besides blankets and pillows, granny squares can be used for a wide range of other projects. In fact, you can use them make bags, scarves, shawls, and even garments like cardigans and sweaters. To put it another way, the only limit is your imagination!
The “Plush Waffle” Granny Square Written Pattern:
Furthermore, if you’d like a printable version of the waffle stitch granny square pattern, you can download the free PDF here.
Tips and Tricks from the Video Tutorial:
Undoubtedly, a big thank you goes out @NatalyMasters for her fantastic video tutorial on the waffle stitch granny square. Check out her channel for more amazing crochet inspiration.
In particular, here are a few helpful tips I picked up from her video:
- Use a smooth, comfortable hook: This will make it easier work the front and back post stitches.
- Be mindful of your tension: Consistent tension will help your diy granny squares lie flat and look their best.
- Don’t be afraid experiment with color: Granny squares are a great way play with different color combinations.
- Block your granny squares before joining them: Blocking helps even out the stitches and gives your finished project a polished look.
Watch the Video Tutorial:
To begin with, if you’d like a visual guide the waffle stitch granny square, I highly recommend watching the video tutorial:
Share Your Creations!
Most importantly, I’d love see your waffle stitch granny squares! Share your projects on Instagram, TikTok, and Facebook.
Let’s Connect!
Finally, don’t hesitate leave a comment below if you have any questions or want share your thoughts on the waffle stitch granny square. Likewise, let’s create a vibrant crochet community together!
Other Crochet Projects You’ll Love:
- Easy Crochet Blanket Patterns for Beginners
- Crochet Pillow Pattern
- Crochet Shawl&Scarf Patterns
Conclusion: Ultimately, the waffle stitch granny square is a fun and versatile pattern that’s sure add a touch of texture and style your crochet projects. As you can see, whether you’re a beginner or an experienced crocheter, I encourage you give this pattern a try. In conclusion, I hope you enjoy crocheting these beautiful squares as much as I do! Happy crocheting!


