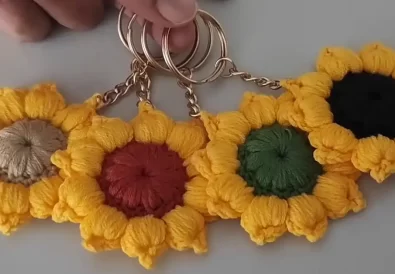
Looking for a fun and easy crochet project you can finish in one sitting? You’re in the right place! This crochet ball keychain is not only beginner friendly, but also makes a perfect little gift for your friends or a cute decoration for your car. With just basic materials and three yarn colors, you’ll create a soft, 3D ball keychain that looks impressive but is super simple to make. Let’s get started!
How to Crochet a Ball Keychain – Step-by-Step for Beginners
Materials for Your Crochet Ball Keychain
Before we begin, here’s what you’ll need:
- Medium-weight yarn (5-ply, 50% cotton, 50% acrylic) in 3 colors
- 2.20 mm crochet hook
- Keychain clip
- Tapestry needle
- Fiberfill for stuffing
- Scissors
Everything here is affordable and easy to find. Pick your favorite yarn colors to personalize your keychain!
Best Yarn and Hook for Crochet Keychain Projects
For the best shape, use yarn that holds its form well. Cotton blends are great for this. A 2.20 mm hook helps create tight stitches that keep stuffing secure. Try mixing pastels or bold colors for a fun, playful look.

Crochet Ball Keychain Pattern – Full Tutorial
Crochet the First Ball of the Keychain
- Chain 31, leaving a small yarn tail.
- Fold the chain into a loop and slip stitch into the first chain.
- Starting from the second chain, make 30 single crochets.
- Slip stitch into the first sc to complete the round.
Repeat the following steps for a total of 8 rounds:
- Chain 1
- 1 single crochet into each stitch (30 total)
- Join with a slip stitch
After Round 8, cut the yarn, make a hidden join, and weave in the yarn tail from the beginning.
Make the Second Ball for Your Crochet Keychain
Repeat the exact same steps using your second color. Again, work 8 rounds of 30 single crochets and finish with a hidden join. Do not stuff the circles yet.
How to Interlock Balls for a 3D Crochet Keychain
Now take your third yarn color. Chain 31, then form it into a loop.
Before you start crocheting, pass this loop through the other two circles—one from the left, one from the right.
Crochet 30 single crochets around the chain.
Repeat the same 8-row pattern. This will give you a beautiful 3D structure.
Stuffing Your Crochet Ball Keychain
Now that all three circles are crocheted and linked, it’s time to stuff them.
Gently fill each circle with fiberfill stuffing to give them a full, round shape.
Adjust each ball so it’s evenly aligned.
After finishing Round 8, cut the yarn and leave a long tail. You’ll use this to attach the keychain clip.
Attaching the Clip to Your Crochet Keychain
Using your yarn tail and a tapestry needle, secure the keychain clip to the top of the joined balls.
Stitch it tightly to hold everything in place.
Hide any loose threads inside the top ball.

Crochet Keychain Pattern Tips for Beginners
Resize Your Crochet Ball Keychain Easily
Want a smaller or larger version?
Just adjust your starting chain!
Fewer chains = smaller ball. More chains = bigger ball.
Make sure your stitch count still works evenly in the round.
Best Yarn for Amigurumi Keychain Patterns
Choose strong yarns that won’t fray or stretch.
Cotton blends are perfect for this project.
Avoid silky yarns—they can make the shape collapse.
Mistakes to Avoid in Your Crochet Keychain Project
Count your stitches carefully each round.
Missing even one stitch will affect the final shape.
Also, don’t forget to stuff the balls before closing them!
Creative Ideas Using This Crochet Ball Keychain
Gift This Ball Keychain for Special Occasions
These keychains make great birthday or holiday gifts.
They’re also perfect as back-to-school bag charms, teacher gifts, or just something handmade for someone special.
Color Variations for Your Crochet Keychain
Try adding a bell inside for a jingle effect.
Use glow-in-the-dark yarn for a fun twist.
You can even crochet initials and attach them for personalization.

Frequently Asked Questions About Crochet Ball Keychains
Can I make this with fewer than 3 colors?
Yes! You can use just one color or two. It still looks great.
Is this project good for kids?
With adult help, yes! It’s simple and safe for older kids learning crochet.
How long does it take to make?
Most beginners finish this keychain in about an hour.
Download the Free PDF Pattern
For offline access or to print the full pattern, download the PDF version here:
Download Crochet Ball Keychain PDF
Watch the Video Tutorial
Need visual guidance? Follow along with the full video here:
Watch on YouTube
Subscribe to @TubaCrochet
We’d Love to See Your Keychains!
Made your own version of this keychain?
Share it with the community and get featured!
Tag @tubacrochet on:
Other Crochet Projects You’ll Love
- Try this [Mini Crochet Bag Keychain Pattern]
- Make a [Crochet Hat Keychain] for summer vibes
- Don’t miss our [Easy Rose Coaster Tutorial]
Enjoyed This Project?
If you found this pattern helpful, show some love!
Like the video,
Leave a comment,
Pin it for later,
And don’t forget to subscribe to @TubaCrochet for more inspiring crochet tutorials!
Happy crocheting and see you in the next project!