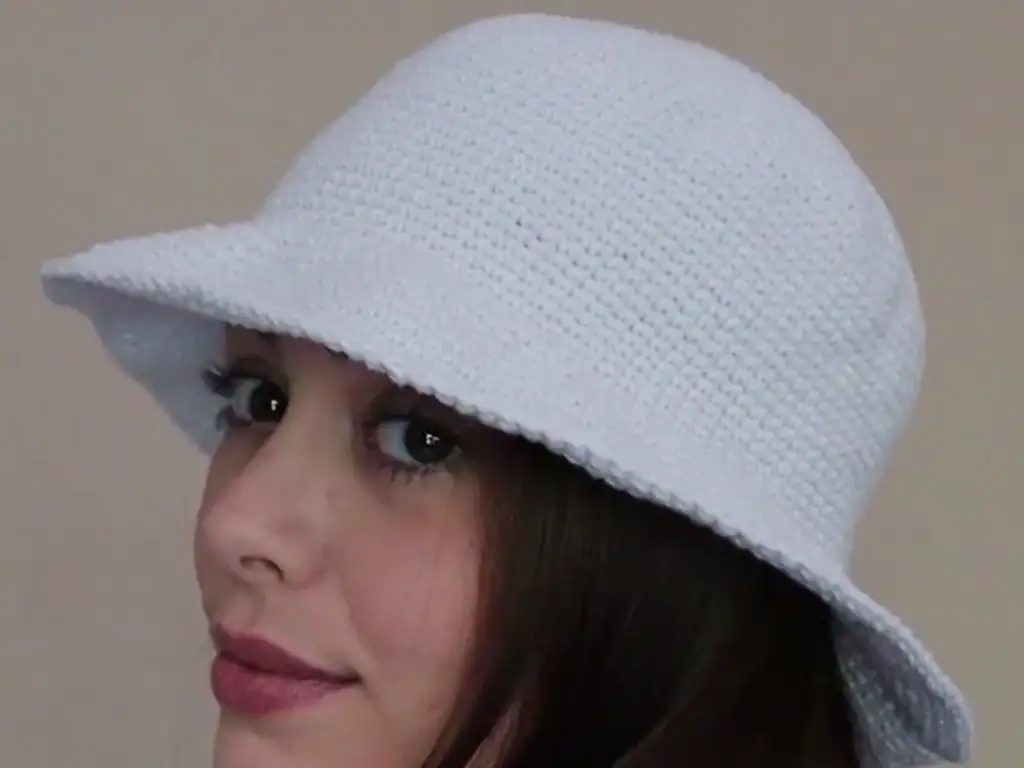
Bucket hats are back in a big way, and crocheting your own is the perfect way to add a unique, handmade touch to your summer wardrobe. This particular crochet bucket hat pattern is fantastic for beginners. Not only is it stylish, but the simple stitches and construction make it quick to work up! Whether you’re heading to the beach, strolling through a farmer’s market, or simply need some shade, this hat will be your new go to accessory.
Why You’ll Love This Crochet Bucket Hat
This hat’s a summer staple for a reason! It’s:
- Stylish: The bucket hat trend is here to stay, and this handmade version is extra special.
- Breezy: Great for sunny weather thanks to the open weave of the crochet stitches.
- Beginner friendly: If you’re new to crochet, this is a great project to build your skills.
- Customizable: Choose your favorite colors and add embellishments to make it your own.
Crochet Bucket Hat Basics: Materials & Essential Stitches
- Yarn: A lightweight yarn (think cotton or a cotton blend) in your chosen color is ideal.
- Crochet hook: A 4mm hook is perfect for this project.
- Scissors: For snipping your yarn tails.
- Stitch Marker: To keep track of your rounds.
- Yarn Needle: For weaving in those ends.


Stitches You’ll Need
- Chain stitch (ch): The foundation for many crochet projects.
- Slip stitch (sl st): For joining rounds seamlessly.
- Single crochet (sc): The main star of this pattern!
- Increase (inc): We’ll increase by working two single crochets into the same stitch.
Crochet Your Bucket Hat Base: Step by Step Guide
Crown:
- Magic Ring: Start with a magic ring or chain 4 and slip stitch to join into a circle.
- Round 1: Work 8 single crochets into the magic ring. Slip stitch to join. (8 sts)
- Round 2: Increase in each stitch around. (16 sts)
- Rounds 3-7: Increase in every other stitch around. (24 sts, 32 sts, 40 sts, 48 sts)
Body:
- Rounds 8-22: Work one single crochet in each stitch around for a total of 15 rounds.


Brim (Shaping)
- Round 23: Increase in every third stitch around. (64 sts)
- Round 24: Single crochet in each stitch around.
- Round 25: Increase in every fourth stitch around. (80 sts)
- Round 26 (Optional for a more dramatic brim): Increase in every fifth stitch around. (96 sts)
- Rounds 27-30: Single crochet in each stitch around.
Finishing:
- Round 31: Slip stitch to join your final round and weave in all ends.
Customizing the Brim
For a flatter brim, skip rounds 25 or 26 (or both) in the brim shaping section.
For a more curved brim, work additional rounds of increasing after round 26, following the same pattern of increasing every nth stitch (where n is a number between 3 and 5).
Congratulations! You’ve crocheted a stylish bucket hat.


Customize Your Crochet Bucket Hat: Ideas & Inspiration
- Play with colors: Stripes, contrasting brims – get creative!
- Add embellishments: Sew on buttons, beads, or try some embroidery.
- Adjust the size: Work fewer (or more) increasing rounds at the base for a different fit.
Tips and Tricks
- Use your stitch marker diligently to keep your place.
- Practice consistent tension for a neat look.
- If you’re stuck, refer to the excellent tutorial by @MindfulKnots on YouTube: [https://www.youtube.com/@MindfulKnots]
Share Your Creations!
I’d love to see your finished crochet bucket hats! Tag me on Instagram (@tubacrochet_) or on TikTok (@tubacrochet). Let’s build a community of crochet lovers!
Other Crochet Projects You’ll Love
Inspired to keep crocheting? Try these patterns next:
- Simple Crochet Phone Bag
- Easy Crochet Blanket
- Beginner Friendly Crochet Granny Squares
Happy crocheting!


