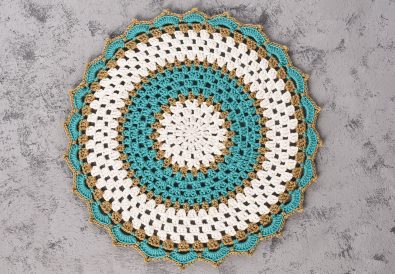
Learn how to make a crochet heart placemat with this crochet placemat tutorial! Perfect for beginners, this simple, quick, and DIY project adds a handmade touch your table decor. It’s time to add some love to your home! This heart crochet placemat is the perfect project for that. It combines beauty with practicality. You will enjoy crafting it for yourself or your loved ones. This guide is great for any skill level. It is fun for both newbies and experienced crafters. It’s a fantastic way to spend an afternoon. Your table will get a cozy update!
This project is beginner friendly. It’s a relaxing hobby that yields a beautiful outcome. The easy crochet placemat pattern is also a chance to explore colorwork. You’ll also practice shaping stitches. This heart-shaped crochet placemat is very versatile. It is good for everyday use. It is also nice for special celebrations. Think Valentine’s day dinners. Consider also family gatherings. These placemats will add warmth to any table.

Crochet Heart Placemat: A Beginner-Friendly Project
This project is so appealing. It makes a wonderful addition to any home. The handmade crochet placemat combines function with heartfelt design. Making it feels personal and special. Whether you’re new to crochet, or an experienced maker, you can easily craft one of these. This project will also help you enhance your skills. The repetitive nature of this design makes it very relaxing. You will feel accomplished after you finish.
Why Choose a Crochet Heart Placemat?
Why pick this pattern? A crochet heart placemat offers many charms. Its unique design creates a unique table setting. It’s also a thoughtful, handmade gift. You can adjust the colors to fit any décor. Imagine making a heart crochet placemat as a gift! This project adds warmth and character to any meal. It’s not just practical; it’s also very pretty. The heart shape brings a sense of affection. It is perfect for showing love through crafting.
Skills Needed for This Project
This beginner-friendly crochet placemat doesn’t need advanced skills. You’ll use basic stitches. These include the chain, slip stitch, double crochet and triple crochet. You will also use a color change technique. There is a front post double crochet for the edging. Don’t worry if you are new to crochet! This free crochet placemat tutorial will help you learn every step. You will learn everything from creating a magic ring through to the finishing touches. We’ll walk you through all the methods. This project provides a great introduction to colorwork. This design helps build confidence and skill.
DIY Crochet Placemat: Materials You’ll Need
Let’s talk materials! Gather these for your DIY crochet placemat. Choosing the right materials can affect the finished product. It’s helpful to pick yarn that you love to touch. It will make the crochet process enjoyable.
Yarn Selection for Your Placemat
You’ll need medium-weight yarn (also known as worsted weight yarn) for this project. I recommend using 100% cotton yarn, as it’s durable and perfect for table decor. Choose yarn in your favorite colors – you could even make a crochet heart coaster and placemat set by using coordinating colors for both items!
For a typical crochet placemat pattern, you will need about 100-150 yards of yarn per placemat, depending on the size. Some great yarn options include brands like Red Heart, Lion Brand, or Bernat.
Essential Crochet Tools
Here’s what you’ll need to crochet the heart crochet placemat:
A 5mm (H) crochet hook
Scissors for cutting yarn
Yarn needle for weaving in ends
Stitch markers (optional, but helpful for keeping track of your rounds)
Felt-tip pen (optional, for marking your pattern as you go)


Heart Crochet Placemat: Step-by-Step Tutorial
Ready to start your step-by-step crochet placemat with heart design? This guide breaks it down. It makes the crochet placemat with a heart pattern easy to follow. It uses simple language and clear guidance.
Creating the Magic Ring
Begin by making a magic ring. This method creates a seamless start for projects. Hold the yarn leaving a tail. Form a loop. Hold where strands cross. Work stitches inside. Pull the tail tight to close the center. The magic ring prevents a hole in the center. This is great when working in the round. It’s a foundational technique for circular crochet patterns. This step ensures your placemat will be neat and beautiful.
Understanding the Crochet Pattern
The easy crochet placemat pattern uses basic crochet stitches. Double crochets create the body. Triple crochets form the heart curves. Color changes also create the heart design. The pattern involves increasing in the early rounds. This makes the circle grow. Later, you’ll create the heart shape. It will use color changes. You’ll also use triple crochets. The final rounds include slip stitches and a front post double crochet. This creates a beautiful textured border. Be sure to track your progress. It helps you stay on track as you create the design. It’s an enjoyable process to create a beautiful result.
Working with Two Colors
Changing colors is essential for the heart design. When you need to change color, complete the last double crochet of the first color. The last pull through of the stitch is done using the new color. Always carry the yarn not in use along the back of your work. You’ll switch back as needed. This technique keeps your yarn from being cut too often. It also prevents too many loose ends. Keeping yarn carried keeps color changes looking neat. You can learn this skill very quickly. You can then apply it to many future projects. Remember to always use the new yarn when finishing a stitch.
Forming the Heart Shape
The heart shape forms through color changes. It also uses strategically placed triple crochet stitches. In the colorwork rounds, you’ll switch between your colors. This creates a color design. The triple crochets make the curves of the heart design. They give it the classic heart shape. The color changes highlight each heart. This results in a charming and lovely design. This method adds extra detail. You’ll find this part of the process very fun.


Handmade Crochet Placemat: Adding a Personal Touch
This handmade crochet placemat can be completely personalized. Choose unique colors that suit your taste! Your project can become one of a kind. It shows your personality through crafting. This special creation adds value beyond just functionality.
Customizing Your Crochet Placemat
There are many ways to make this pattern your own. Try different yarn textures. Add beads or other embellishments. You could make a set with varying color schemes. These small tweaks will make them uniquely yours. This is a great way to show off your individual style. You will enjoy this personal experience! You can make something truly yours by just adding a few details.
Gift Ideas: Crochet Heart Placemats for Loved Ones
A crochet heart placemat can make a lovely gift. Think Valentine’s Day, anniversaries, or housewarming events. The heartfelt design conveys love and thoughtfulness. The handmade nature adds to its uniqueness. You can tailor the colors to match the recipient’s home decor. Imagine giving a crochet heart coaster and placemat set! This shows you put effort and care into the gift. It makes a lasting impression. It is a great idea to personalize the gift for every recipient.
Crochet Placemat Pattern: Free and Easy to Follow
This free crochet pattern is designed for all skill levels. It includes a detailed written pattern. It provides a lot of support to guide you.
Download the Free Crochet Heart Placemat Pattern Here
Ready to start? Download the Crochet heart placemat free pattern PDF here: https://crochetstrends.com/wp-content/uploads/2025/02/Crochet-Heart-Placemat-Pattern.pdf This free pattern is for personal use. This document contains all the instructions. It includes helpful notes. It will help you create your own beautiful placemat. The guide is clear, precise, and user-friendly.
Reading and Understanding Crochet Charts (if applicable)
If you are experienced, you can use charts! Some people prefer visual aids. Charts use symbols to represent each crochet stitch. You can use these for a more visual reference. Learn how to read crochet charts. It unlocks more complex patterns. Online resources can teach you this skill. Knowing charts also makes more patterns accessible to you. It opens up your crochet world.
Heart-Shaped Crochet Placemat: Design and Construction
The heart-shaped crochet placemat is not just decorative. It is a functional and beautiful piece. It combines art with everyday usefulness.
The Significance of the Heart Shape
The heart shape represents love, affection, and care. This is why it’s perfect for occasions like Valentine’s Day or anniversary dinners. It’s also an ideal pattern for creating crochet table decor for Valentine’s Day.
Techniques Used in This Pattern
This pattern utilizes many crochet techniques. The magic ring is a very common technique for working in the round. Double crochets make up most of the base of this design. Triple crochets are used to form the top curves of each heart design. Front post double crochets edge the pattern. These all make your placemat look beautiful. Understanding these steps will allow for other crochet projects. Each stitch contributes to the finished look. It makes the final result truly stunning.


Crochet Table Setting Ideas: Styling Your Placemat
A crochet placemat offers versatility for your home. You can use it for everyday use or special occasions. It will make any table look more beautiful.
Creating a Romantic Table Setting
Use the crochet heart placemat for a romantic dinner. Set the table using candles and soft lighting. Use your placemat with coordinating napkins and dishes. This will enhance your dining atmosphere. The heart design creates a lovely ambiance. Use complementary colors to get a cohesive look. This makes a great setting for special moments. This thoughtful design helps celebrate love.
Everyday Decor with Crochet Placemats
These placemats look great for daily use. Use them at any meal for added charm. It’s a simple way to elevate the everyday. They help protect your furniture. They will also add a lovely pop of color to your home. Use different colors to match the season. This will make your meals feel like a special occasion. A DIY crochet placemat can add function and style. These simple additions make a difference in your home.
Seasonal Table Setting Inspiration
Style your table with seasonal themes. In the fall, use warm colors. In the winter, use a cool palette. Use brighter colors in the spring and summer. The crochet placemat pattern can be customized. Use various color combinations. It is a versatile element in your décor. This makes your home décor more festive. The seasonal changes can enhance your home décor. You can match your decor with different seasons.
Tricks from the Video
Here are some important tips from the video:
- Tension: Maintain even tension when crocheting. This will create a uniform fabric.
- Carrying Yarn: Don’t cut the yarn during color changes. Carry the other color along from underneath. This ensures you will have fewer ends to weave in.
- Slip Stitches: Use slip stitches to move into chain spaces. This will make the round flow smoothly.
- Triple Crochets: Take care when forming triple crochets. Make sure all loops are even. This creates a smooth heart shape.
- Invisible Join: Finish with an invisible join. It will create a professional, seamless look.
Yarn, Hook, and Tools:
- Yarn: Himalaya Himagurumi Koton (or similar worsted weight cotton blend)
- Main Color: White (approx. 100 yards)
- Contrast Color: Pink (approx. 60 yards)
- Hook: 2.75 mm crochet hook (or size that matches your yarn)
- Other Tools: Scissors, yarn needle, stitch markers (optional), felt-tip pen (optional)
Detailed Crochet Pattern:
Here’s the detailed crochet placemat pattern from the video tutorial. This written pattern includes all the steps. It also features all the important methods.
Round 1: (Base Circle)
- Make a magic ring.
- Ch 3 (counts as first dc).
- Work 11 dc inside the magic ring.
- Gently pull the tail tight to close the center.
- Sl st in the top of the first ch-3. (12 dc)
Round 2: (Increasing Round)
- Ch 3 (counts as first dc).
- Work 1 dc in the same stitch.
- Ch 1.
- Skip next stitch. Work 2 dc in the next stitch.
- Ch 1.
- Repeat steps 4 and 5 all around.
- Ch 1, sl st in the top of the first ch-3. (12 groups of 2 dc, with ch-1 between)
Rnd 3: (Increasing Round)
- Sl st in the ch-1 space.
- Ch 3 (counts as first dc).
- Work 2 dc in same ch-1 space.
- Ch 1.
- Work 3 dc in the next ch-1 space.
- Ch 1.
- Repeat steps 5 and 6 all around.
- Ch 1, sl st in the top of the first ch-3. (12 groups of 3 dc, with ch-1 between)
Round 4: (Increasing Round)
- Sl st in the next ch-1 space.
- Ch 3 (counts as first dc).
- Work 1 dc in same ch-1 space.
- Ch 1.
- Work 2 dc, ch 1, 2 dc in the same ch-1 space.
- Ch 1.
- Repeat steps 5 and 6 all around.
- Ch 1, sl st in the top of the first ch-3. (12 groups of 2dc, ch 1, 2dc, with ch-1 between)
Round 5: (Increasing Round)
- Sl st in the next ch-1 space.
- Ch 3 (counts as first dc).
- Work 1 dc in the same ch-1 space.
- Ch 1.
- Work 2 dc in the next ch-1 space.
- Ch 1.
- Repeat steps 5 and 6 all around.
- Ch 1, sl st in the top of the first ch-3. (12 groups of 2 dc, with ch-1 between)
Rnd 6: (Increasing Round)
- Sl st in the next ch-1 space.
- Ch 3 (counts as first dc).
- Work 2 dc in same ch-1 space.
- Ch 1.
- Work 3 dc in the next ch-1 space.
- Ch 1.
- Repeat steps 5 and 6 all around.
- Ch 1, sl st in the top of the first ch-3. (12 groups of 3 dc, with ch-1 between)
Round 7: (Increasing Round)
- Sl st in the next ch-1 space.
- Ch 3 (counts as first dc).
- Work 2 dc in same ch-1 space.
- Ch 1.
- Work 3 dc in the next ch-1 space.
- Ch 1.
- Repeat steps 5 and 6 all around.
- Ch 1, sl st in the top of the first ch-3. (12 groups of 3 dc, with ch-1 between)
Round 8: (Increasing Round)
- Sl st in the next ch-1 space.
- Ch 3 (counts as first dc).
- Work 1 dc in same ch-1 space.
- Ch 1.
- Work 2 dc, ch 1, 2 dc in the same ch-1 space.
- Ch 1.
- Repeat steps 5 and 6 all around.
- Ch 1, sl st in the top of the first ch-3. (12 groups of 2dc, ch 1, 2dc, with ch-1 between)
Rounds 9 & 10: (Increasing Round)
- Sl st in the next ch-1 space.
- Ch 3 (counts as first dc).
- Work 1 dc in the same ch-1 space.
- Ch 1.
- Work 2 dc in the next ch-1 space.
- Ch 1.
- Repeat steps 5 and 6 all around.
- Ch 1, sl st in the top of the first ch-3. (12 groups of 2 dc, with ch-1 between)
Rnd 11: (Colorwork Round 1 – Heart Base)
- Sl st in the next ch-1 space.
- Ch 3 (counts as first dc).
- Work 1 dc in the same ch-1 space with white.
- Ch 1.
- Work 2 dc in the next ch-1 space with white.
- Ch 1.
- Work 2 dc in the next ch-1 space with white.
- When making the 2nd dc in step 7, switch over pink.
- Ch 1.
- Work 3 dc in the next ch-1 space with pink.
- When making the 3rd dc in step 10, switch to white.
- Ch 1.
- Work 2 dc in the next ch-1 space with white.
- Ch 1.
- Work 2 dc in the next ch-1 space with white.
- Ch 1.
- Work 2 dc in the next ch-1 space with white.
- When making the 2nd dc in step 17, switch back to pink.
- Ch 1.
- Work 3 dc in the next ch-1 space with pink.
- When making the 3rd dc in step 20, switch to white.
- Ch 1.
- Repeat steps 13-22 all around.
- Ch 1, sl st in the top of the first ch-3. (12 groups of 3 dc with pink, and 3 groups of 2 dc with white between)
Round 12: (Colorwork Round 2 – Heart Shaping)
- Sl st in the next ch-1 space.
- Ch 3 (counts as first dc).
- Work 1 dc in same ch-1 space with white.
- Ch 1.
- Work 2 dc in the next ch-1 space with white.
- When making the 2nd dc in step 5, switch to pink.
- Ch 1.
- Work 2 dc in the next ch-1 space with pink.
- Work 3 dc in the next 3 dc with pink.
- Work 2 dc in the next ch-1 space with pink.
- When making the 2nd dc in step 10, switch to white.
- Ch 1.
- Work 2 dc in the next ch-1 space with white.
- Ch 1.
- Work 2 dc in the next ch-1 space with white.
- When making the 2nd dc in step 15, switch to pink.
- Ch 1.
- Work 2 dc in the next ch-1 space with pink.
- Work 3 dc in the next 3 dc with pink.
- Work 2 dc in the next ch-1 space with pink.
- When making the 2nd dc in step 20, switch to white.
- Ch 1.
- Repeat steps 13-21 all around.
- Ch 1, sl st in the top of the first ch-3. (7 dc with pink, and 2 groups of 2 dc with white)
Round 13: (Colorwork Round 3 – Heart Expansion)
- Sl st in the next ch-1 space.
- Ch 3.
- When making the first dc, switch to pink.
- Ch 1.
- Work 2 dc in the next ch-1 space with pink.
- Work 2 dc in the next ch-1 space with pink.
- Work 7 dc in the next 7 dc with pink.
- Work 2 dc in the next ch-1 space with pink.
- Work 2 dc in the next ch-1 space with pink. (11 dc with pink)
- When making the 11th dc in step 9, switch to white.
- Ch 1.
- Work 2 dc in the next ch-1 space with white.
- When making the 2nd dc in step 12, switch to pink.
- Ch 1.
- Work 2 dc in the next ch-1 space with pink.
- Work 2 dc in the next ch-1 space with pink.
- Work 7 dc in the next 7 dc with pink.
- Work 2 dc in the next ch-1 space with pink.
- Work 2 dc in the next ch-1 space with pink. (11 dc with pink)
- When making the 11th dc in step 19, switch to white.
- Ch 1.
- Repeat steps 12-21 all around.
- Sl st in the top of the 2nd ch-3 with pink to join. (11 dc with pink, 1 group of 2 dc in white)
Rnd 14: (Heart Shaping – Triple Crochet)
- Ch 1.
- Work 1 sc in the same space.
- Skip 2 spaces.
- Work 9 tr in the top of the 3rd space.
- Skip 2 spaces.
- Work 1 sc in the next space.
- Skip 2 spaces.
- Work 9 tr in the top of the 9th dc.
- Skip 2 spaces.
- Work 1 sc in the next white dc.
- Repeat steps 3-10 all around, using only pink yarn.
- When making the last tr, switch to white yarn.
- Sl st in the top of the first sc to join the round.
Round 15: (Final Edging)
- Ch 1.
- Sl st in the top of the next dc below.
- Ch 1.
- Sl st in the top of the next dc below.
- Repeat steps 3-4 all around the circle.
- Work 1 sc in the space between the 2 groups.
- Work a sc in the top of the first dc.
- Ch 1.
- Sl st in the top of the next dc.
- Ch 1.
- Sl st in the top of the next dc.
- Repeat steps 9-11 around all of the heart curves.
- Work a fpdc around both of the 2 dc stitches.
- Repeat steps 7-13 all around.
- Cut the pink yarn, weave in the end.
- Finish the last fpdc with white yarn and cut the yarn for an invisible join.
Increasing and Decreasing Rows:
- Increases: The circle grows by increasing stitches in each round. This is done by placing more stitches into each stitch or chain space from the previous round. The early rounds are all increases.
- Decreases: There are no explicit decreases in the design. The white stitches between the hearts “decrease” because they are no longer included in the heart section.
Video Inspiration:
This design was inspired by the YouTube video by @CrochetCraftsmann: (https://www.youtube.com/@CrochetCraftsmann) You can see a video tutorial at: https://youtu.be/jkWJXcZDm_w. The video provides a visual guide. It can assist you while you’re working on your placemat.
Share Your Projects!
We would love to see your handmade crochet heart placemats! Share your photos on Instagram at: https://www.instagram.com/tubacrochet_, TikTok at: tiktok.com/@tubacrochet , and Facebook at: https://www.facebook.com/tubacrochet/. Feel free to leave your comments below! We’d love to see what you create.
Other Crochet Projects You’ll Love:
If you loved making this crochet placemat pattern, check out these other fun crochet projects! Try our crochet heart coaster and placemat set tutorial! These additional projects will help you learn new crochet skills. Check out our other free patterns, too!
- Crochet Heart Coaster: There’s a matching coaster pattern!
- Crochet Table Runner: Try a matching table runner.
- Crochet Placemats with Different Shapes: Experiment with other shapes.
- Granny Square Blanket: A classic and cozy project, perfect for using up yarn scraps.
- Crochet Flower Appliques: Add these to hats, bags, or blankets for a sweet touch.